Knowledge Base
Appy Pie: How to create an iOS Provisioning Profile?
Gaurav Tewari
2 min readPublished on Feb 20 2020 | Last updated on Feb 20 2020
Follow the steps below to create your iOS Provisioning Profile Certificate:
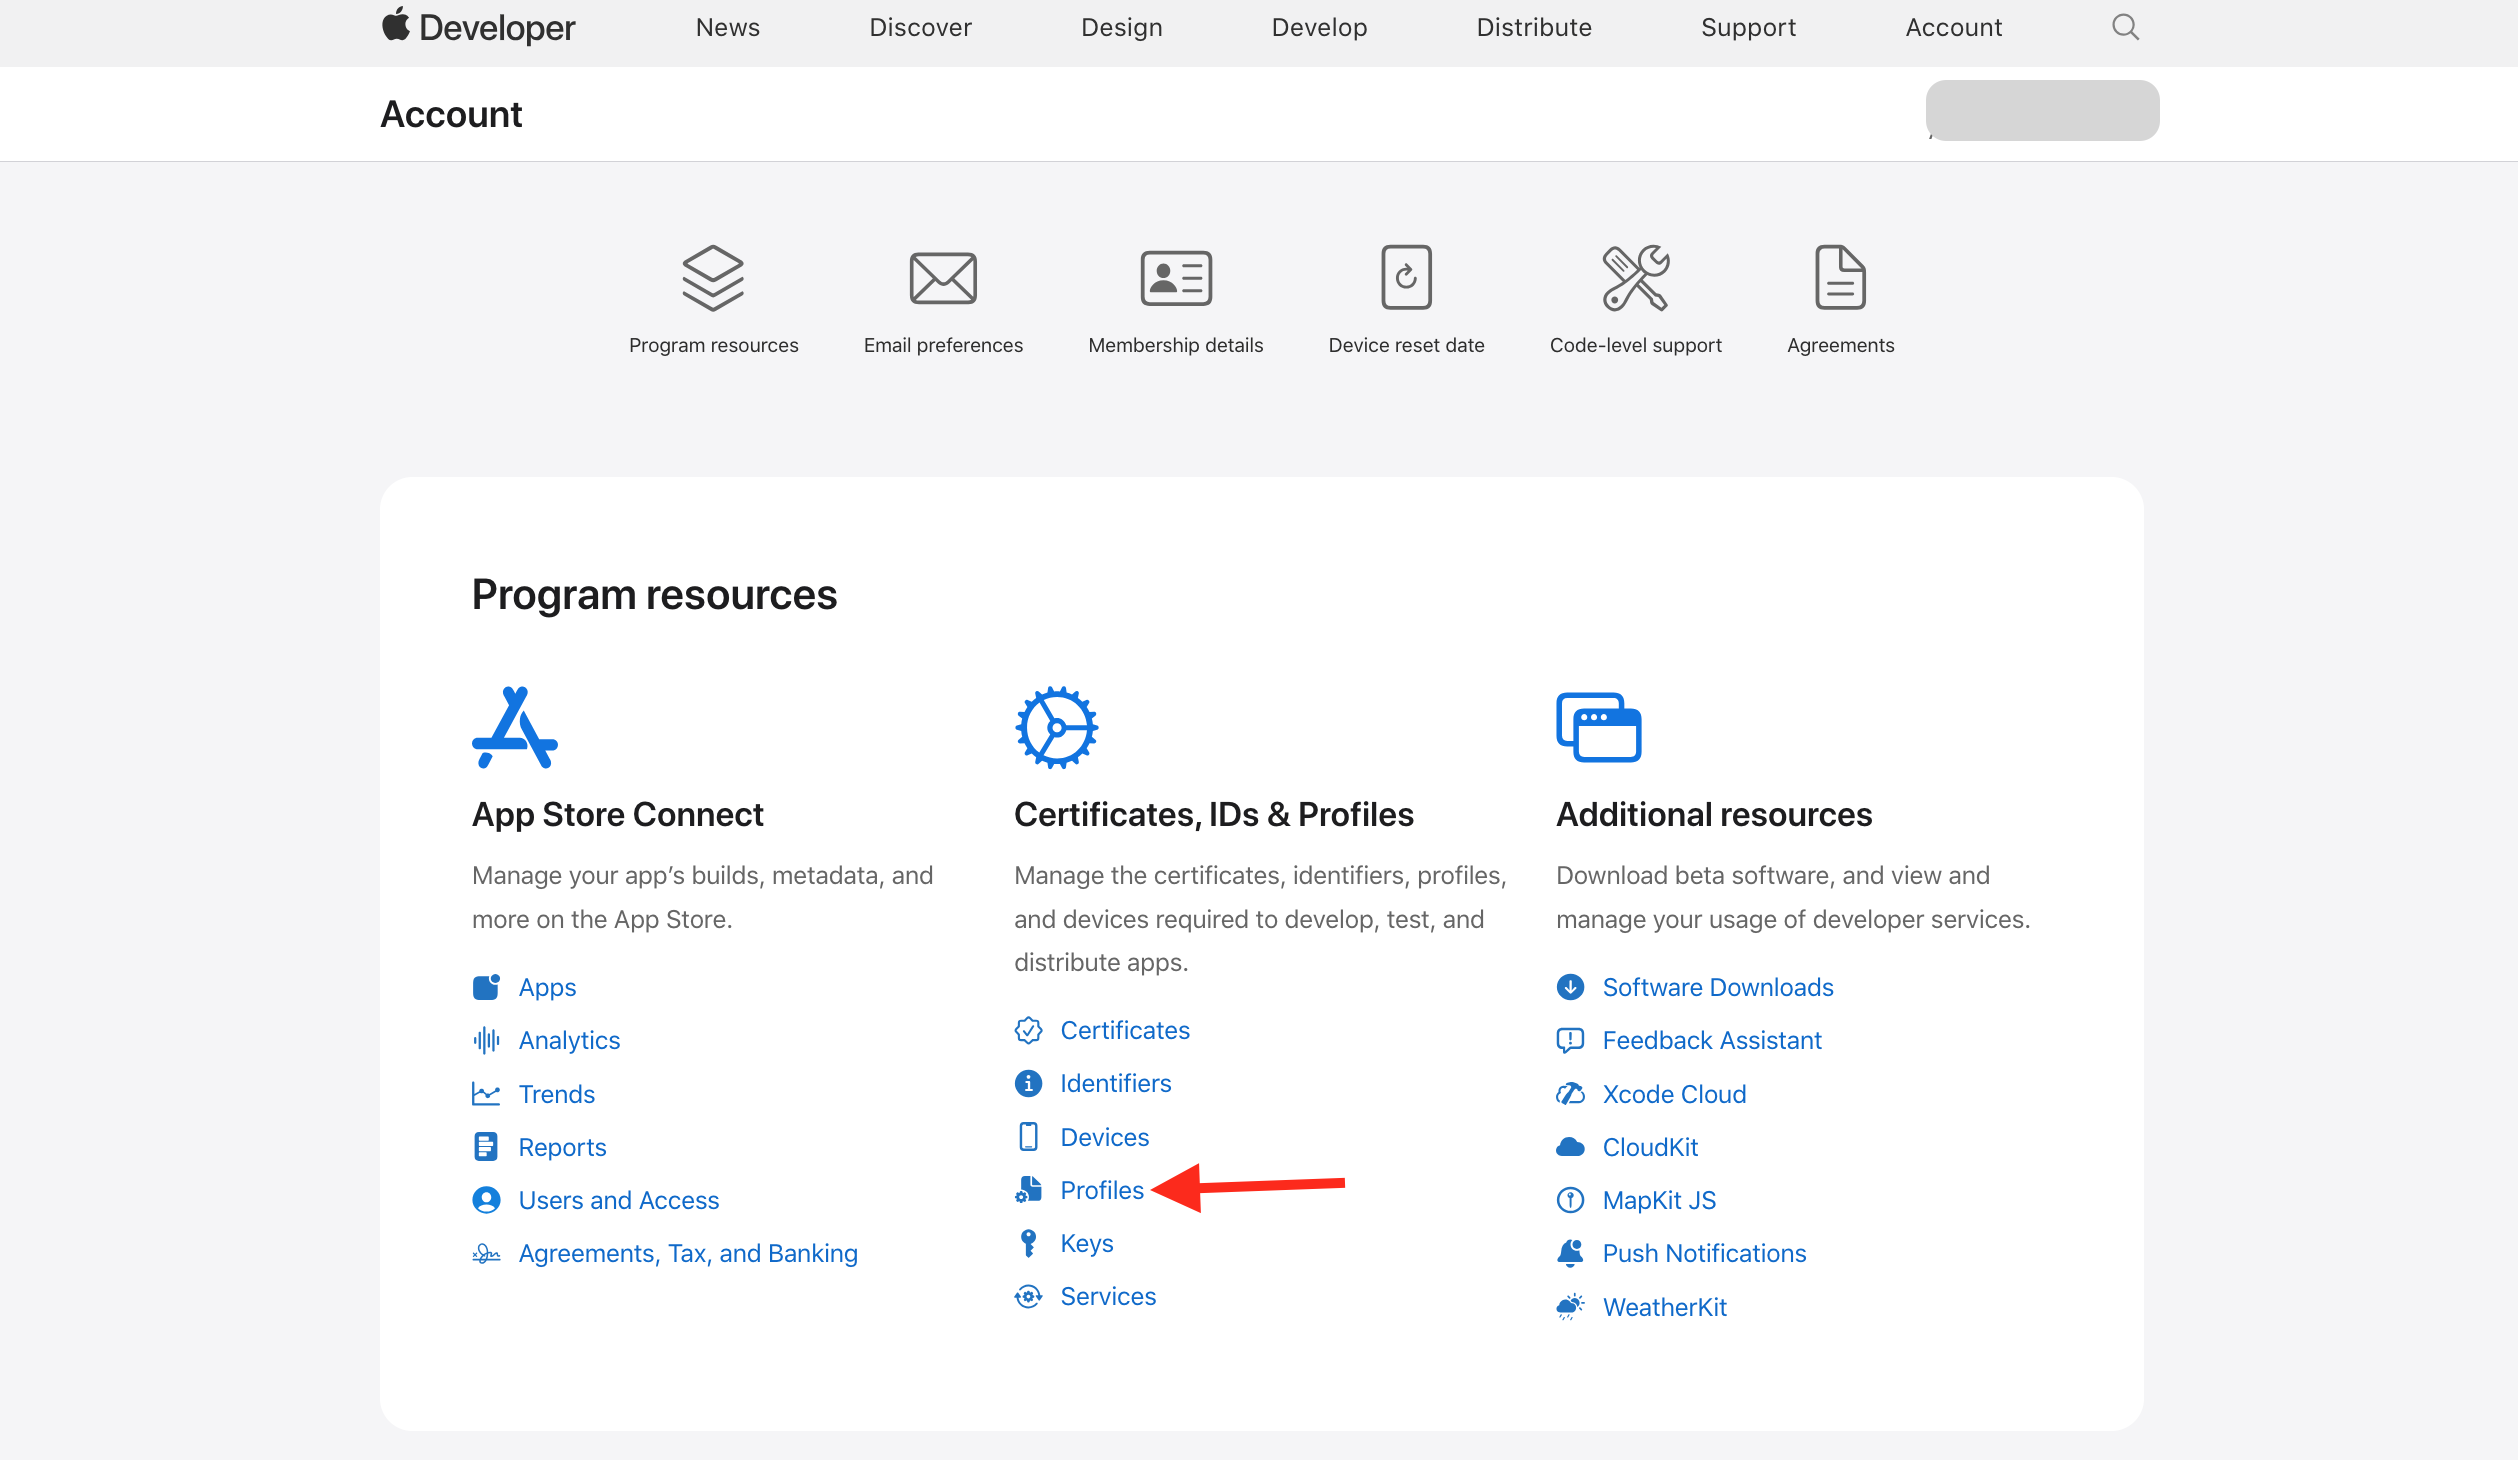
Step 1: Go to Apple Developer and click on Account.

Step 2: Sign in to your Apple Developer account.

Step 3: Under Program resources, locate the Certificates, Identifiers & Profiles, and click Profiles.
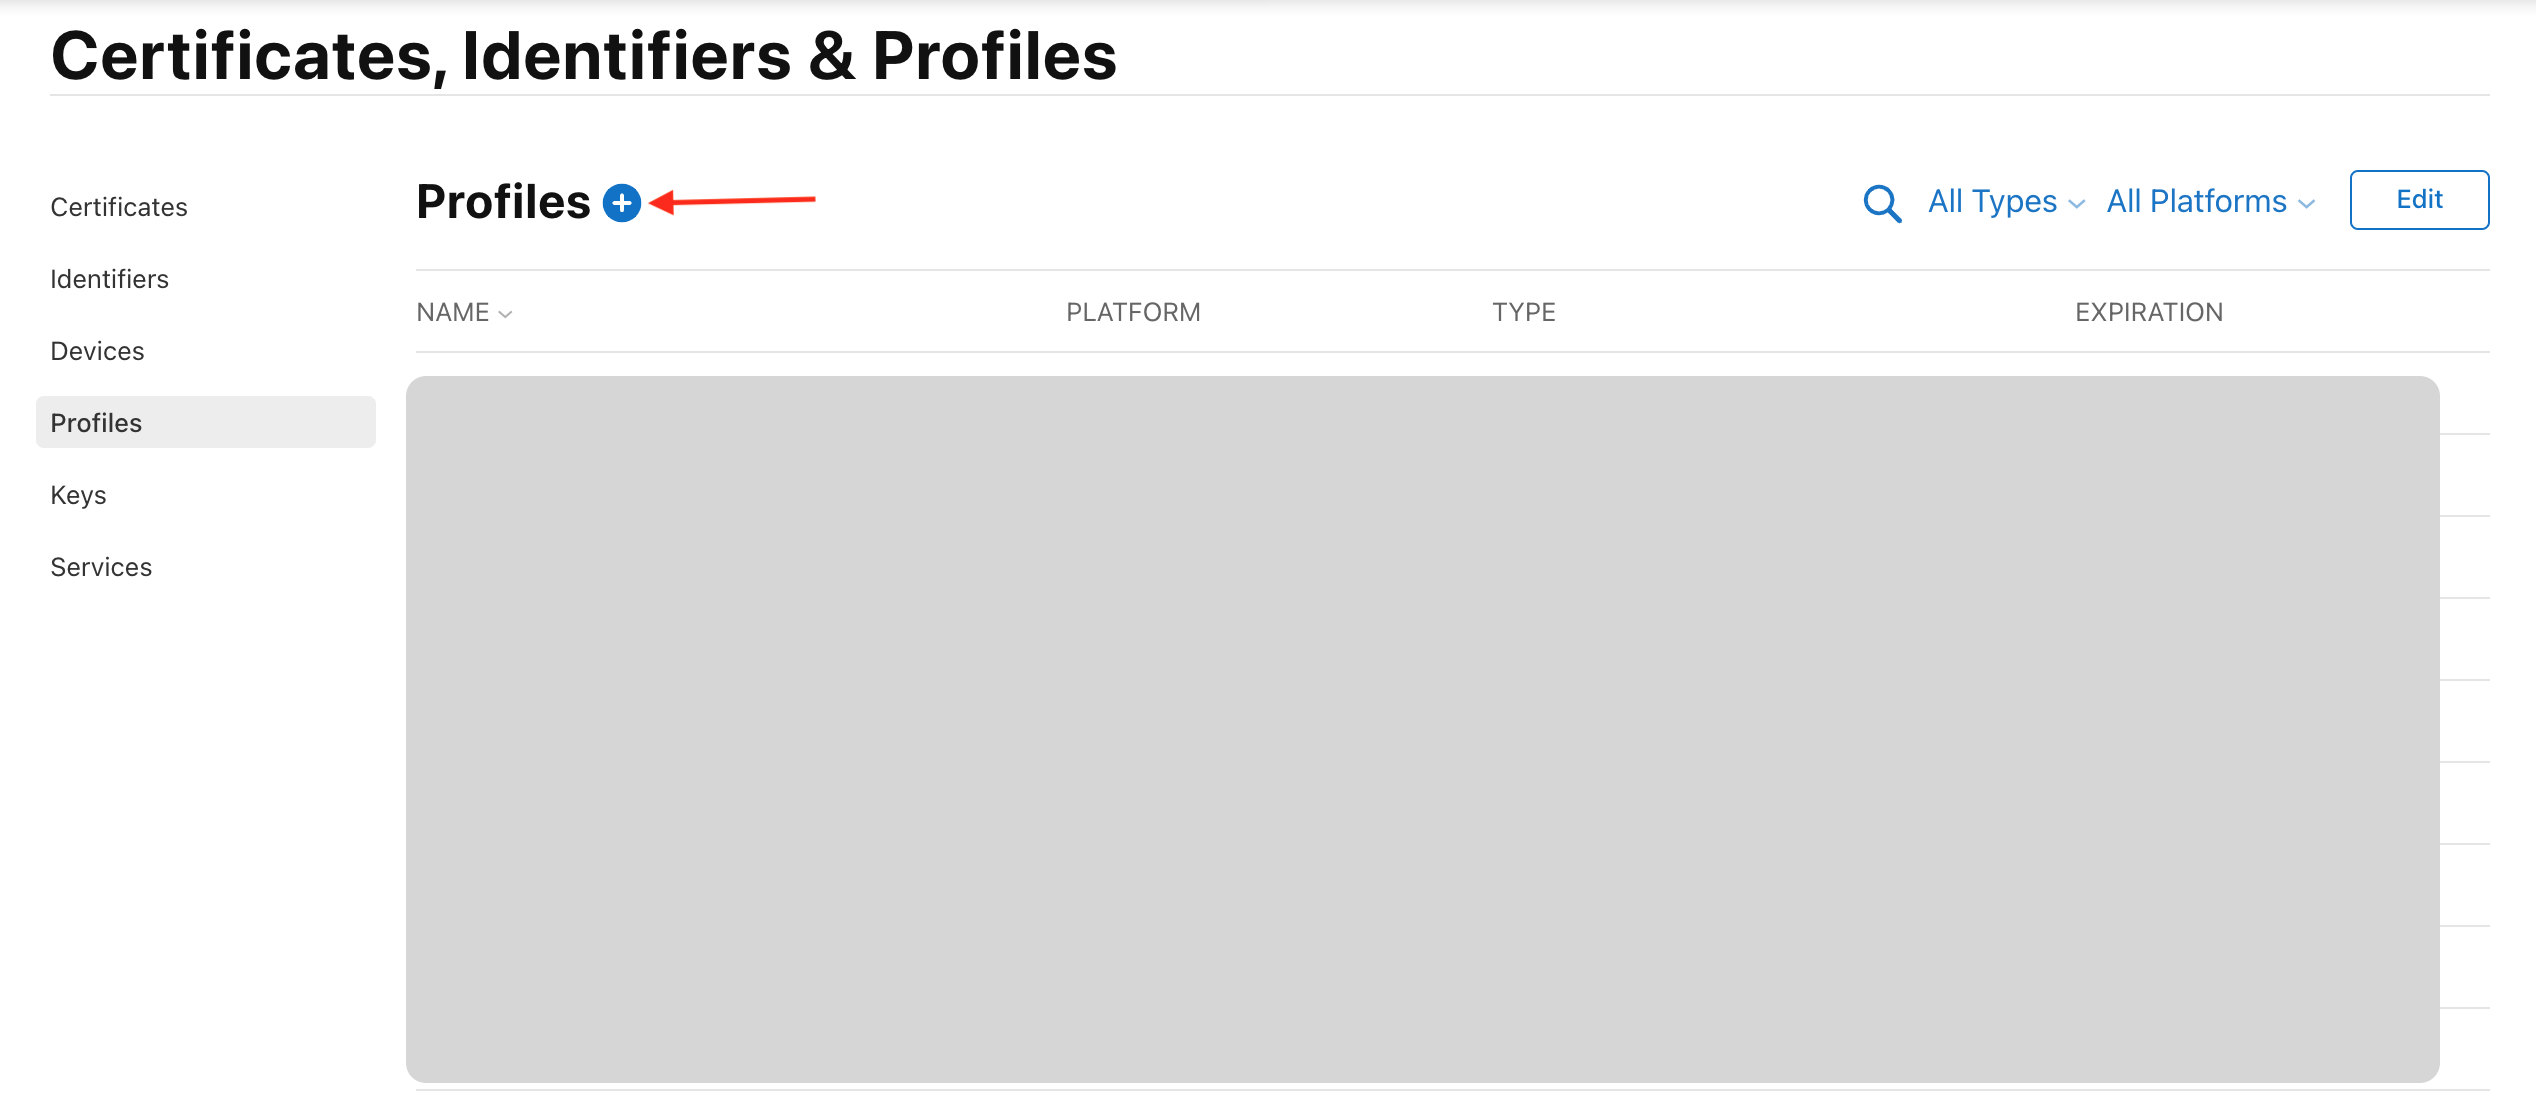
Step 4: Click the + icon next to Profiles.
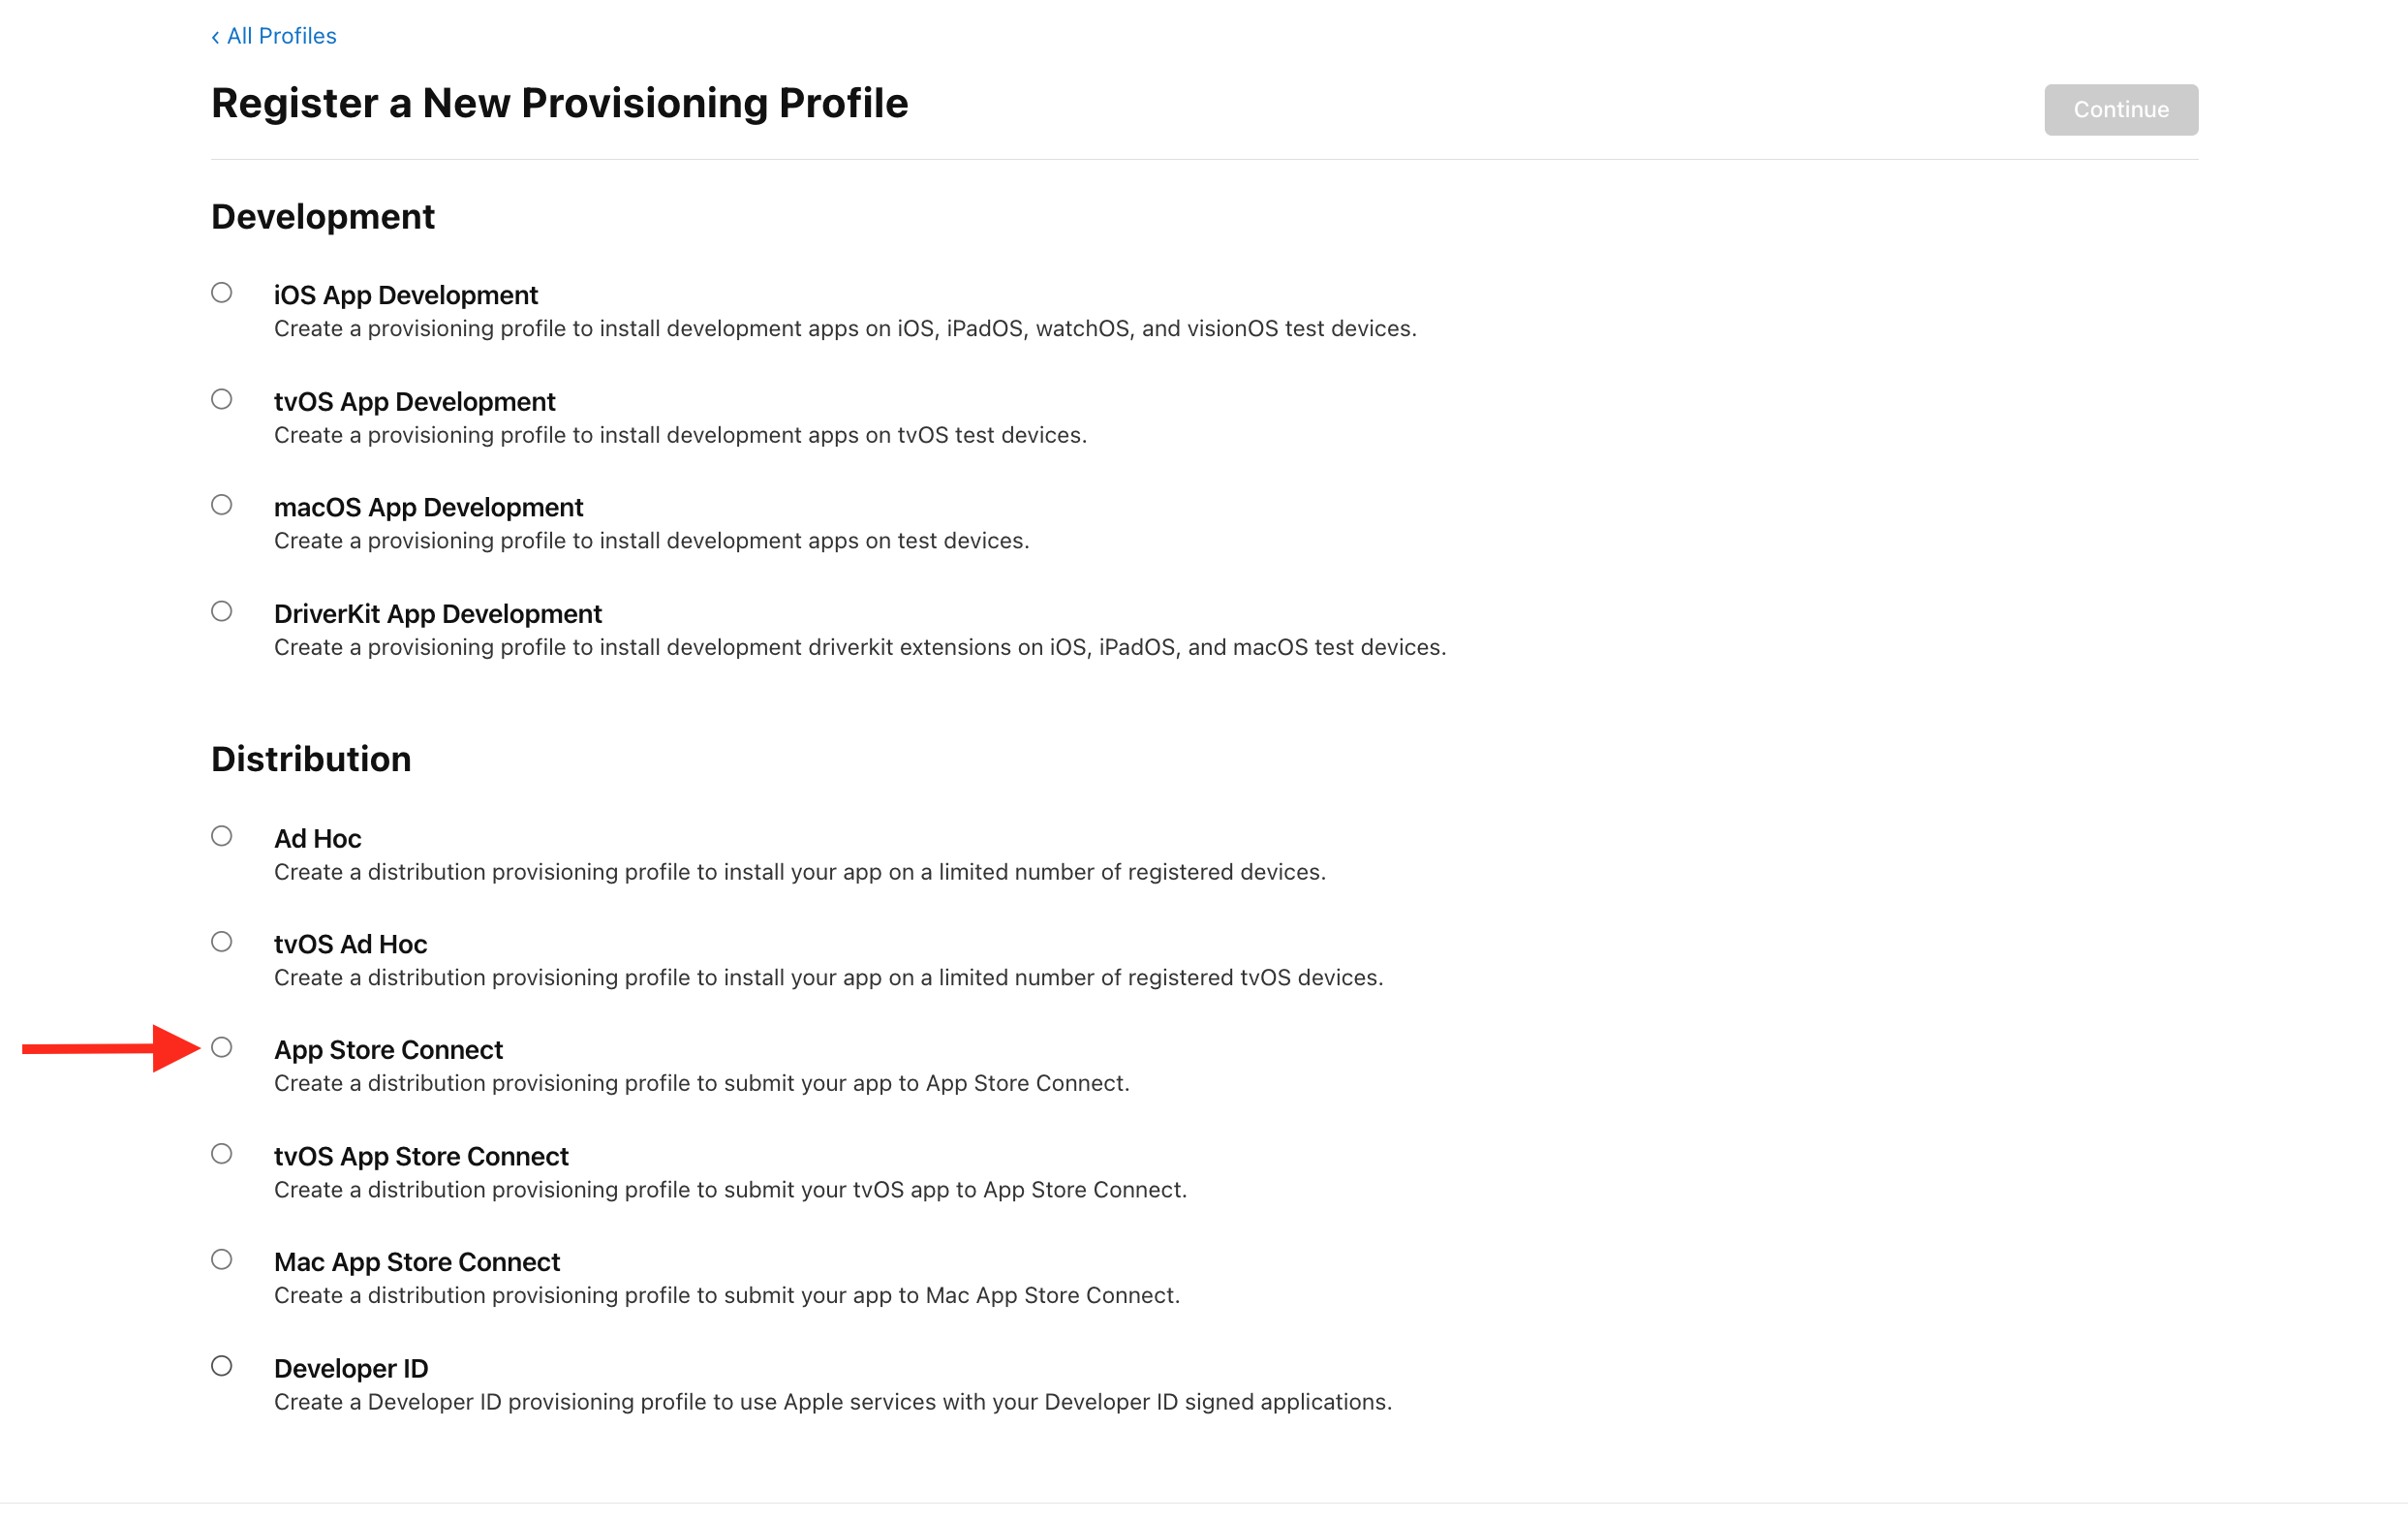
Step 5: Under Distribution, select the App Store Connect option.
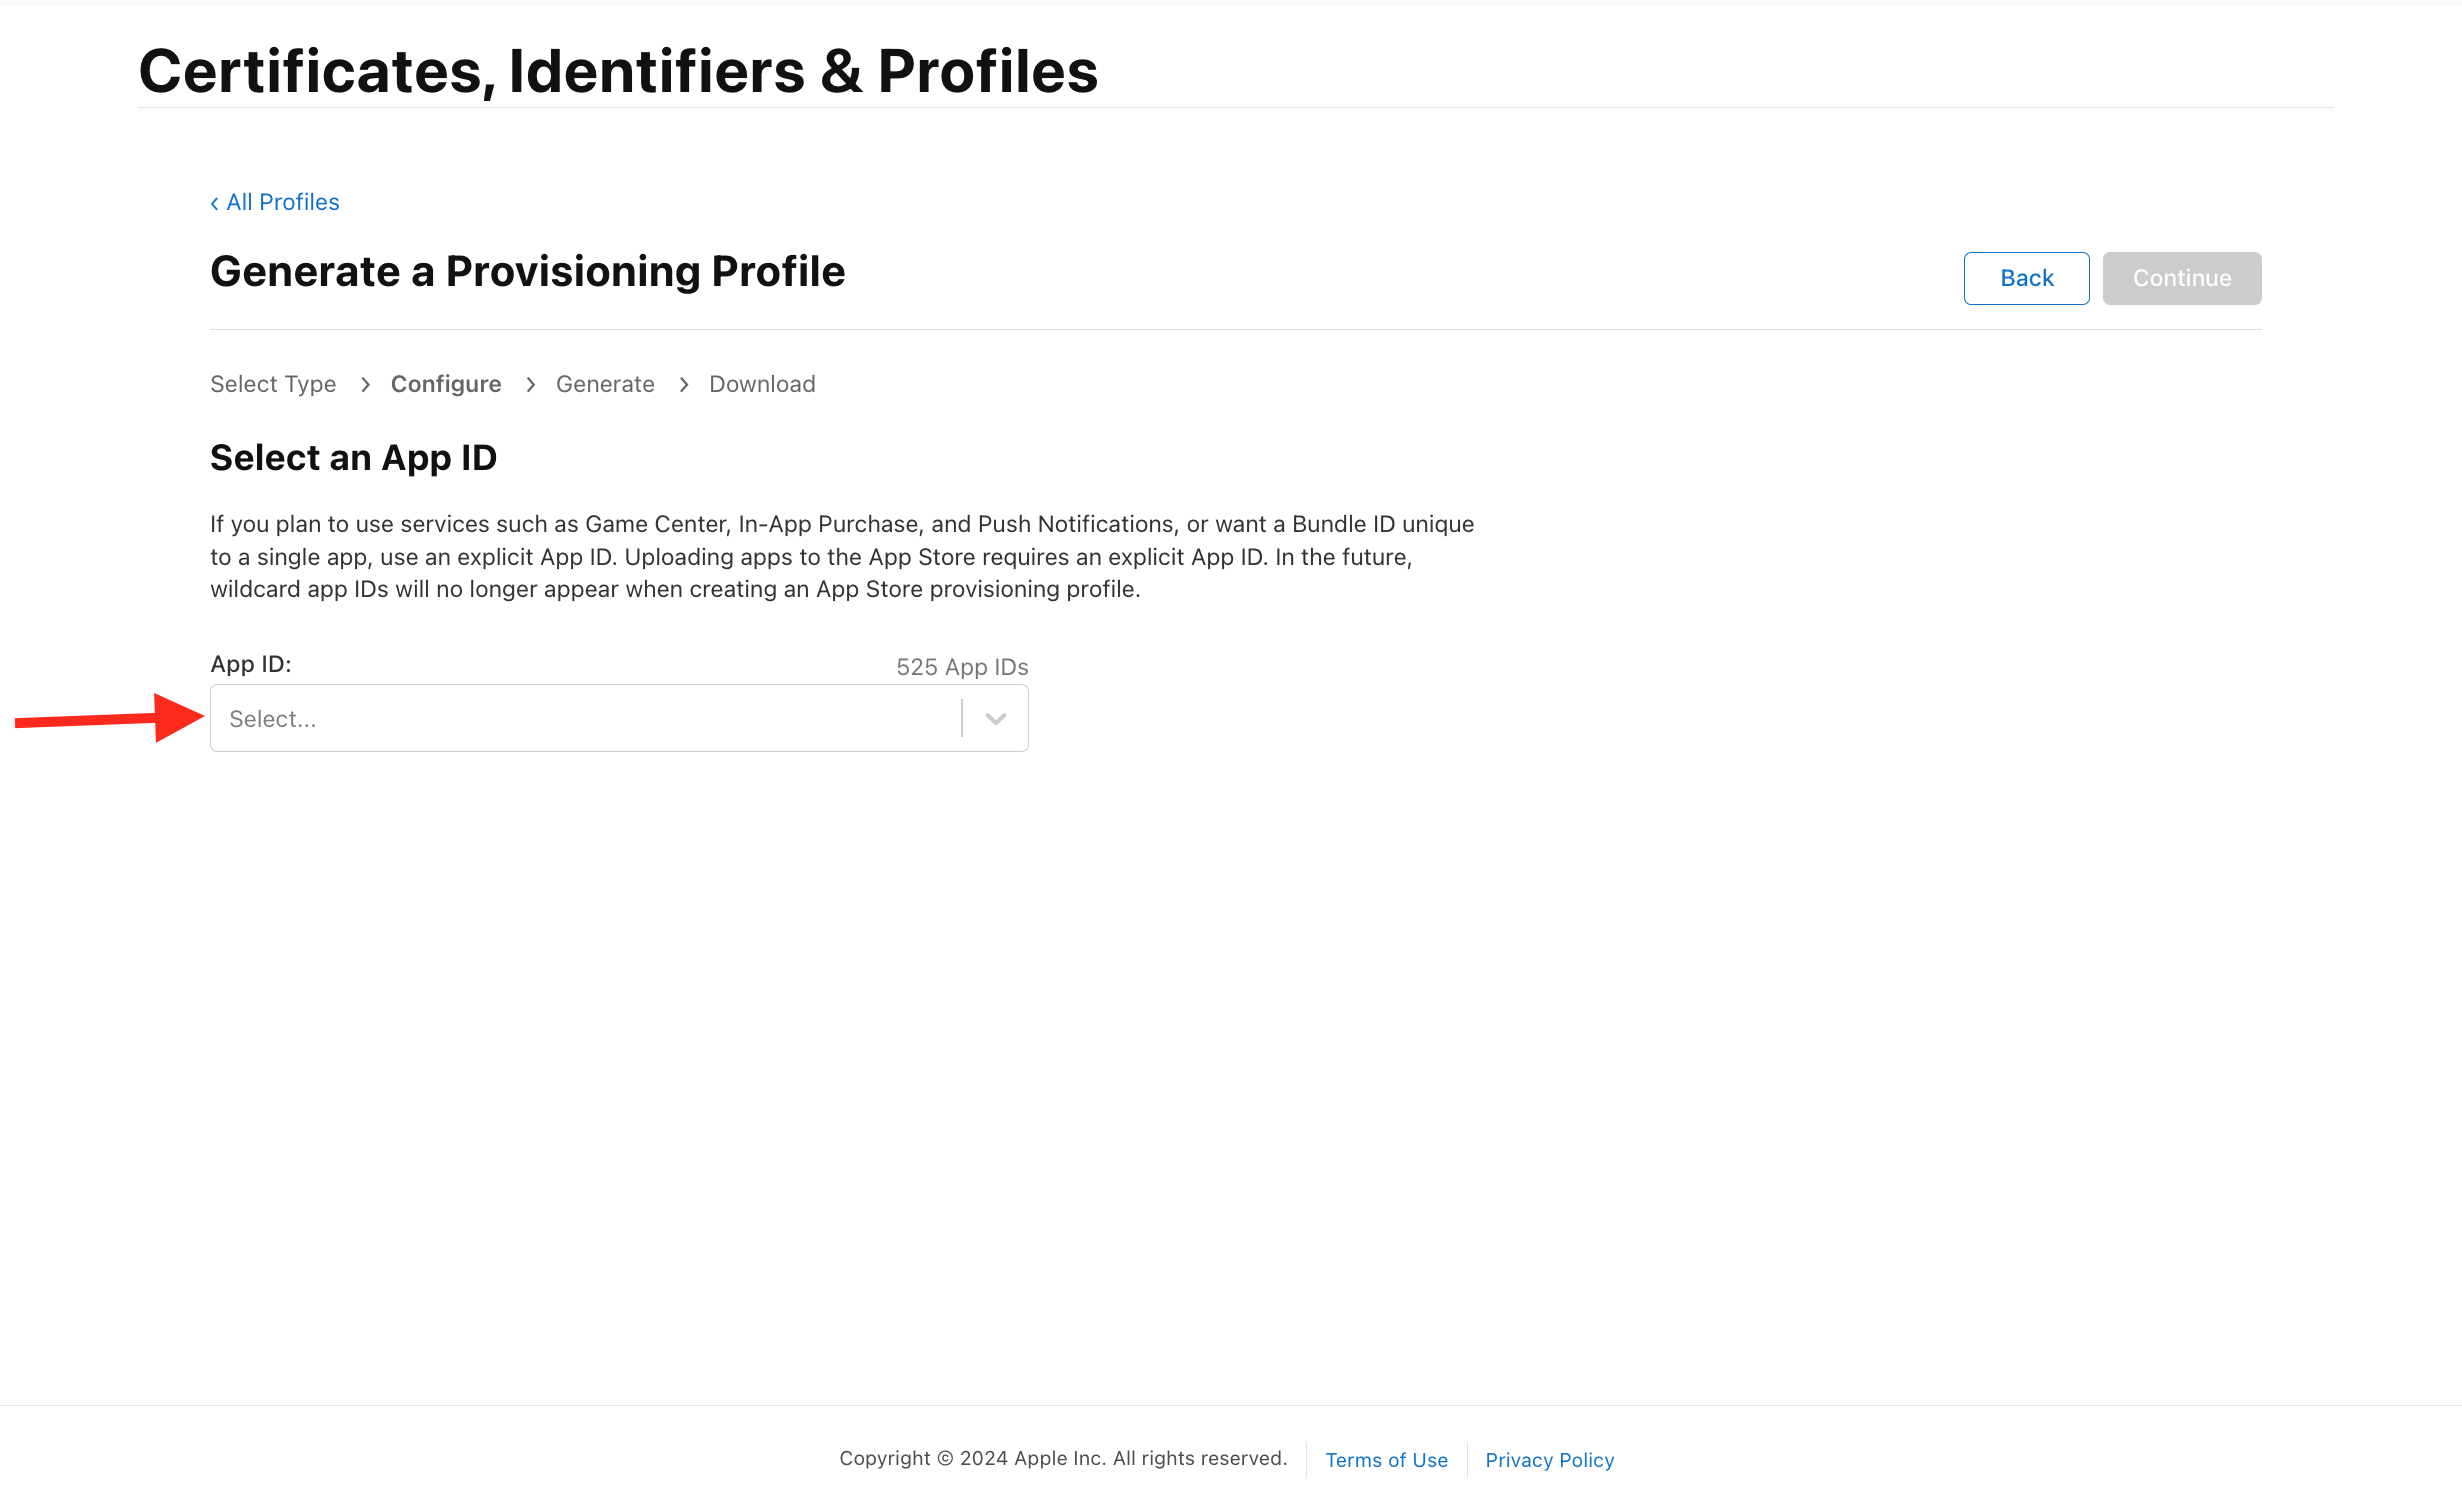
Step 6: Select your App ID, then click Continue.
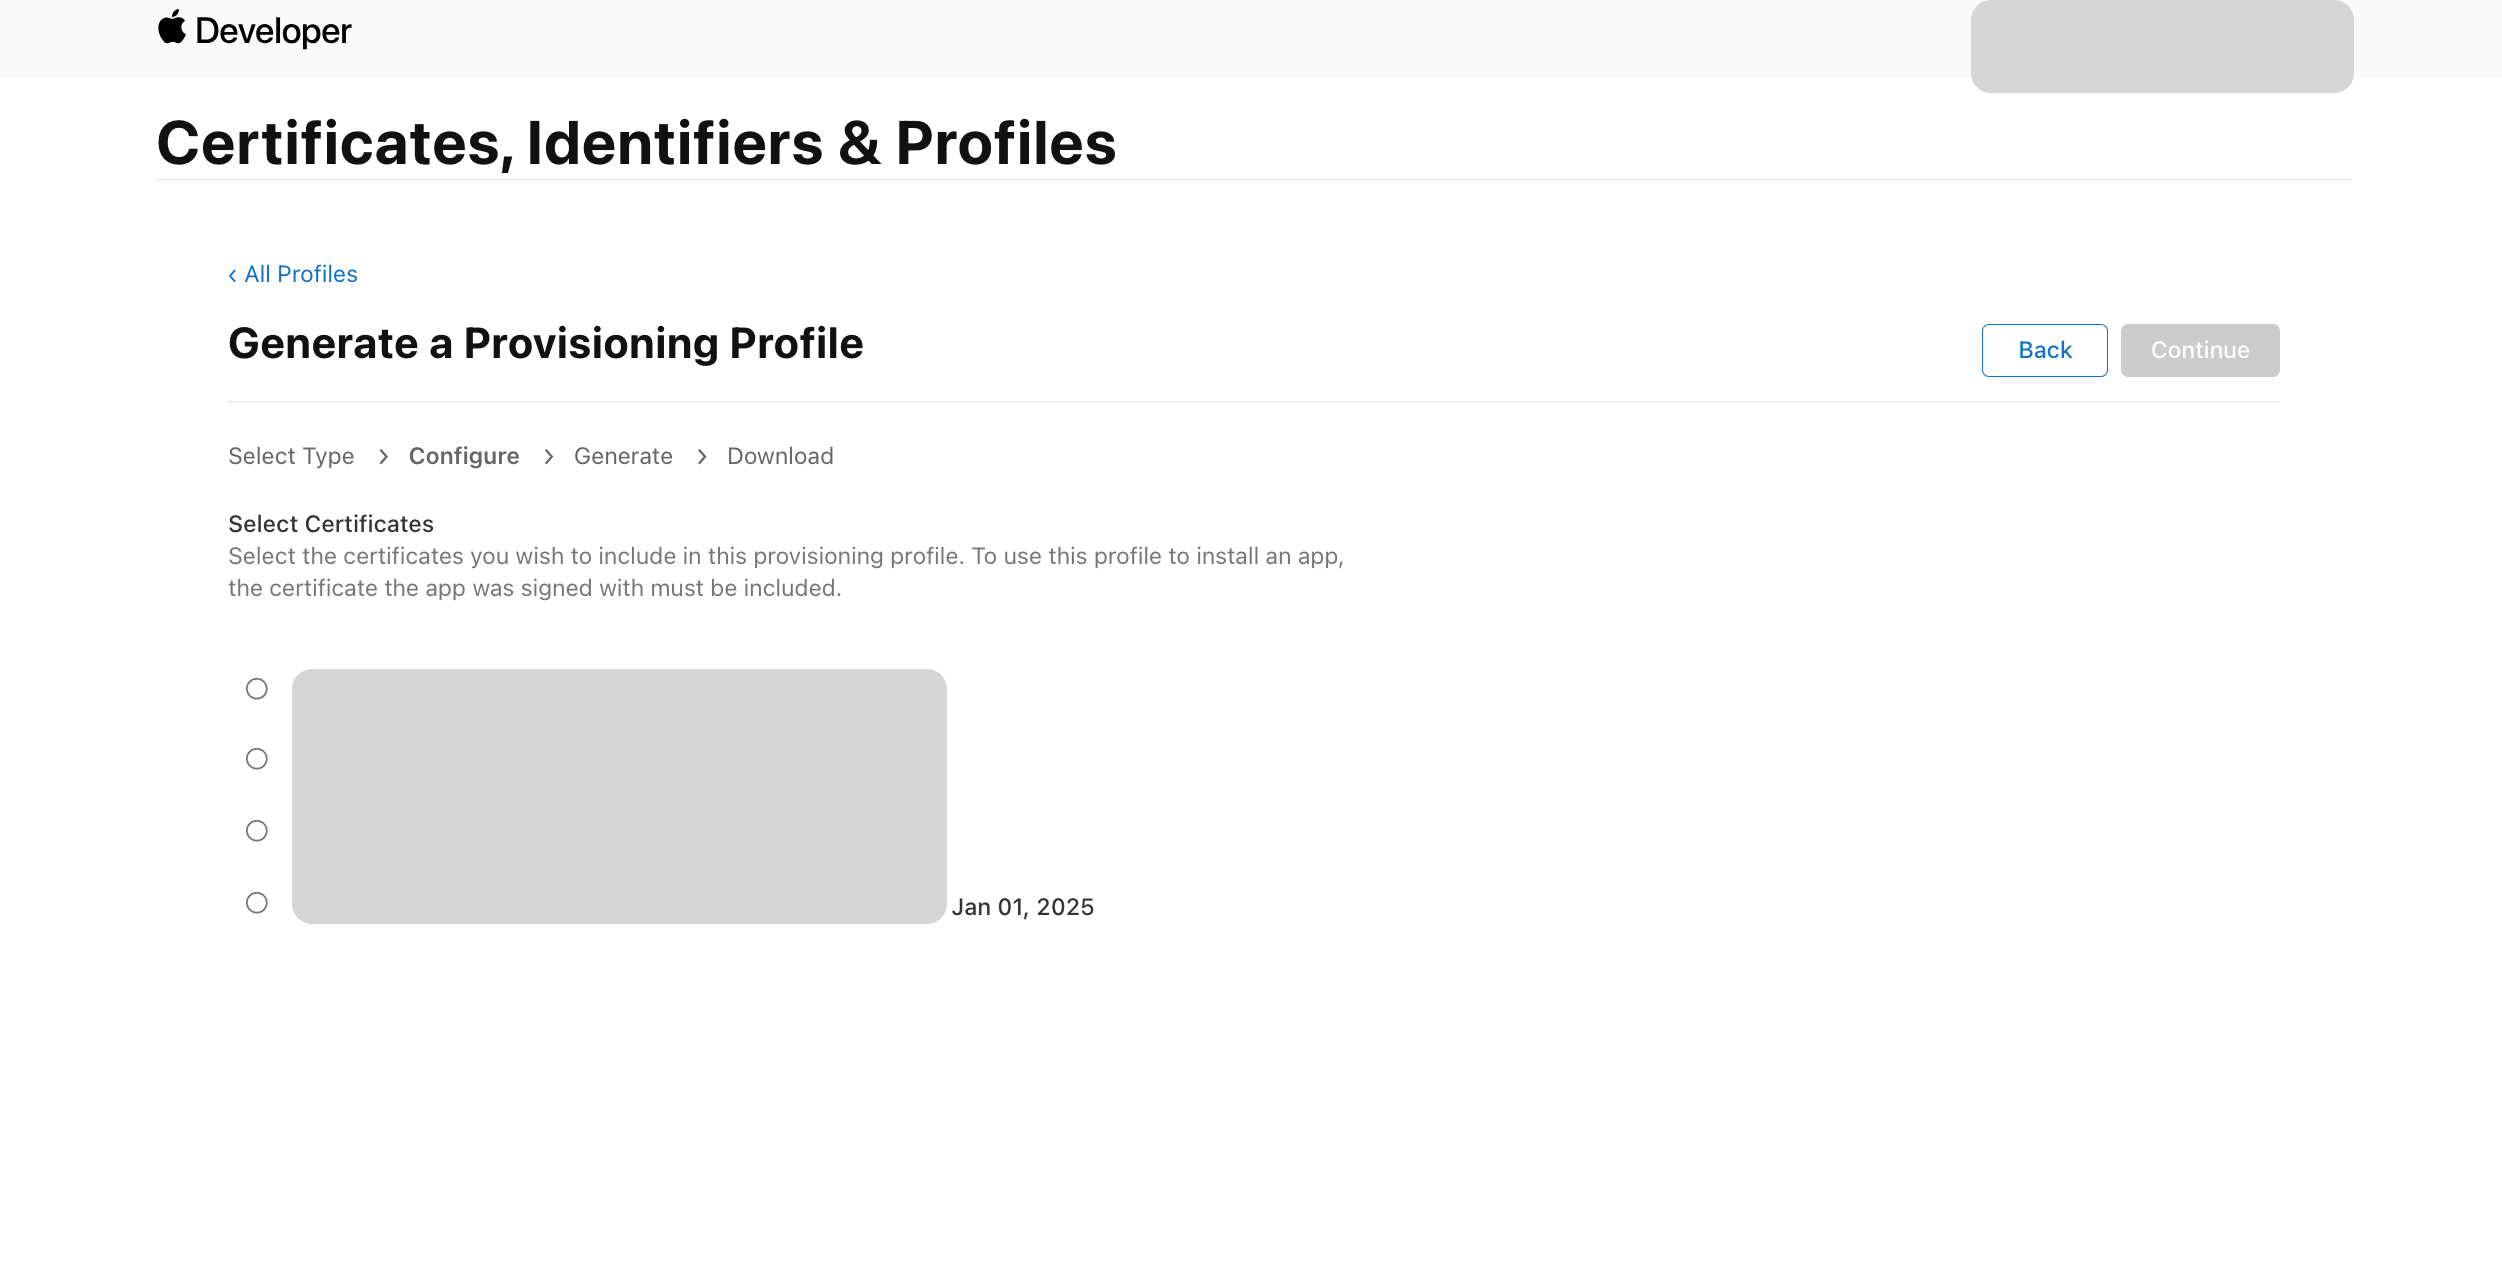
Step 7: Select the latest certificate to include in the provisioning profile, and click Continue.
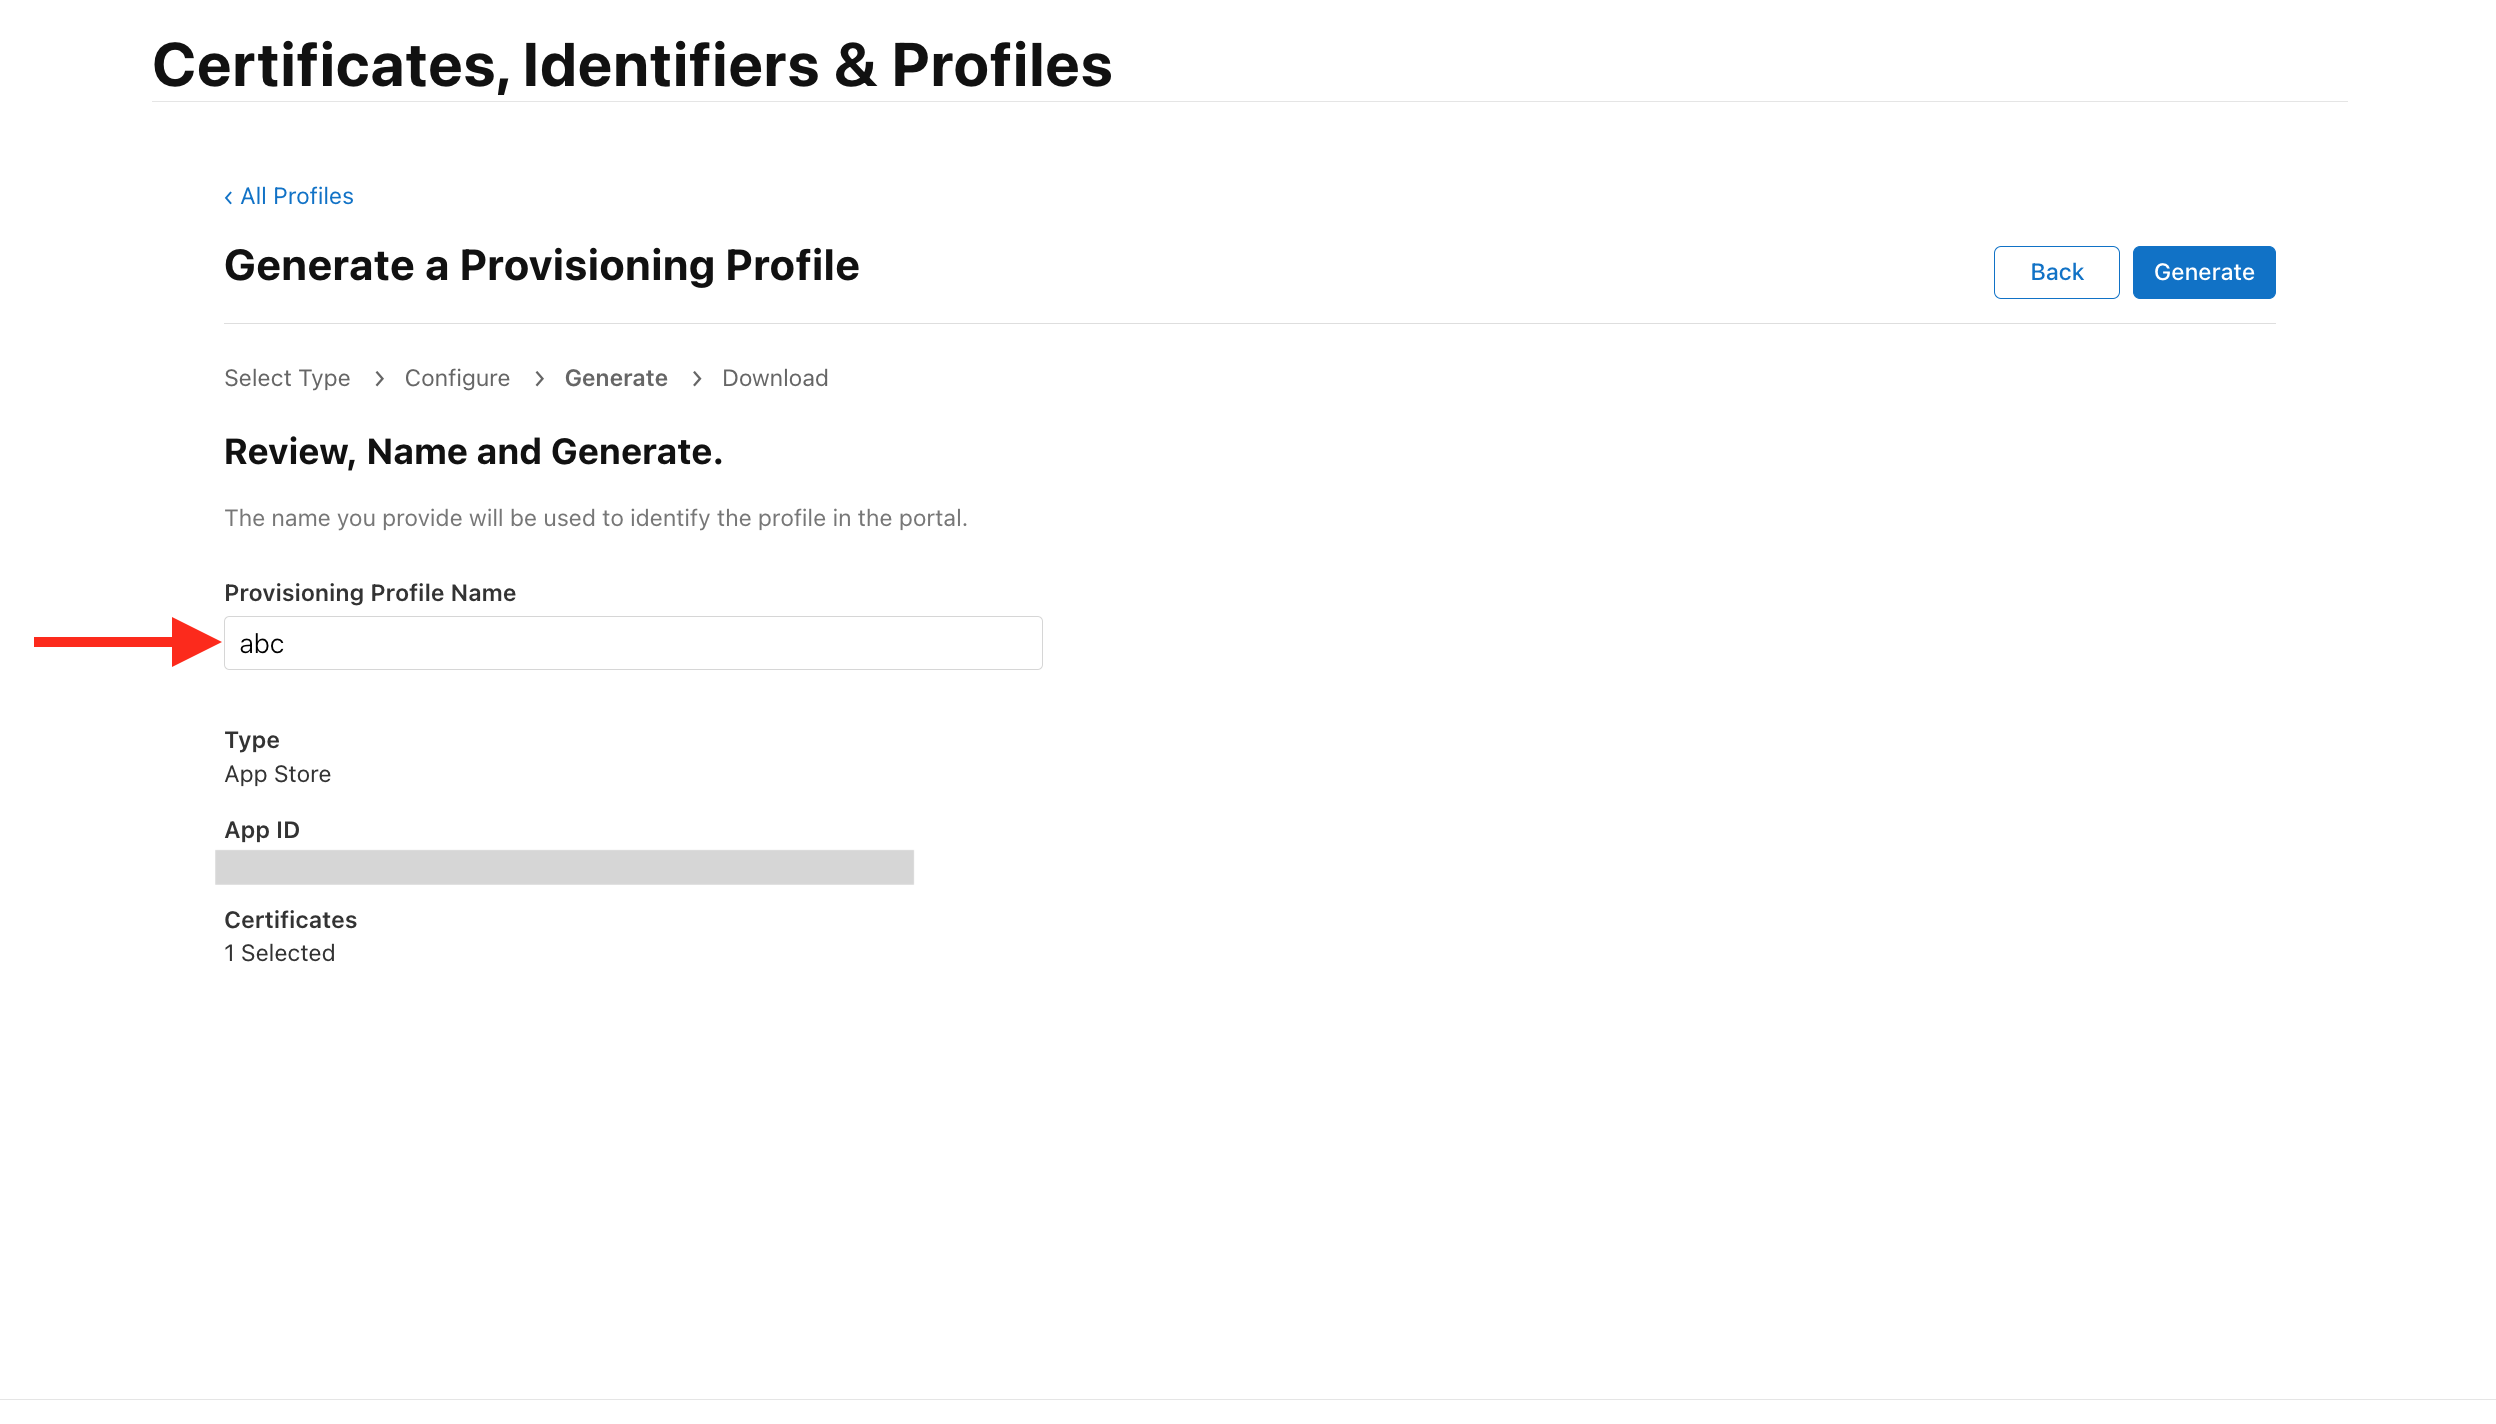
Step 8: Provide the Provisioning Profile Name, and click Generate.
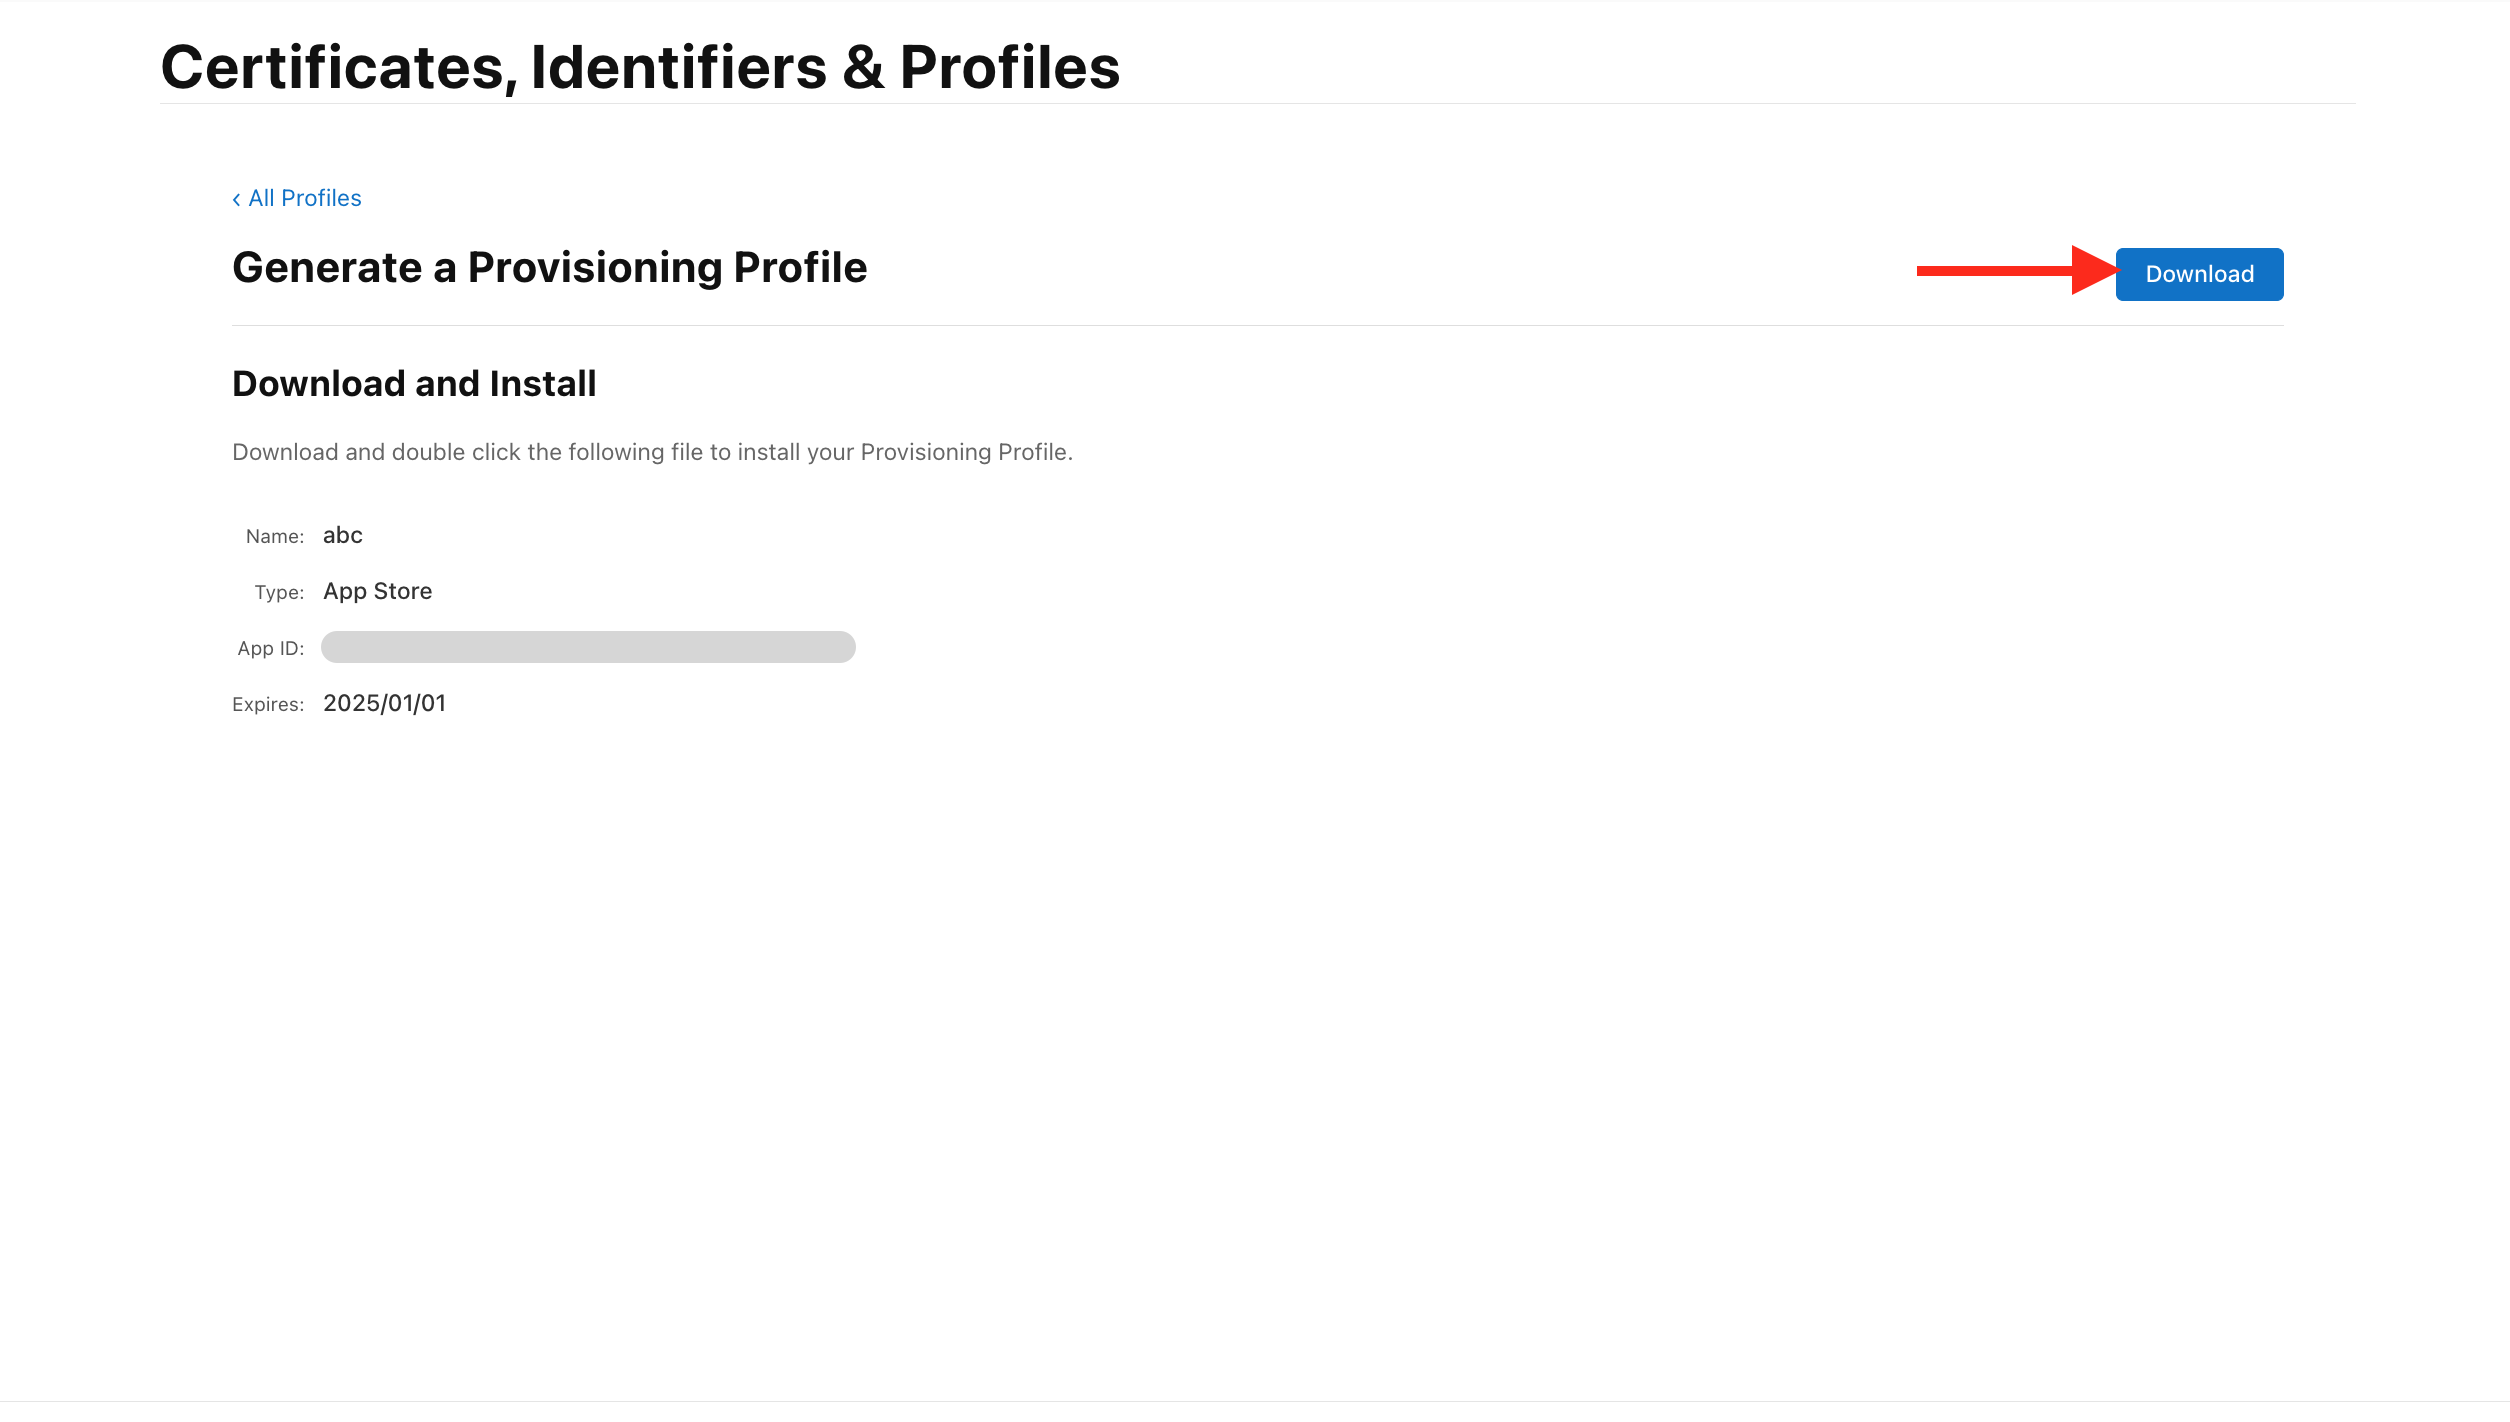
Step 9: Review the details, then click Download to download the Provisioning Profile.
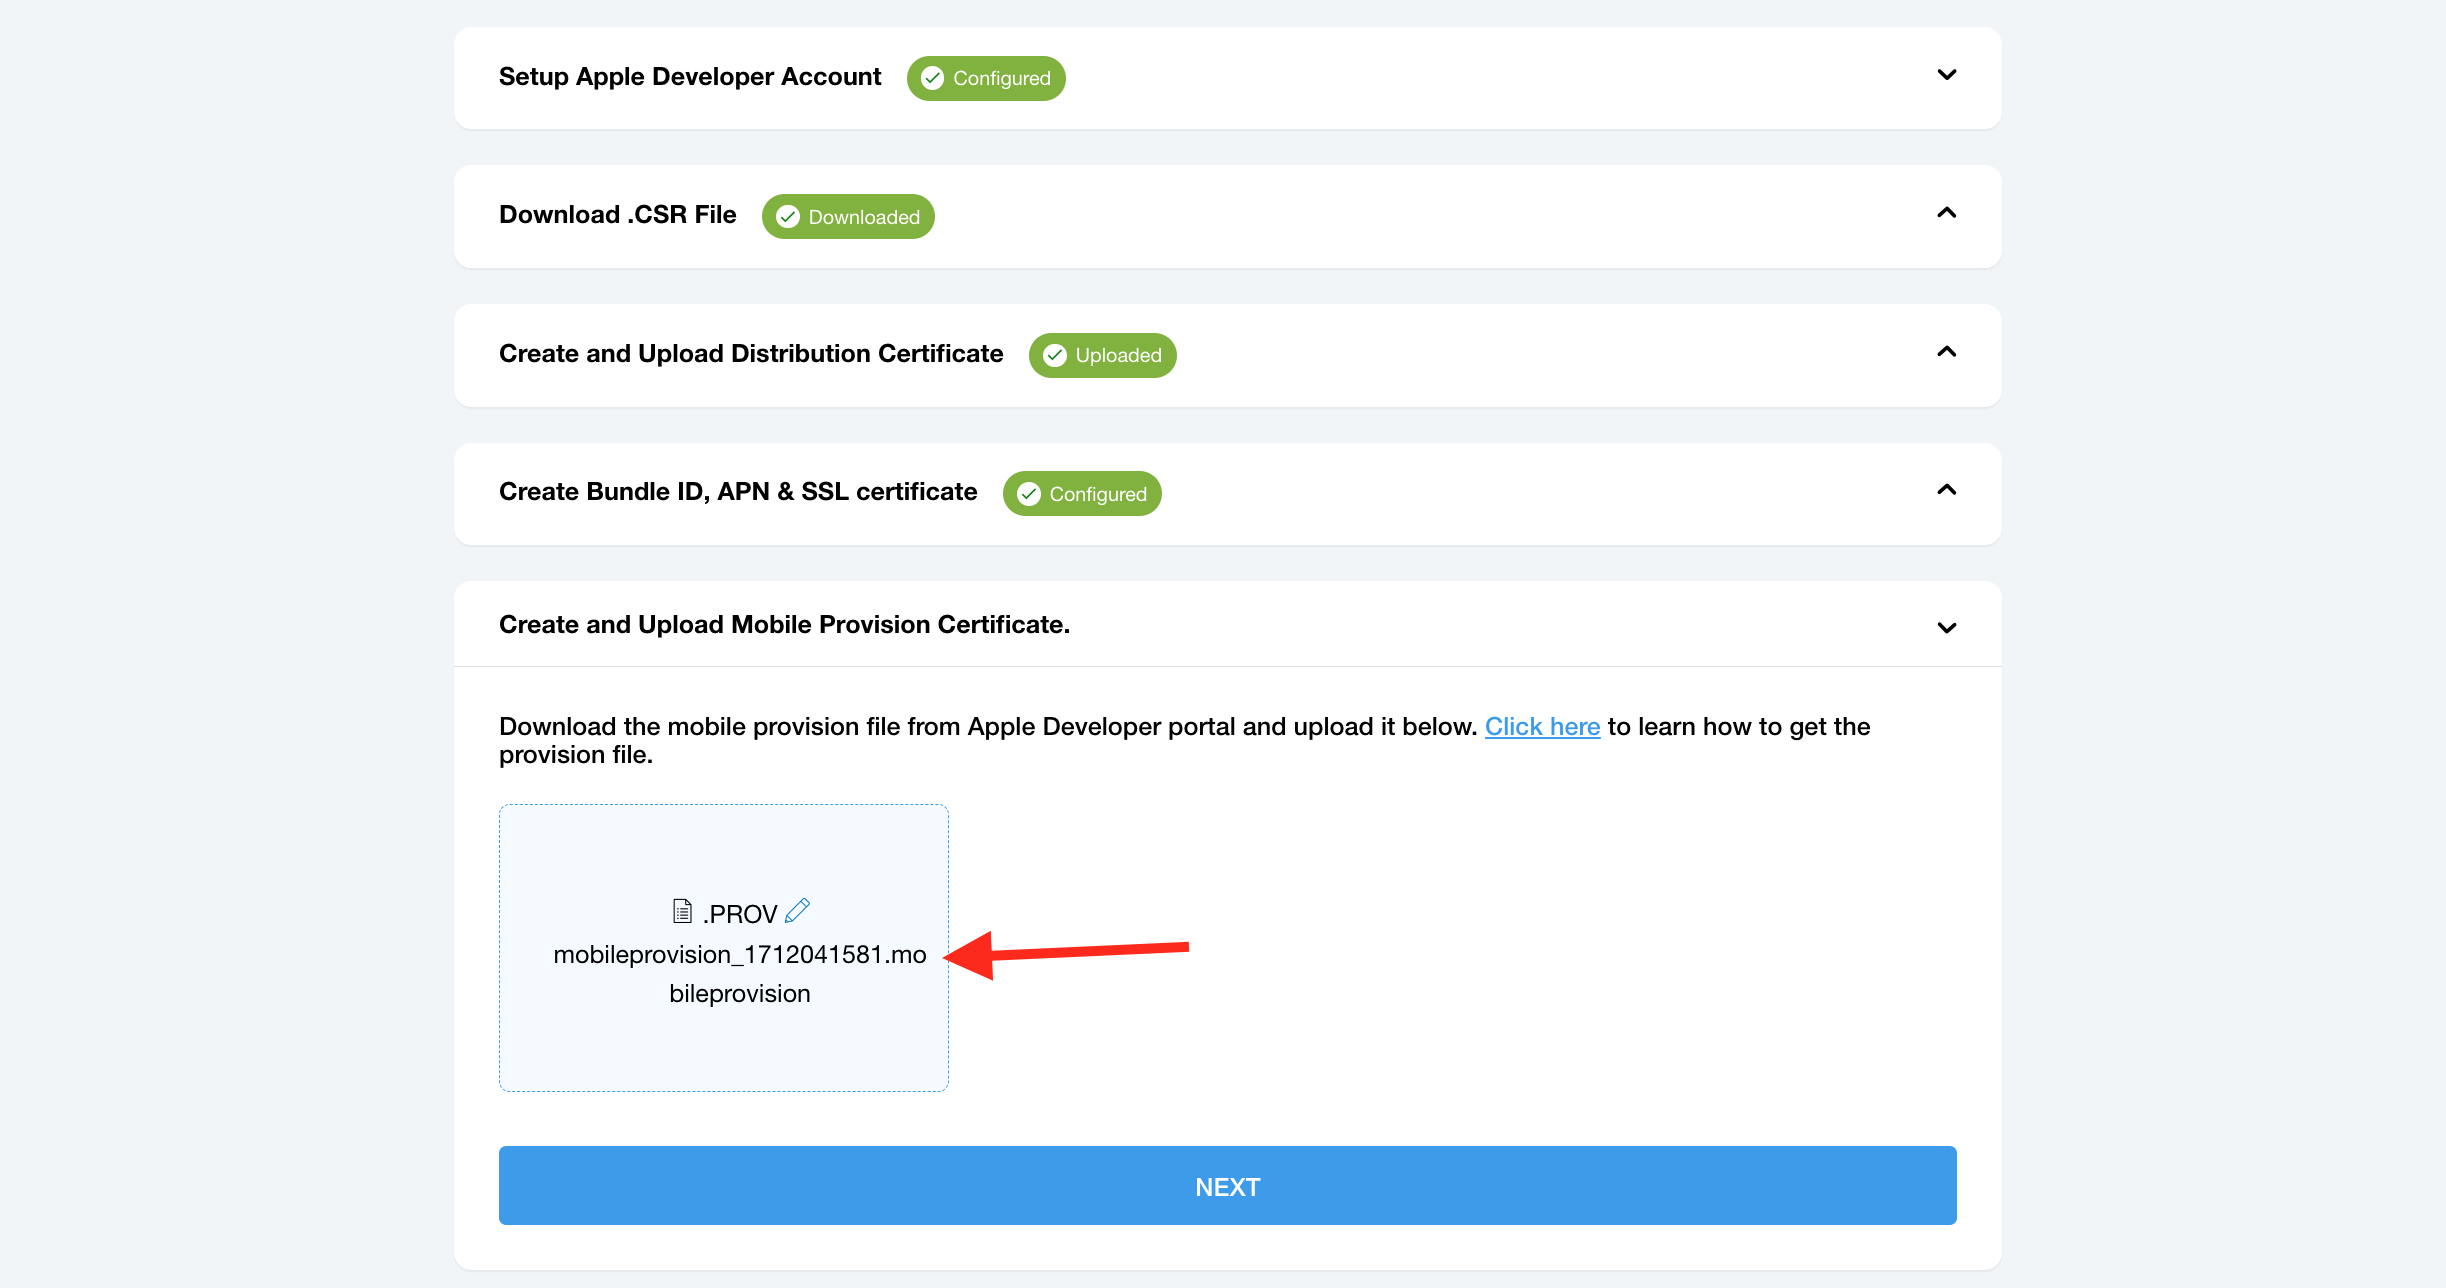
Step 10: Upload the downloaded “Provisioning Profile” in the “Publish Your App” section.
loading...
loading...
loading...
Related Articles
- Appy Pie: How to create an iOS Distribution Certificate?
- Appy Pie: How to create an iOS Provisioning Profile?
- Appy Pie Font Licensing: What You Need to Know
- Appy Pie: How to add Hyperlocal feature to your app?
- How to add and edit features in Appy Pie?
- Why is an Email Address Required on Appy Pie?
- Appy Pie: How to add the Donate feature to your app ?
- Appy Pie: How to add the Audio feature to your app ?
- Appy Pie: How to get Live Publishable Key, Live Secret Key and client ID from Stripe for Taxi?
Still can’t find an answer?
Send us a ticket and we will get back to you.