Knowledge Base
How Can I Set Up Slack Integrations With Appy Pie Connect?
Khan
5 min readPublished on Date | Last updated on Date
Steps to ‘Enable my Slack integration’
Step 1
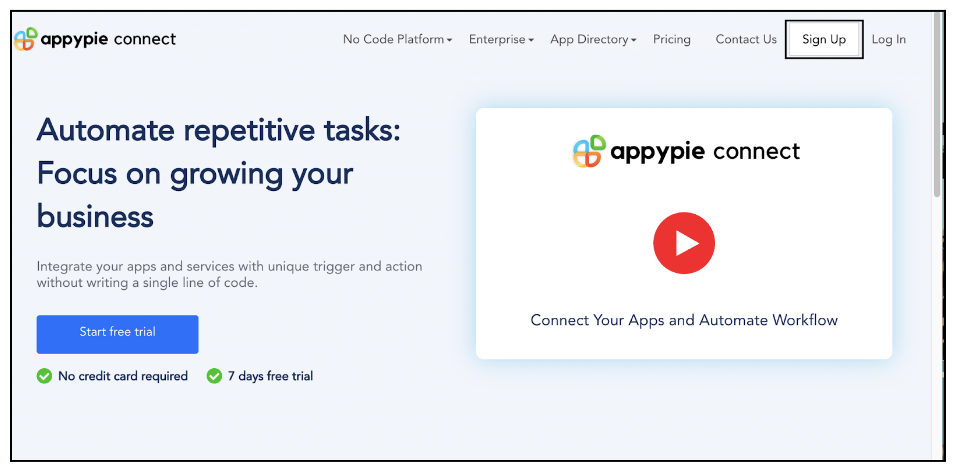
Open the link appypie.com/connect in your browser. As a first step towards Slack Integration, “Log In“ for Appy Pie Connect. In case you do not have a Appy Pie account, Sign up first and then login to your account.
Step 2
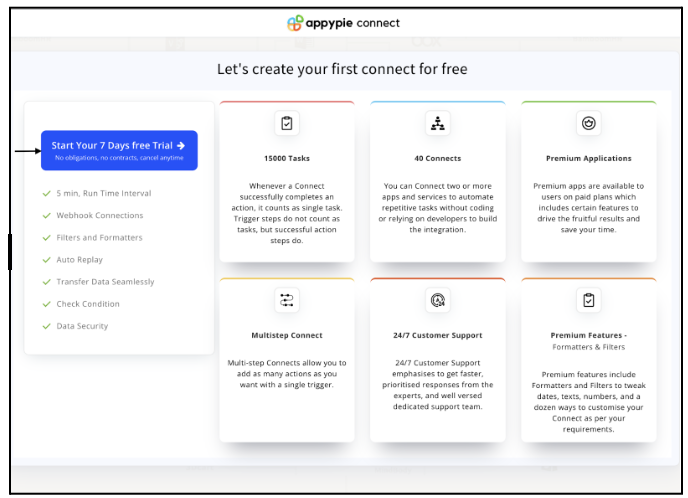
As a sign-up procedure, click on “Start your 7 days free trial” where you will be redirected to the Appy Pie Connect dashboard for further procedure.
Step 3
After logging in, you will see a dashboard as shown in the image. This dashboard will contain all the information regarding your integrations between apps.
Here, click on “Create a Connect”.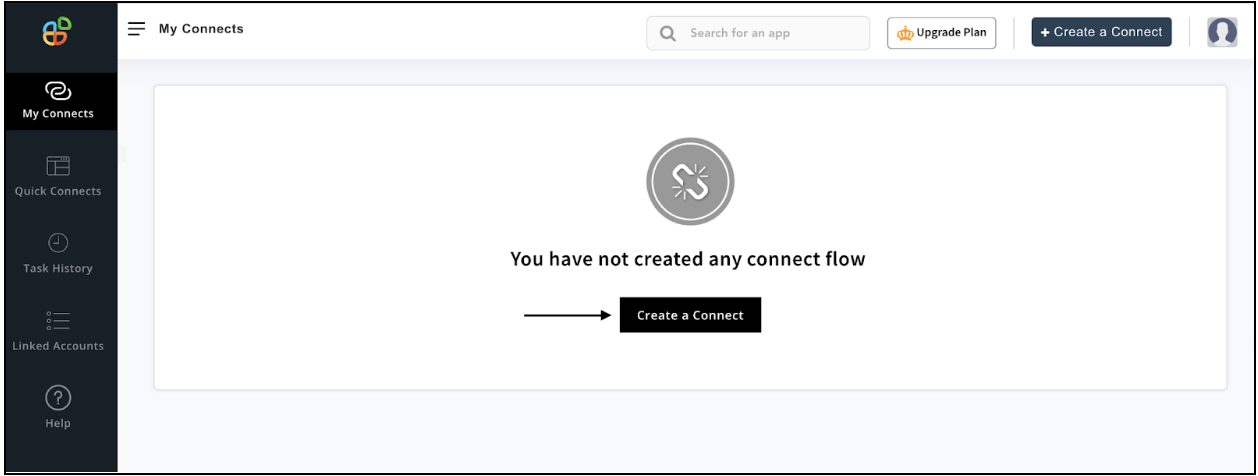
Step 4
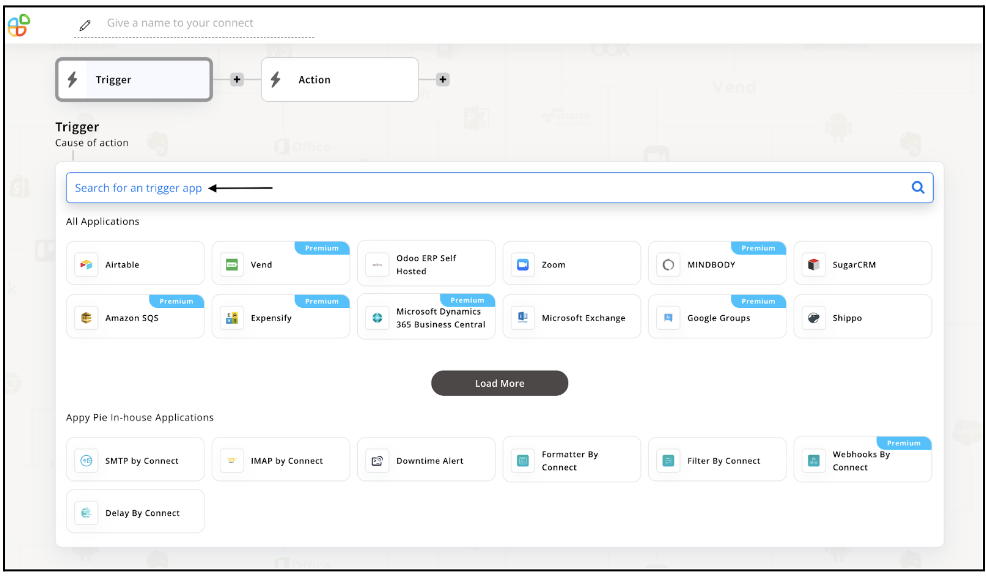
Now, search for ‘Slack’ in the search toolbar as we’re learning how to enable Slack integrations through Appy Pie Connect.
Step 5
Here you need to “Choose a trigger event” to move forward. In case, the event you want to trigger is not available, click on ‘’Don’t see a trigger Event you need? Email us now!’’ given below at the end and request the trigger you want. Our team will get back to you soon.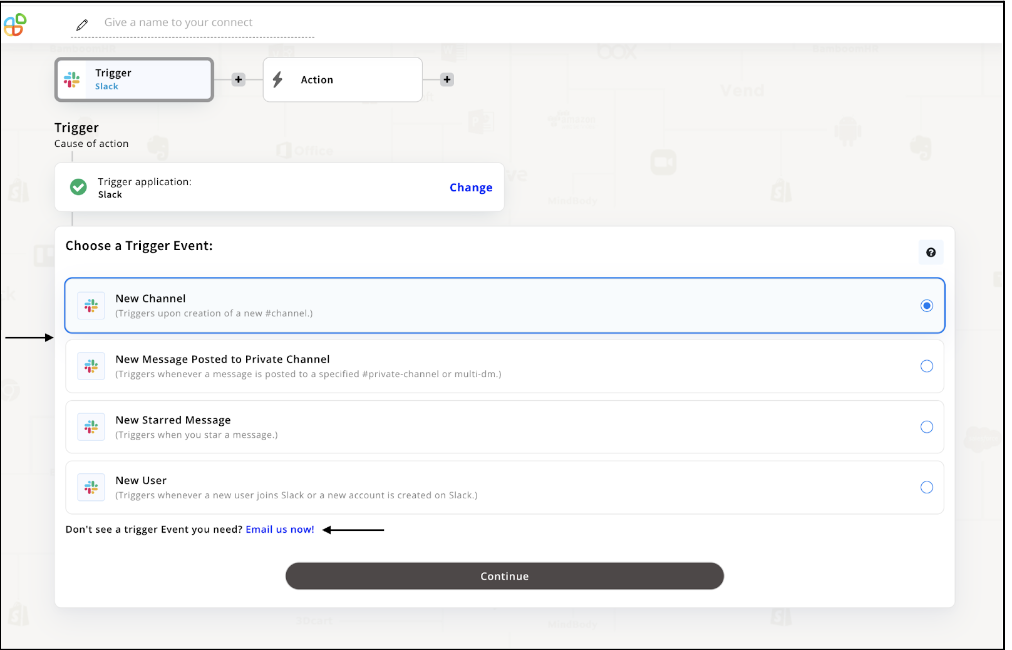
Step 6
After you’ve chosen your trigger event, you’ll need to connect to a Slack account by clicking on “Connect an Account” button.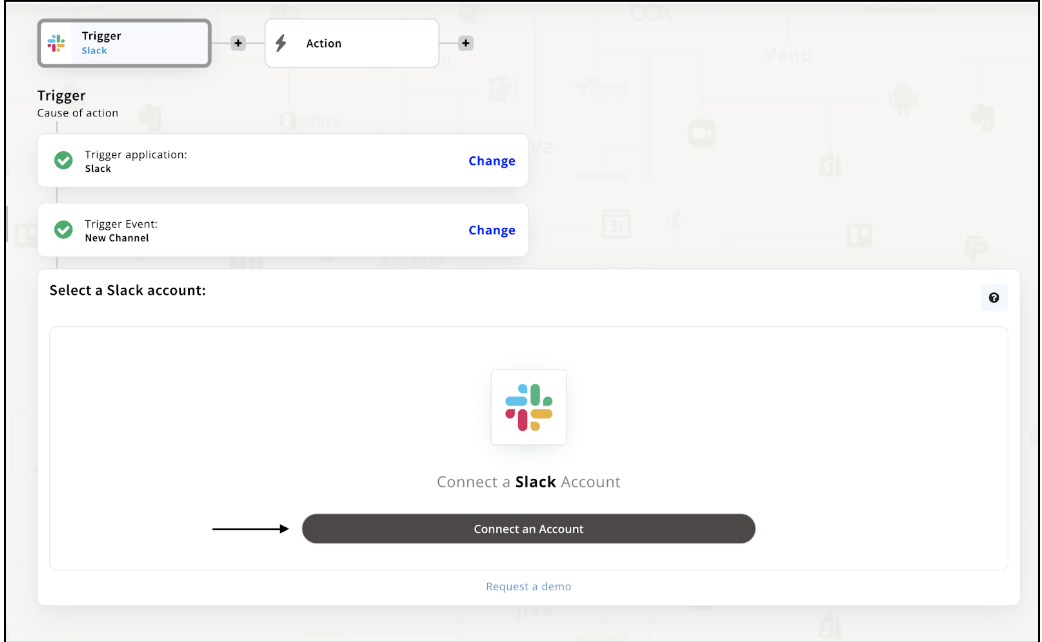
Step 7
You will get an authorization popup where you can enter your workspace URL and select “Continue”. In case, you don’t have your own workspace, generate a new one by creating a Slack account.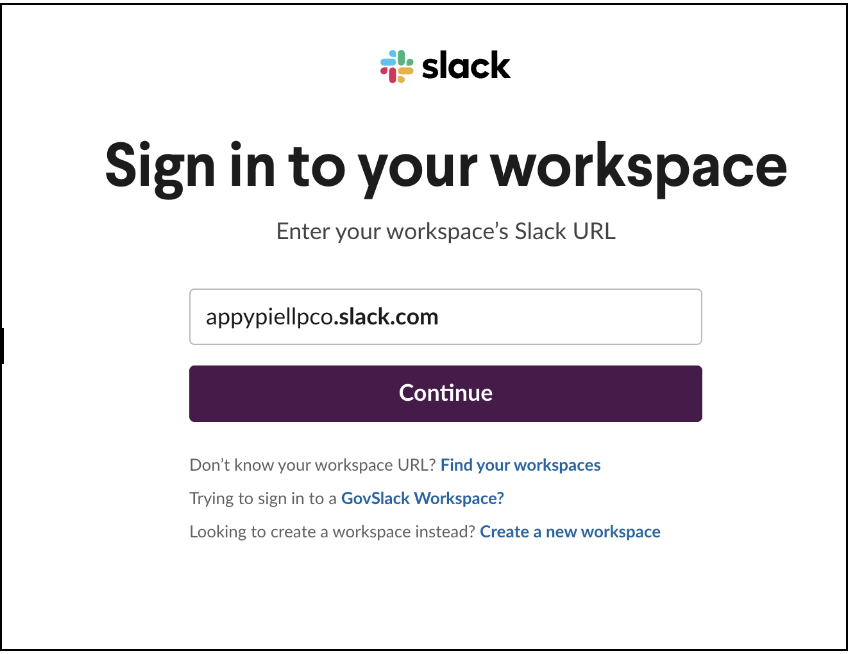
Step 8
When you’ve successfully added a workspace, sign in with your email address. You can also sign in via Google and Apple ID.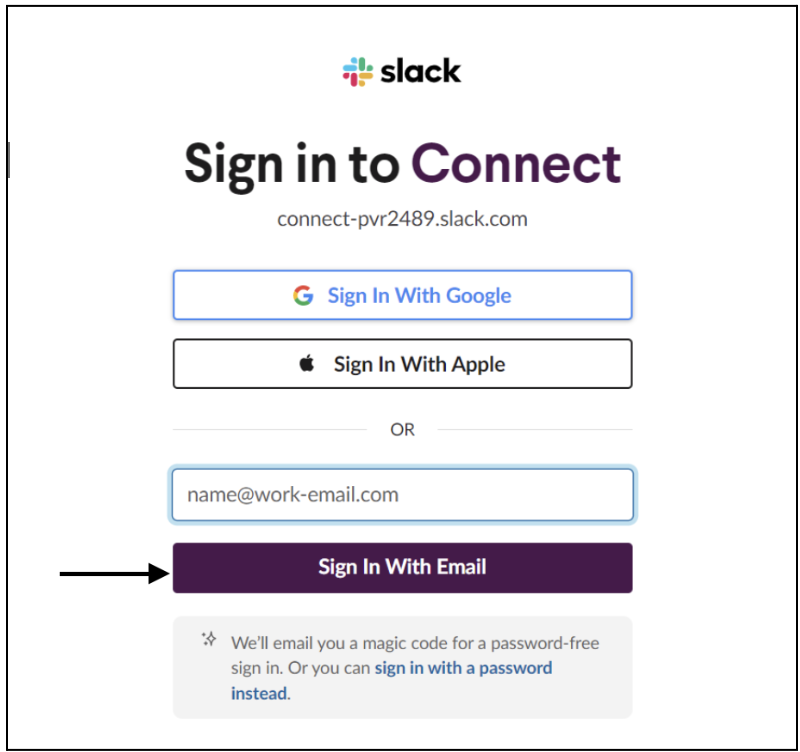
Step 9
Upon signing in to your workspace, a pop-up window will appear to ask for a few permissions including what Appy Pie can view and modify. Click “Allow” to take a step forward. 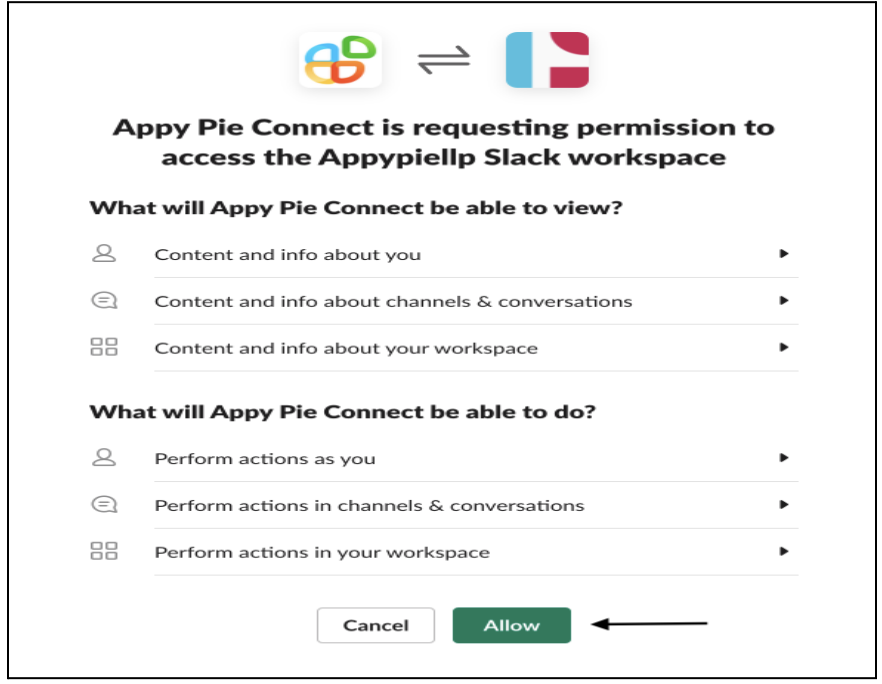
Step 10
Once you have authorized Appy Pie, the trigger application will end and the process of choosing Action will begin. Click “Continue” to proceed and you are ready to choose your desired app for integration.
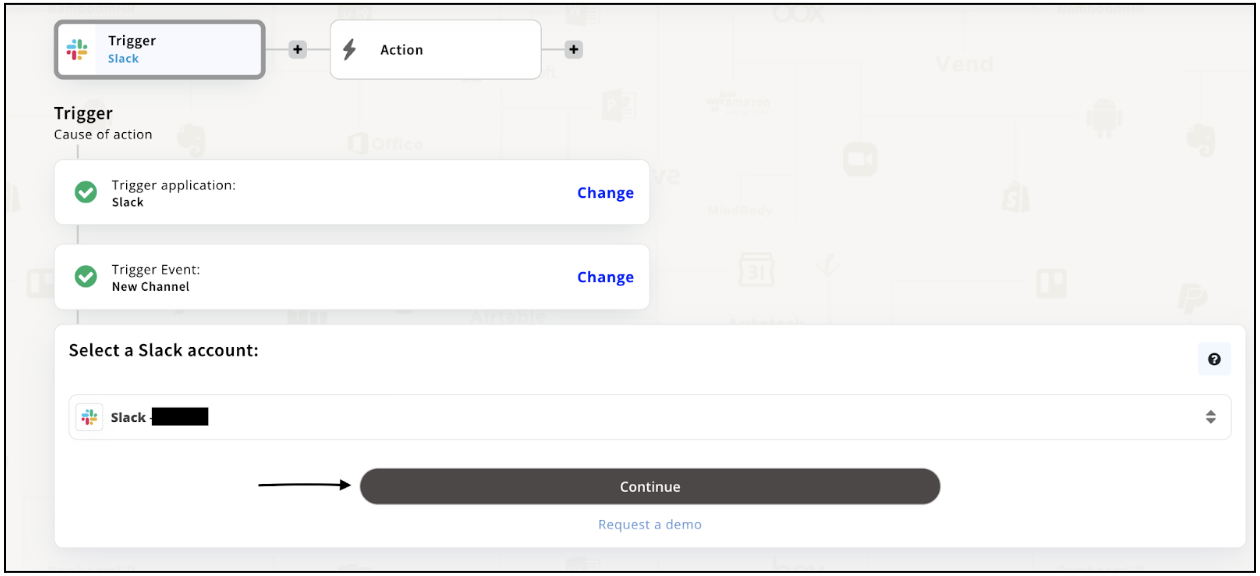
Step 11
Now search for the app you want to integrate with Slack from our search bar tool. For eg; MailChimp Ecommerce and enjoy the customizations offered by Appy Pie Connect.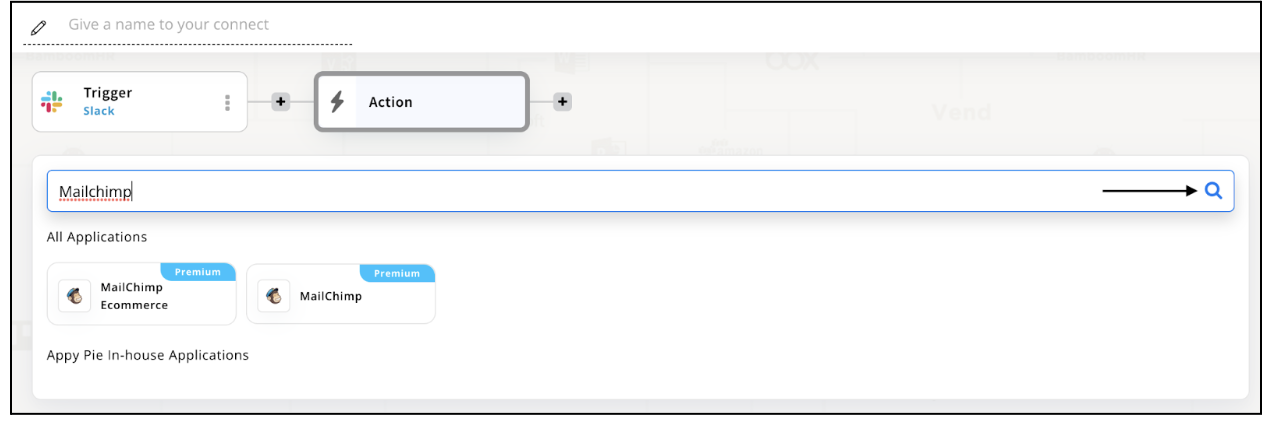
Step 12
In step 7, we selected ‘New channel’ as a ‘Trigger event’. Therefore, we must now select our ‘Trigger action’ from the options below and hit ‘continue’.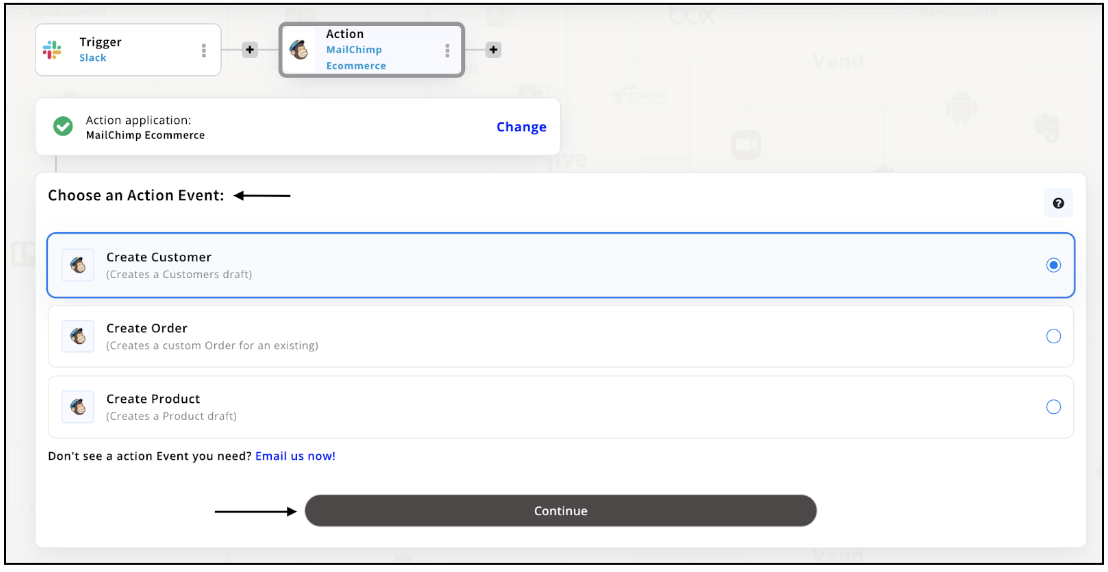
Step 13
After you’ve selected your trigger action, you’ll be asked to ‘Connect an Account’ of MailChimp Ecommerce which you may or may not have. In case, you don’t have a MailChimp account, you’ll have to create one!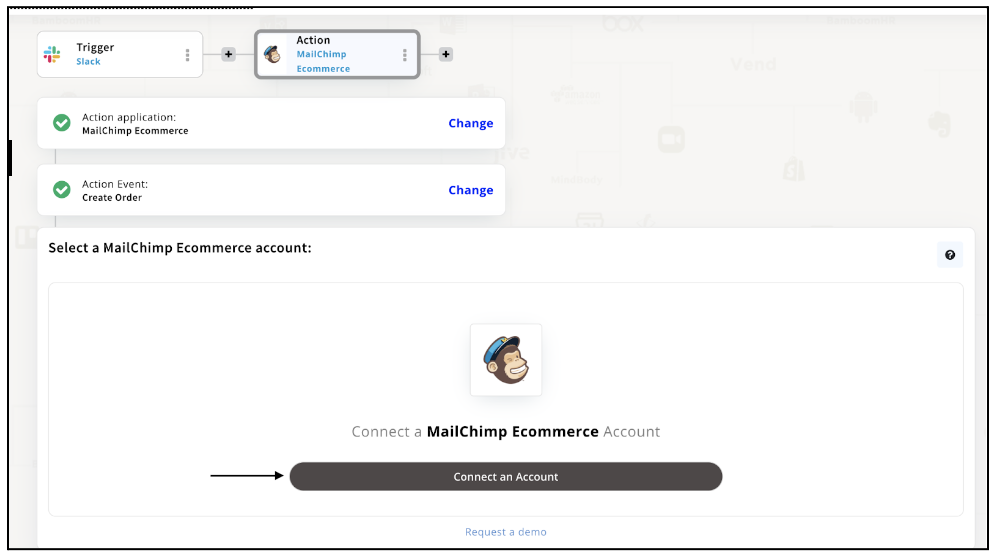
Step 14
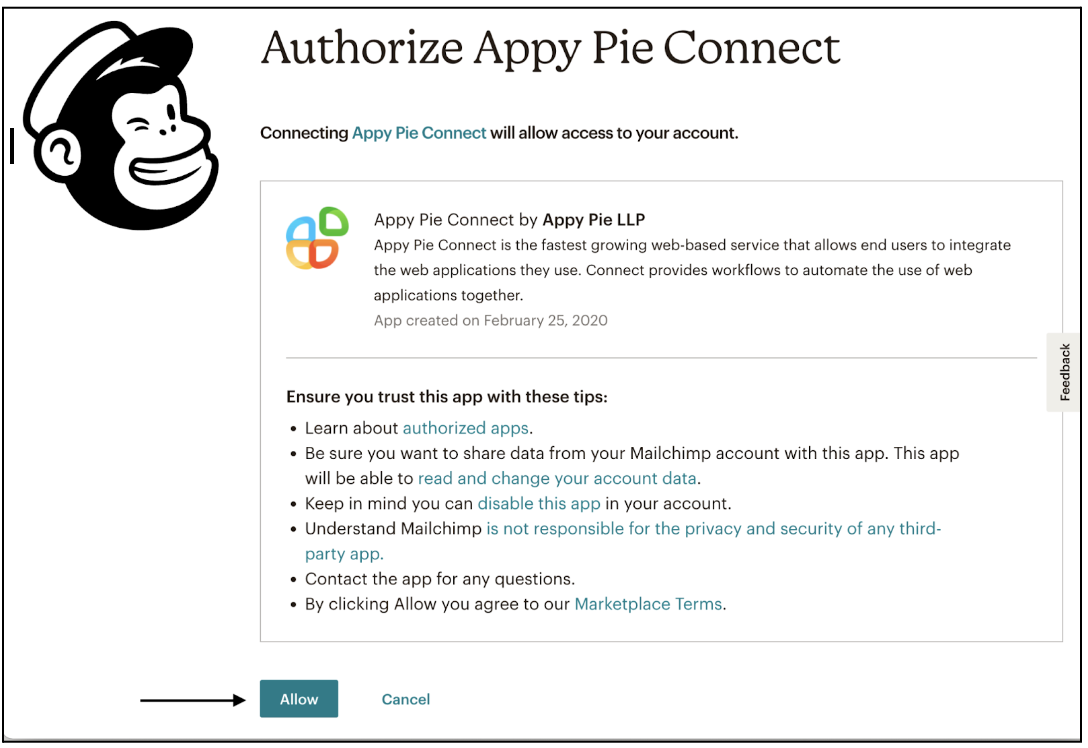
After connecting your MailChimp account, a pop-up will appear asking for the below permissions. Upon your consent, click on “Allow” and proceed further to your Slack Integration.
Step 15
Once the permissions are given, you’ll be redirected to the same page as step 10 where you can see your MailChimp account under ‘select a MailChimp Ecommerce account’.
After selecting your account, hit “Continue”.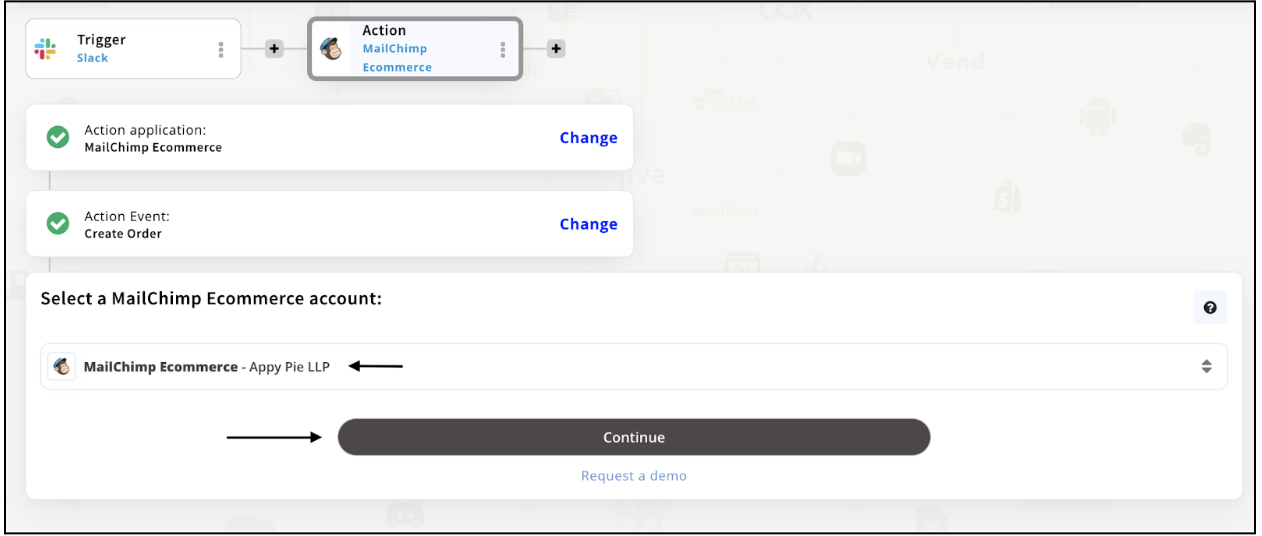
Step 16
Here, you can easily set up your options for the trigger event and action you selected before. After entering the details, you’ll be left with two options i.e. either go for “Skip Run and Continue” or “Continue and Run Test”.
It’s entirely your wish whether you want to run a test or go ahead with the integration without testing.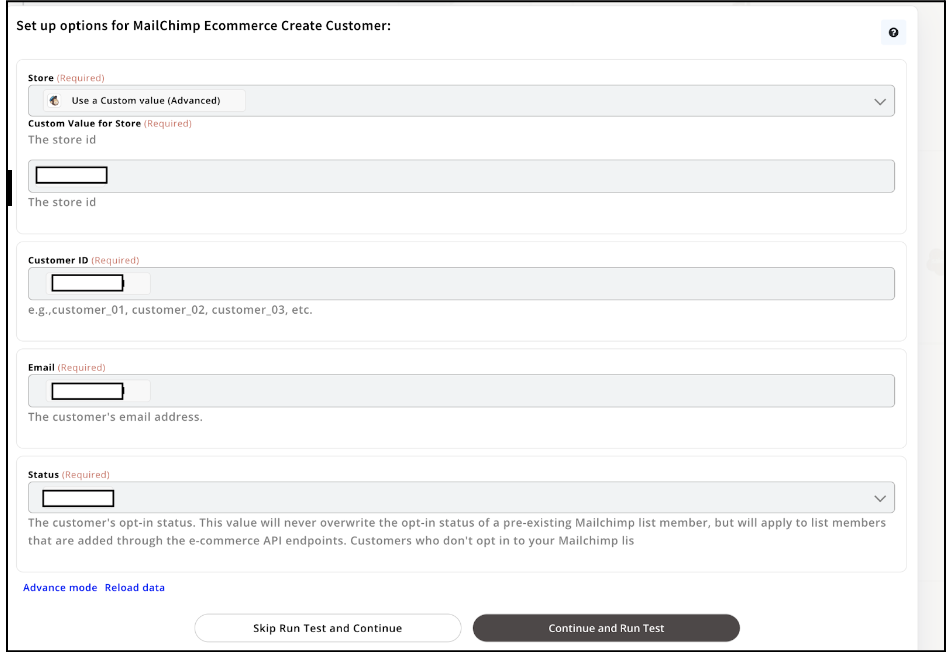
Step 17
Congratulations! Your slack Integration is successful. Enjoy all the benefits and features of Slack Integration with MailChimp Ecommerce.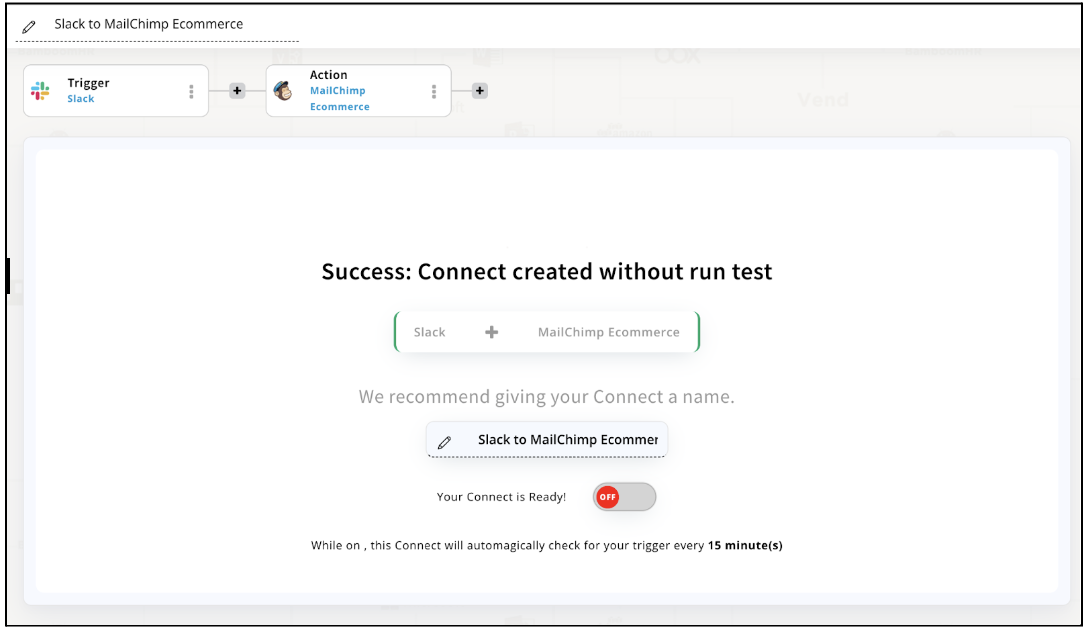
Conclusion
Appy Pie Connect offers 1000+ apps to integrate with, which is a huge advantage for any personnel and business organization. With a wide range of applications available, adding multiple actions and deep customization of any Connect is easy. You only need a Slack and other integration app account to access all the benefits of project management, marketing automation, customer support, file sharing, and team collaboration.
loading...
Related Articles
- How to setup Login with Facebook in my Facebook Developer Account
- How can I setup PayPal web hooks using the PayPal Developer Portal
- How Can I Set Up Facebook Page Integrations With Appy Pie Connect?
- How Can I Set Up Facebook Messenger Integrations With Appy Pie Connect?
- How Can I Set Up Facebook Integrations With Appy Pie Connect?
- How Can I Set Up ClickUp Integrations With Appy Pie Connect?
- How Can I Set Up GitLab Integrations With Appy Pie Connect?
- How Can I Set Up Strava Integrations With Appy Pie Connect?
- How Can I Set Up RepairShopr Integrations With Appy Pie Connect?
Still can’t find an answer?
Send us a ticket and we will get back to you.