Knowledge Base
Appy Pie: How to Create Android Client ID?
Priya Gautam
3 min readPublished on Date | Last updated on Date
Follow below steps to create Android Client ID :
Step 1: Go to Google Developers Console. If you have a Google account, login, else Create an Account.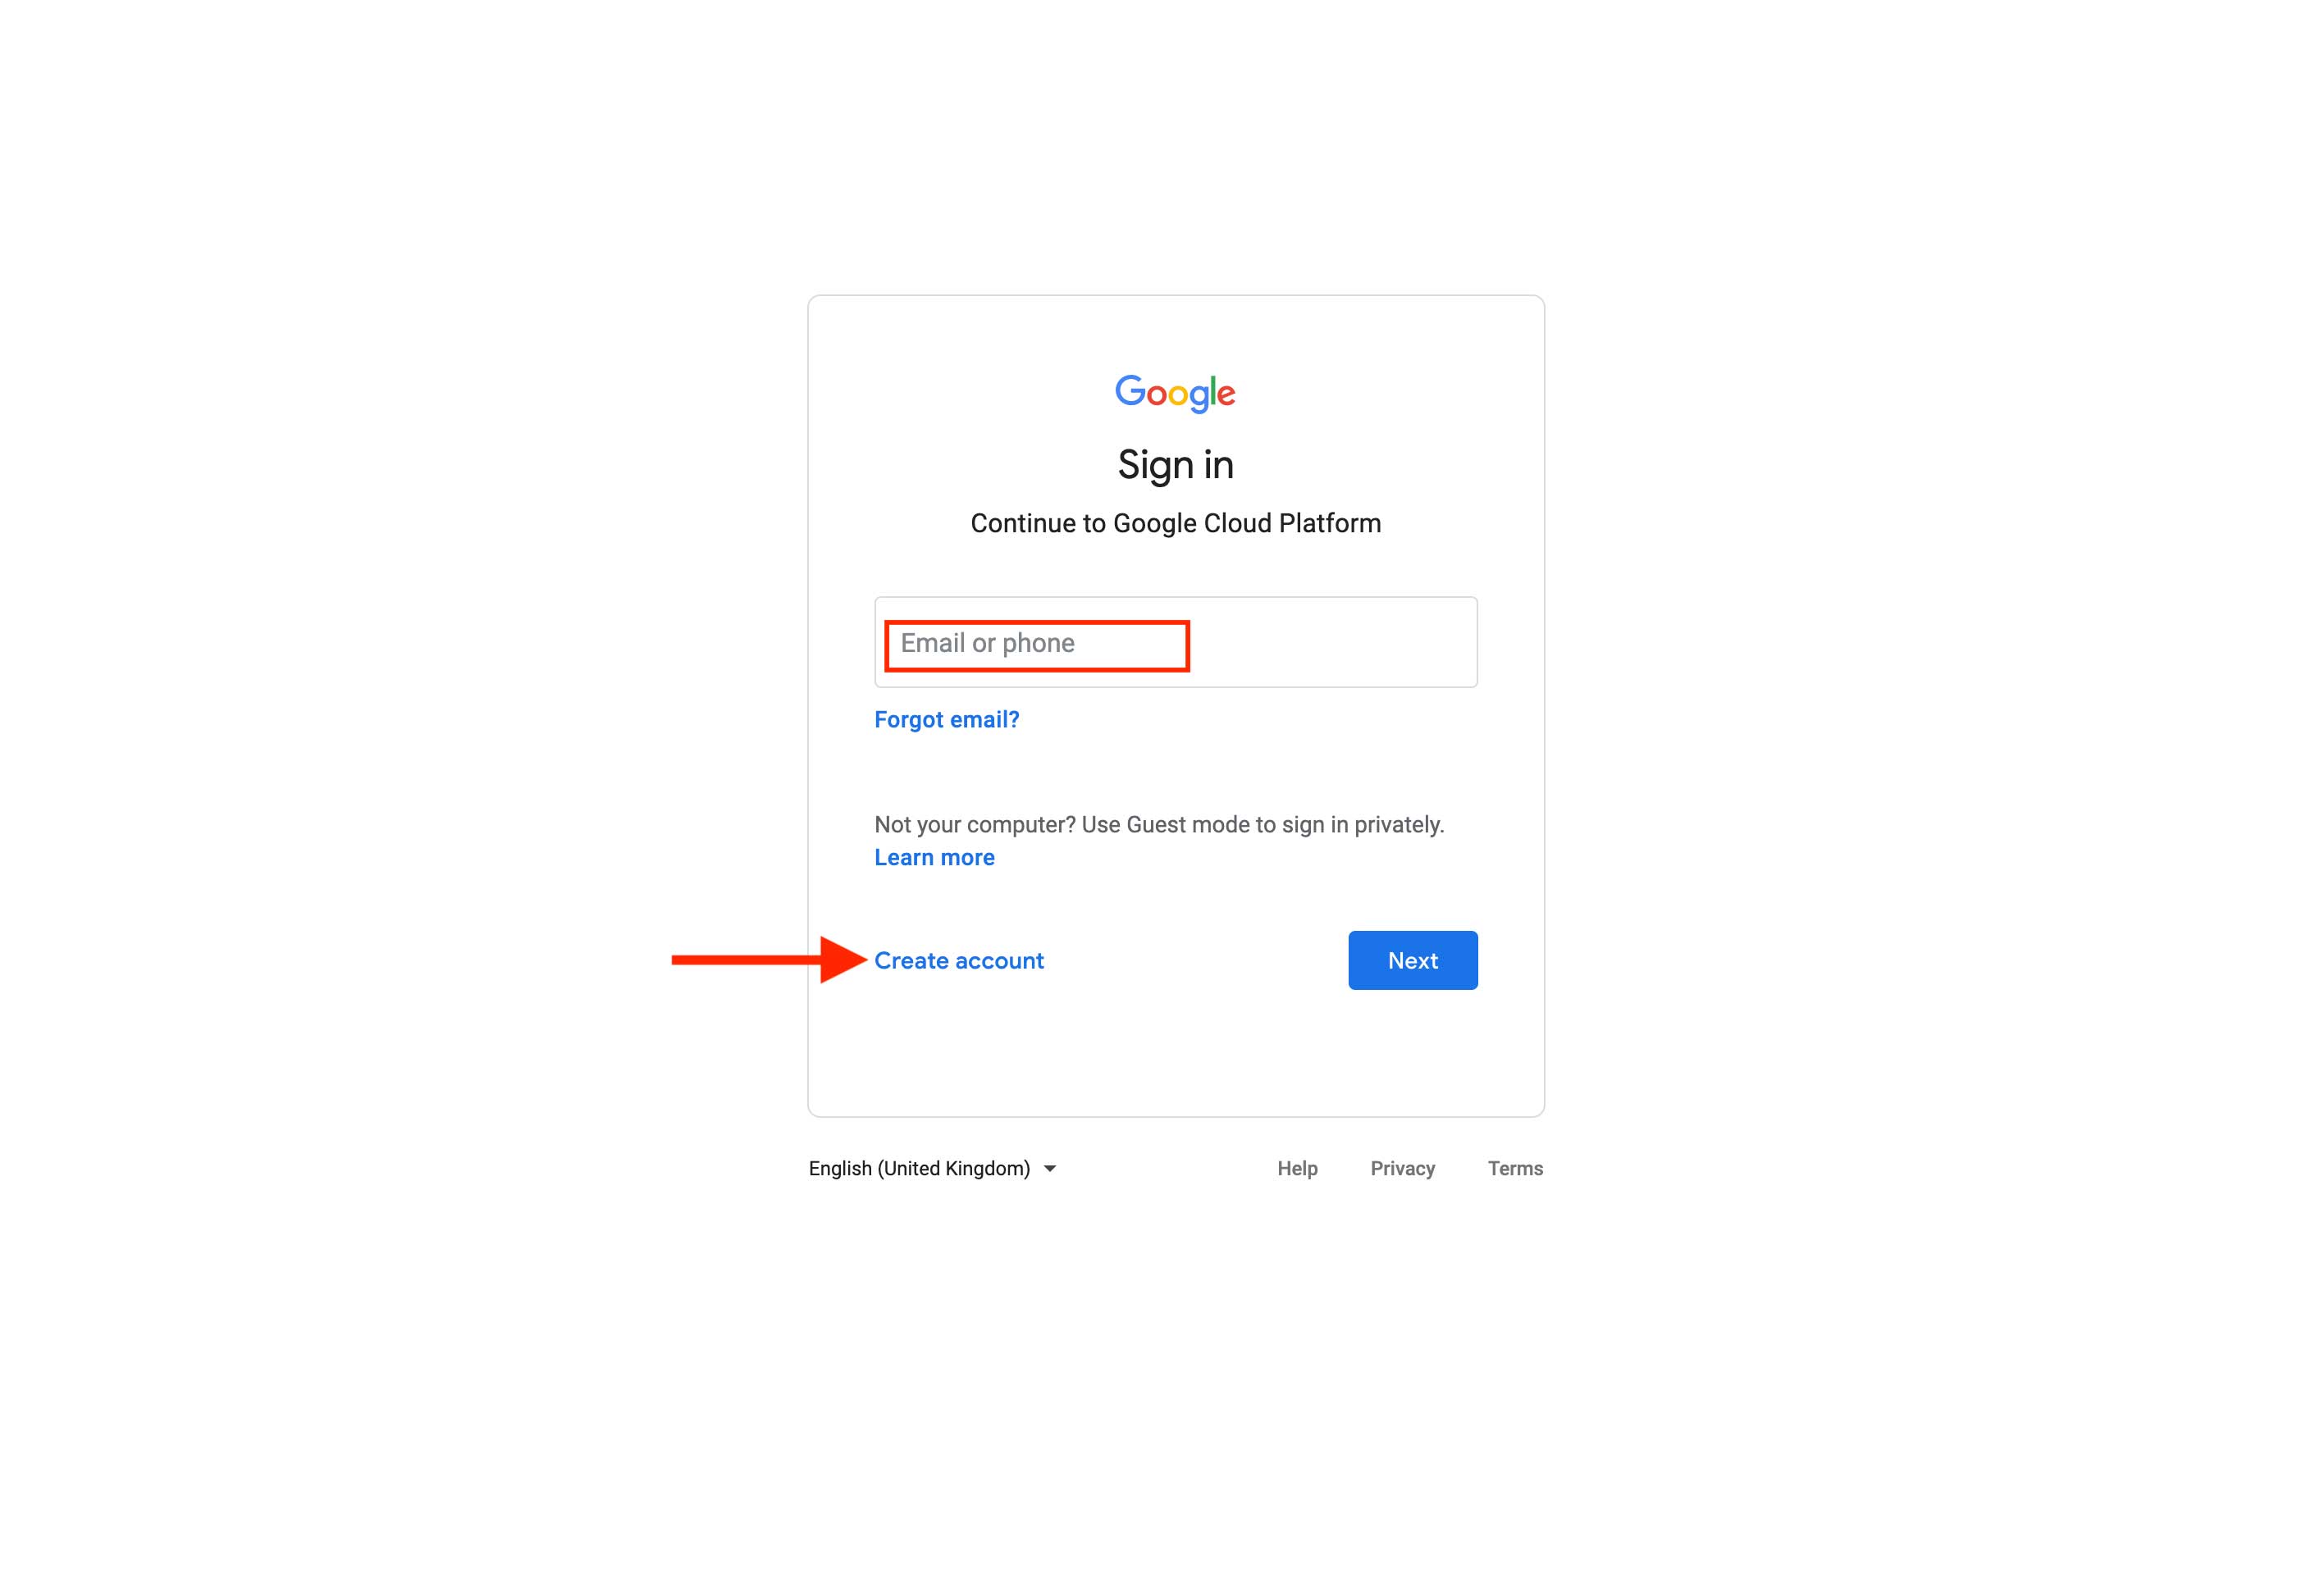 Step 2: On the dashboard, click on the Project dropdown menu.
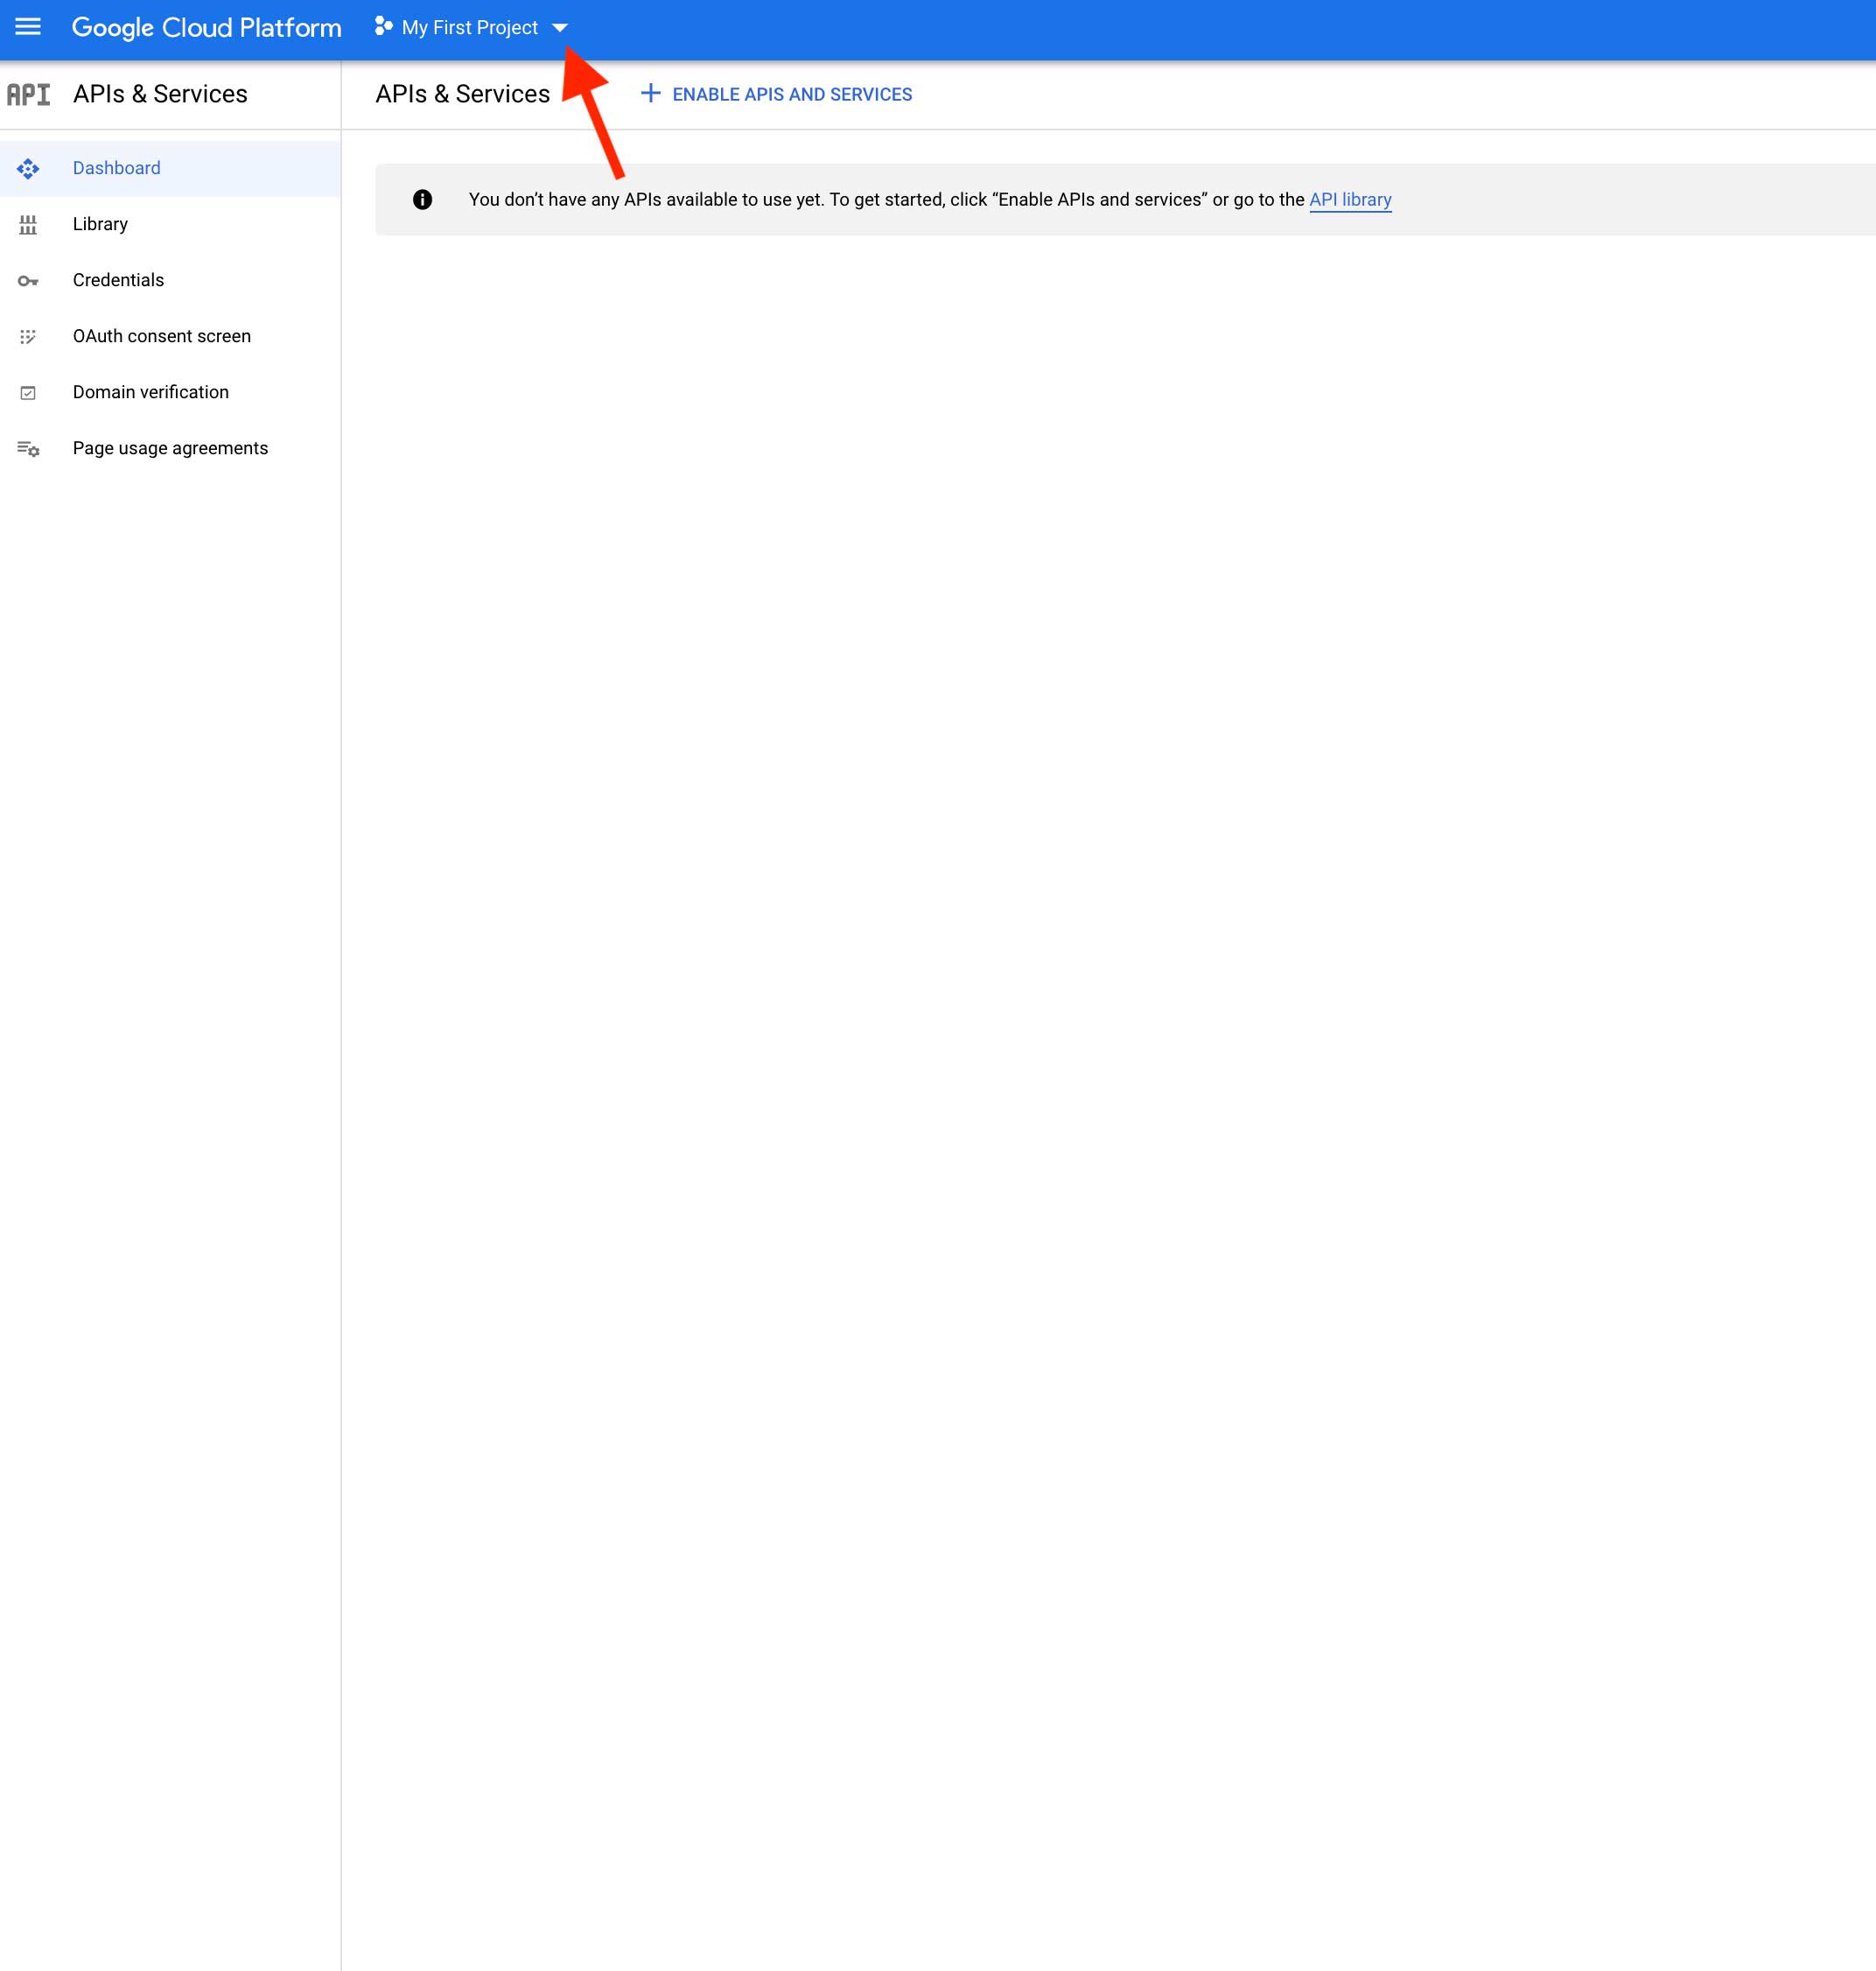
Step 3: Select an existing project or create a New Project.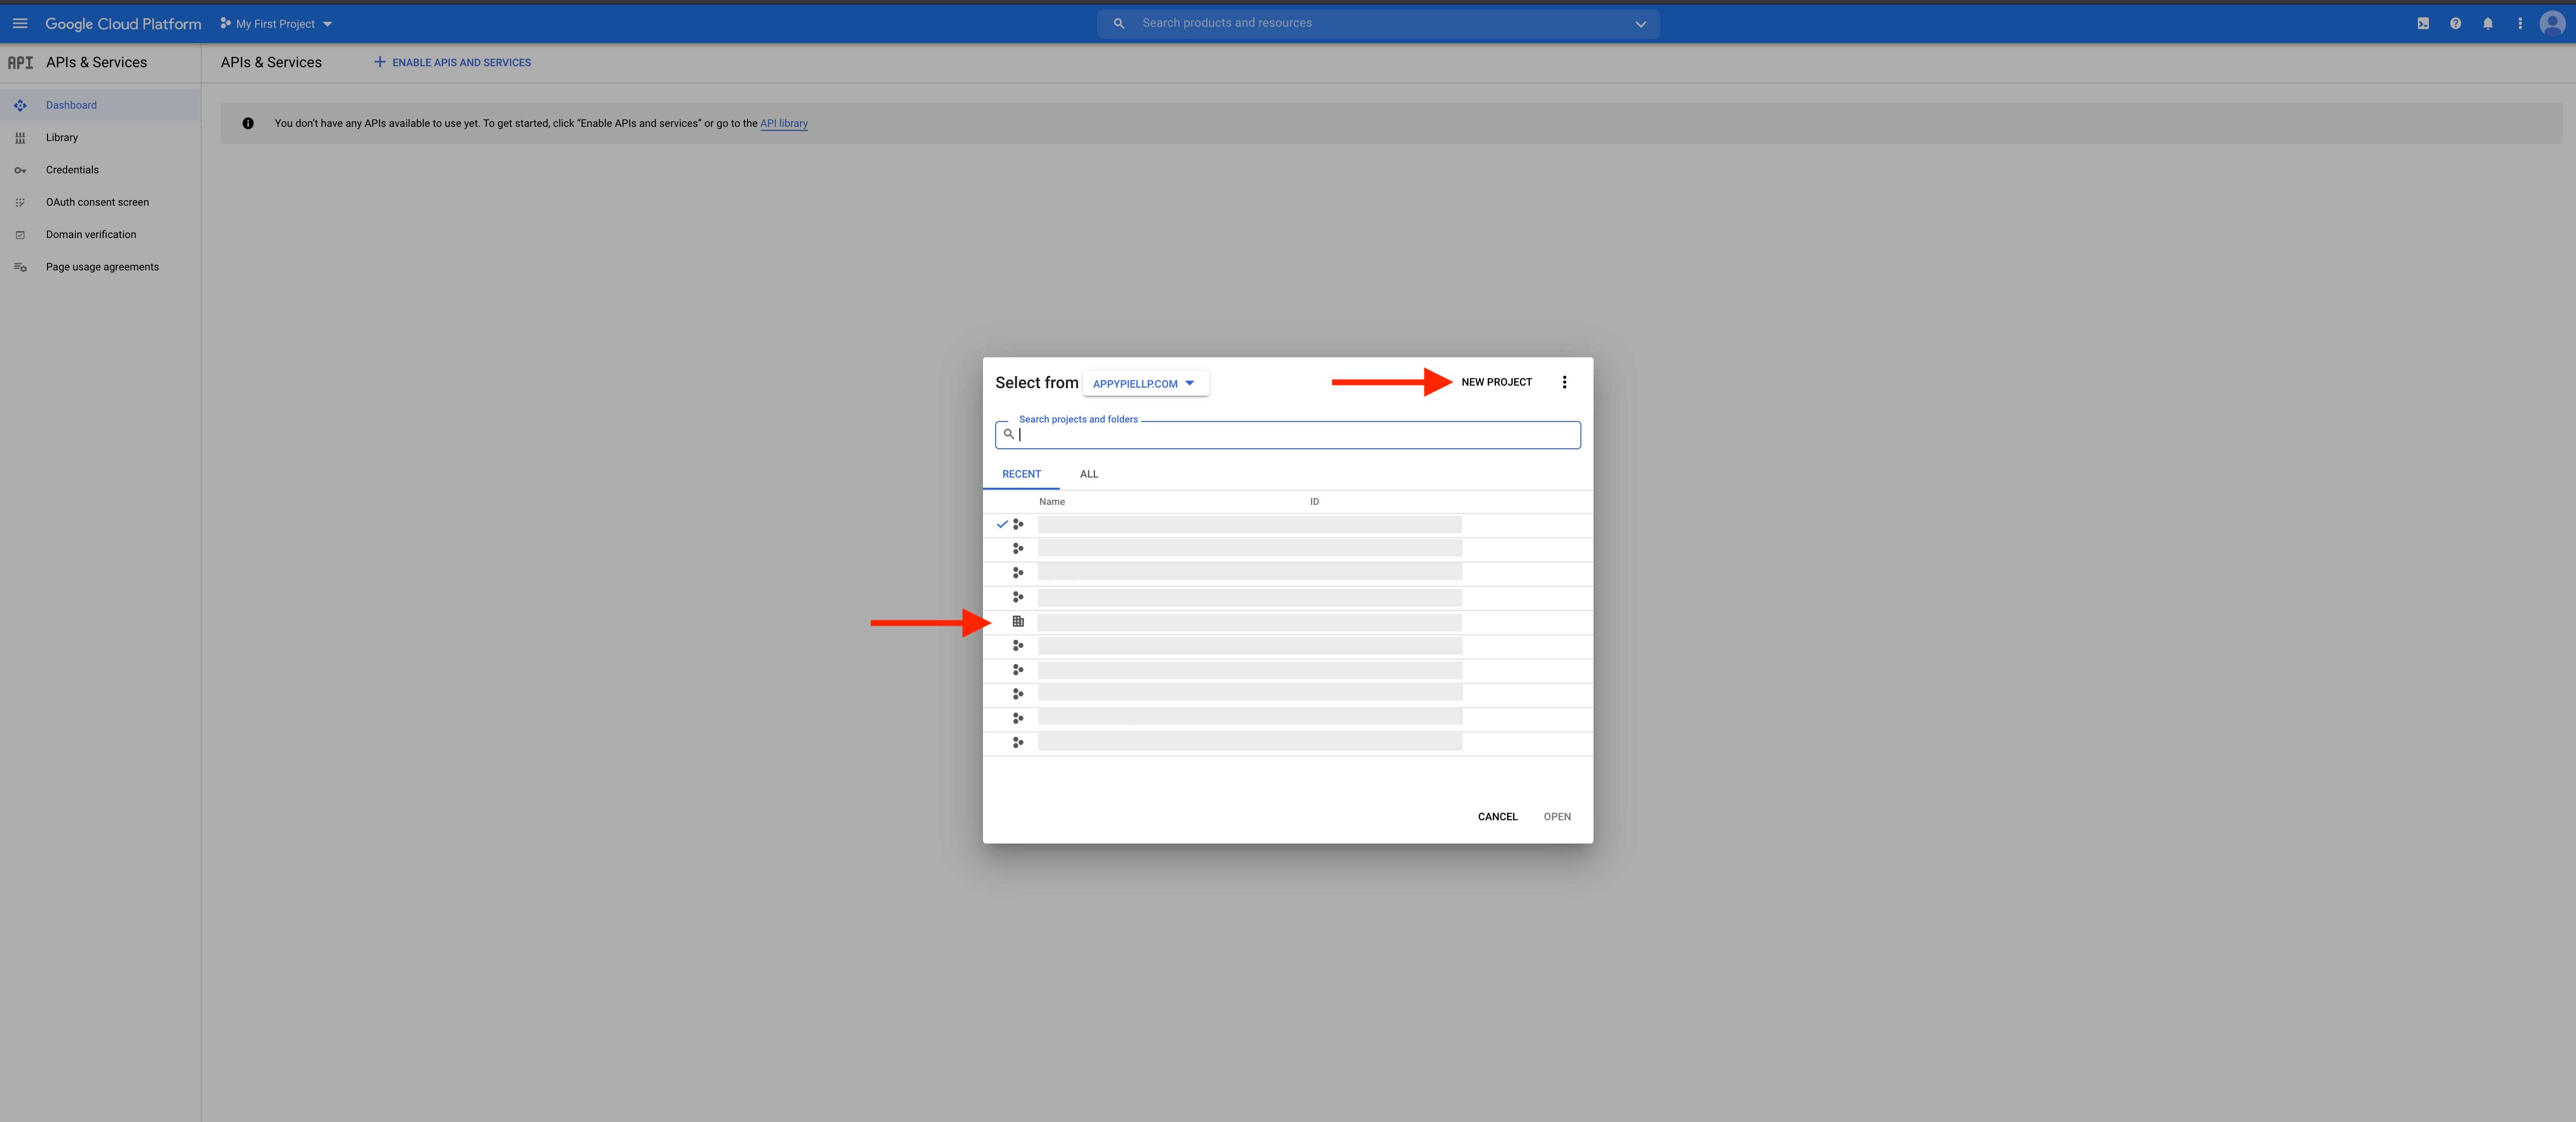
Step 4: Click on Credentials.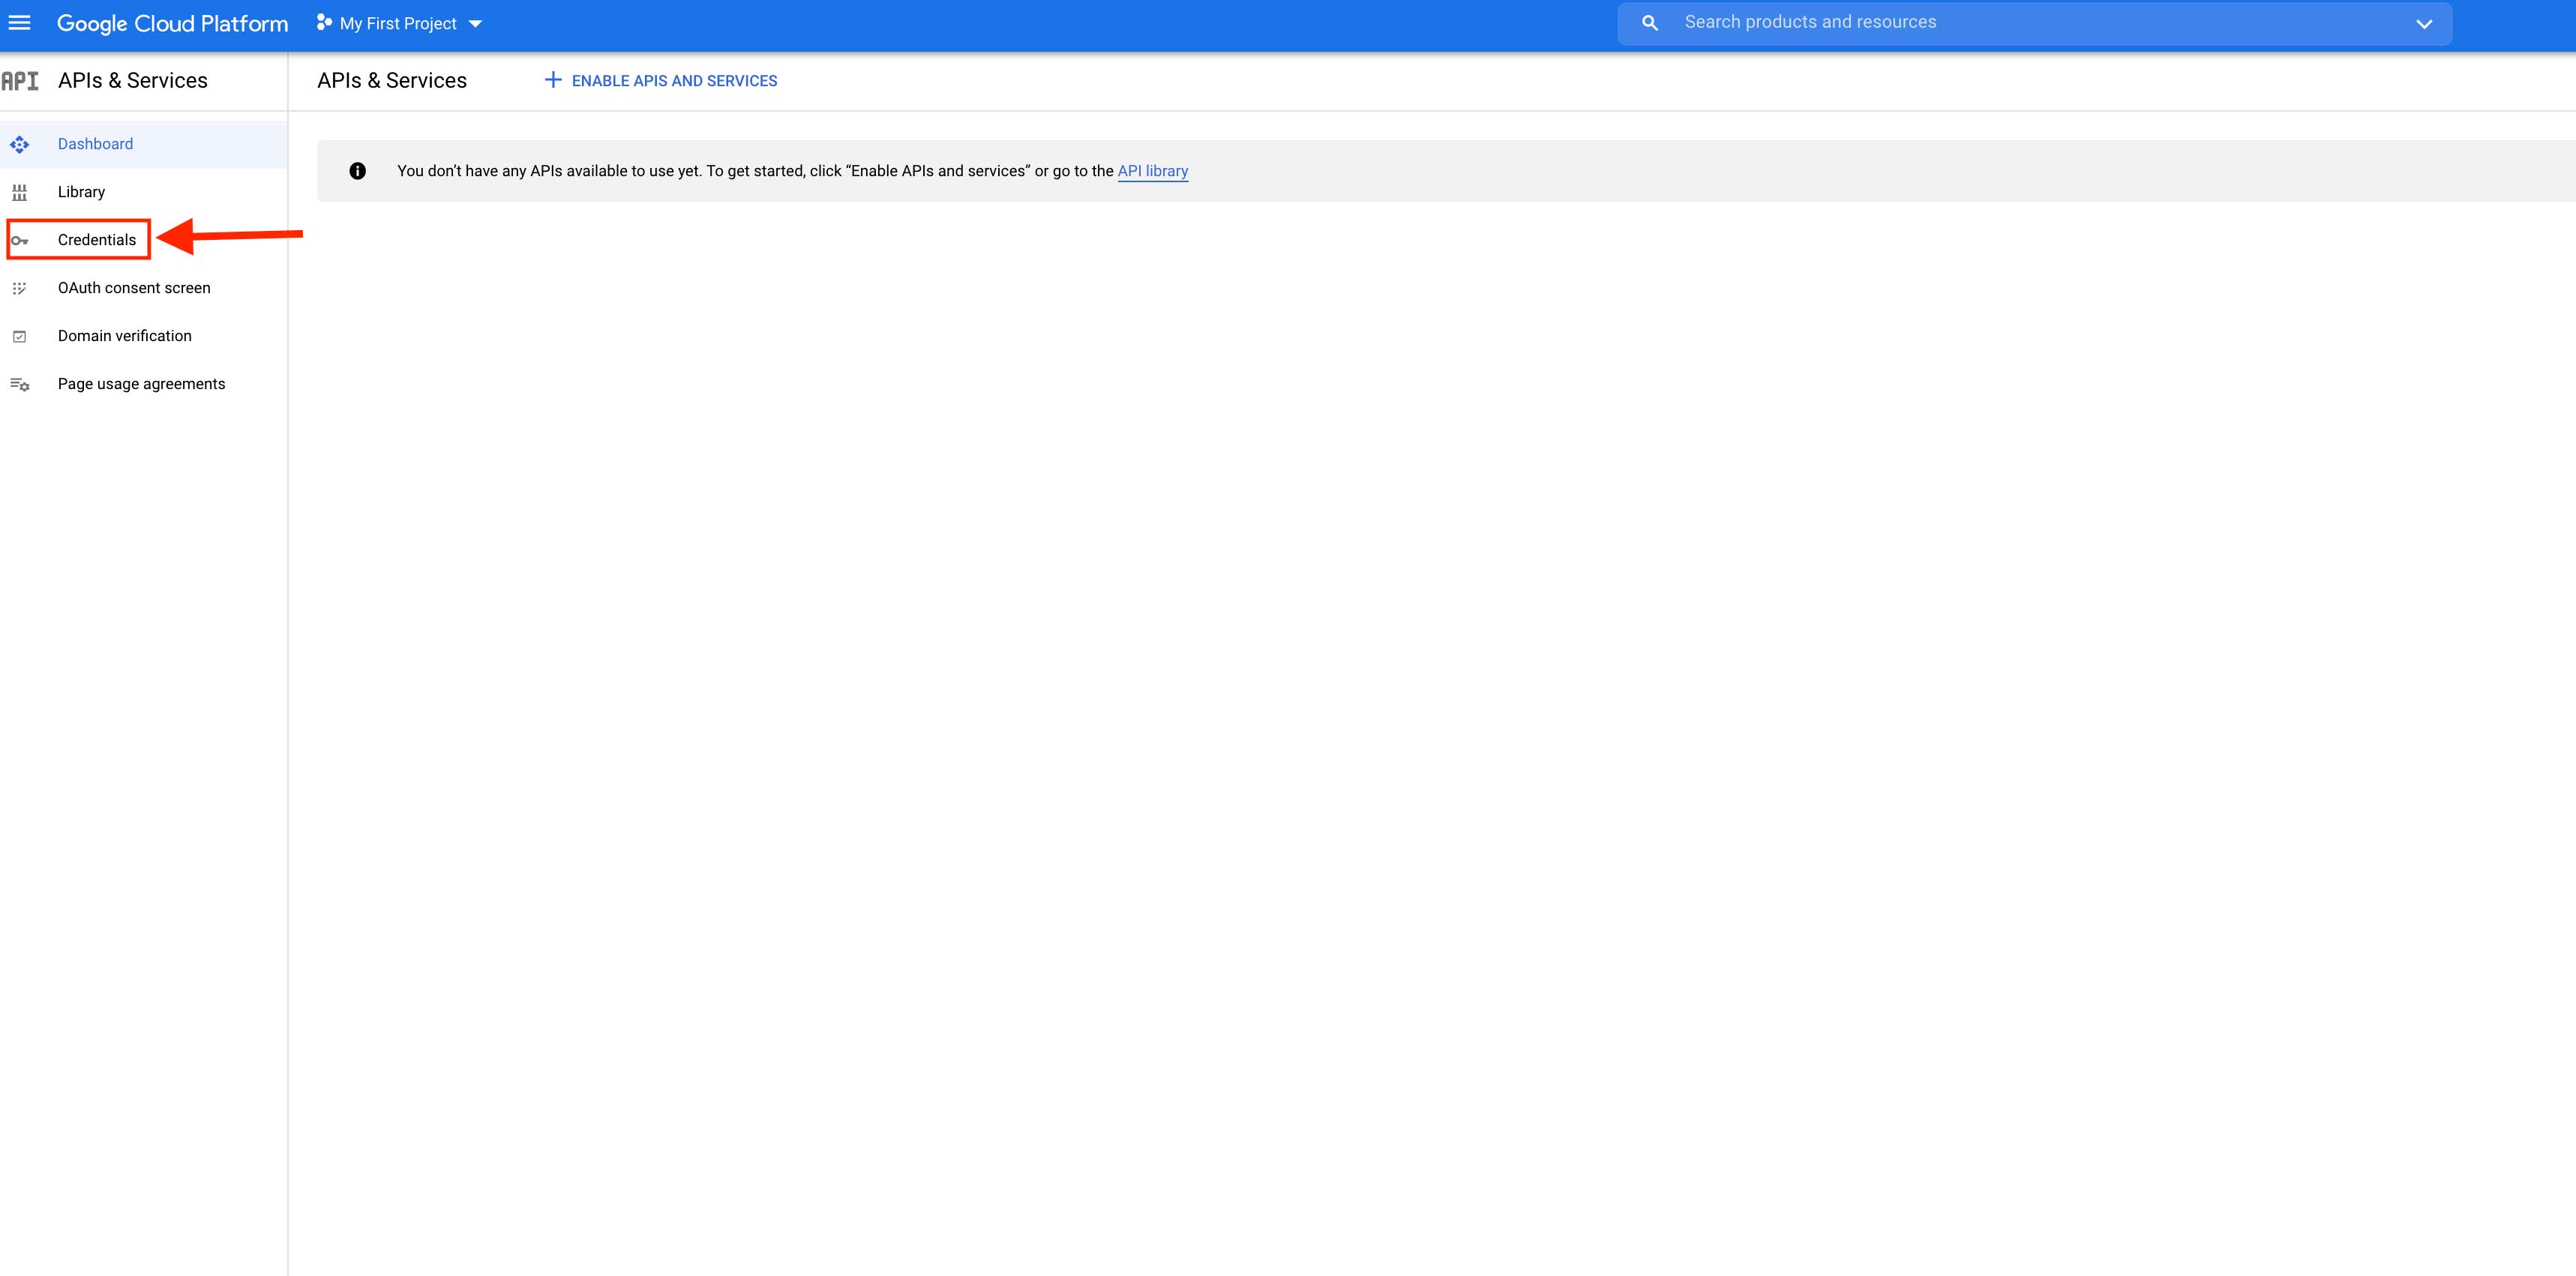
Step 5: On the credentials page, click on Create Credentials.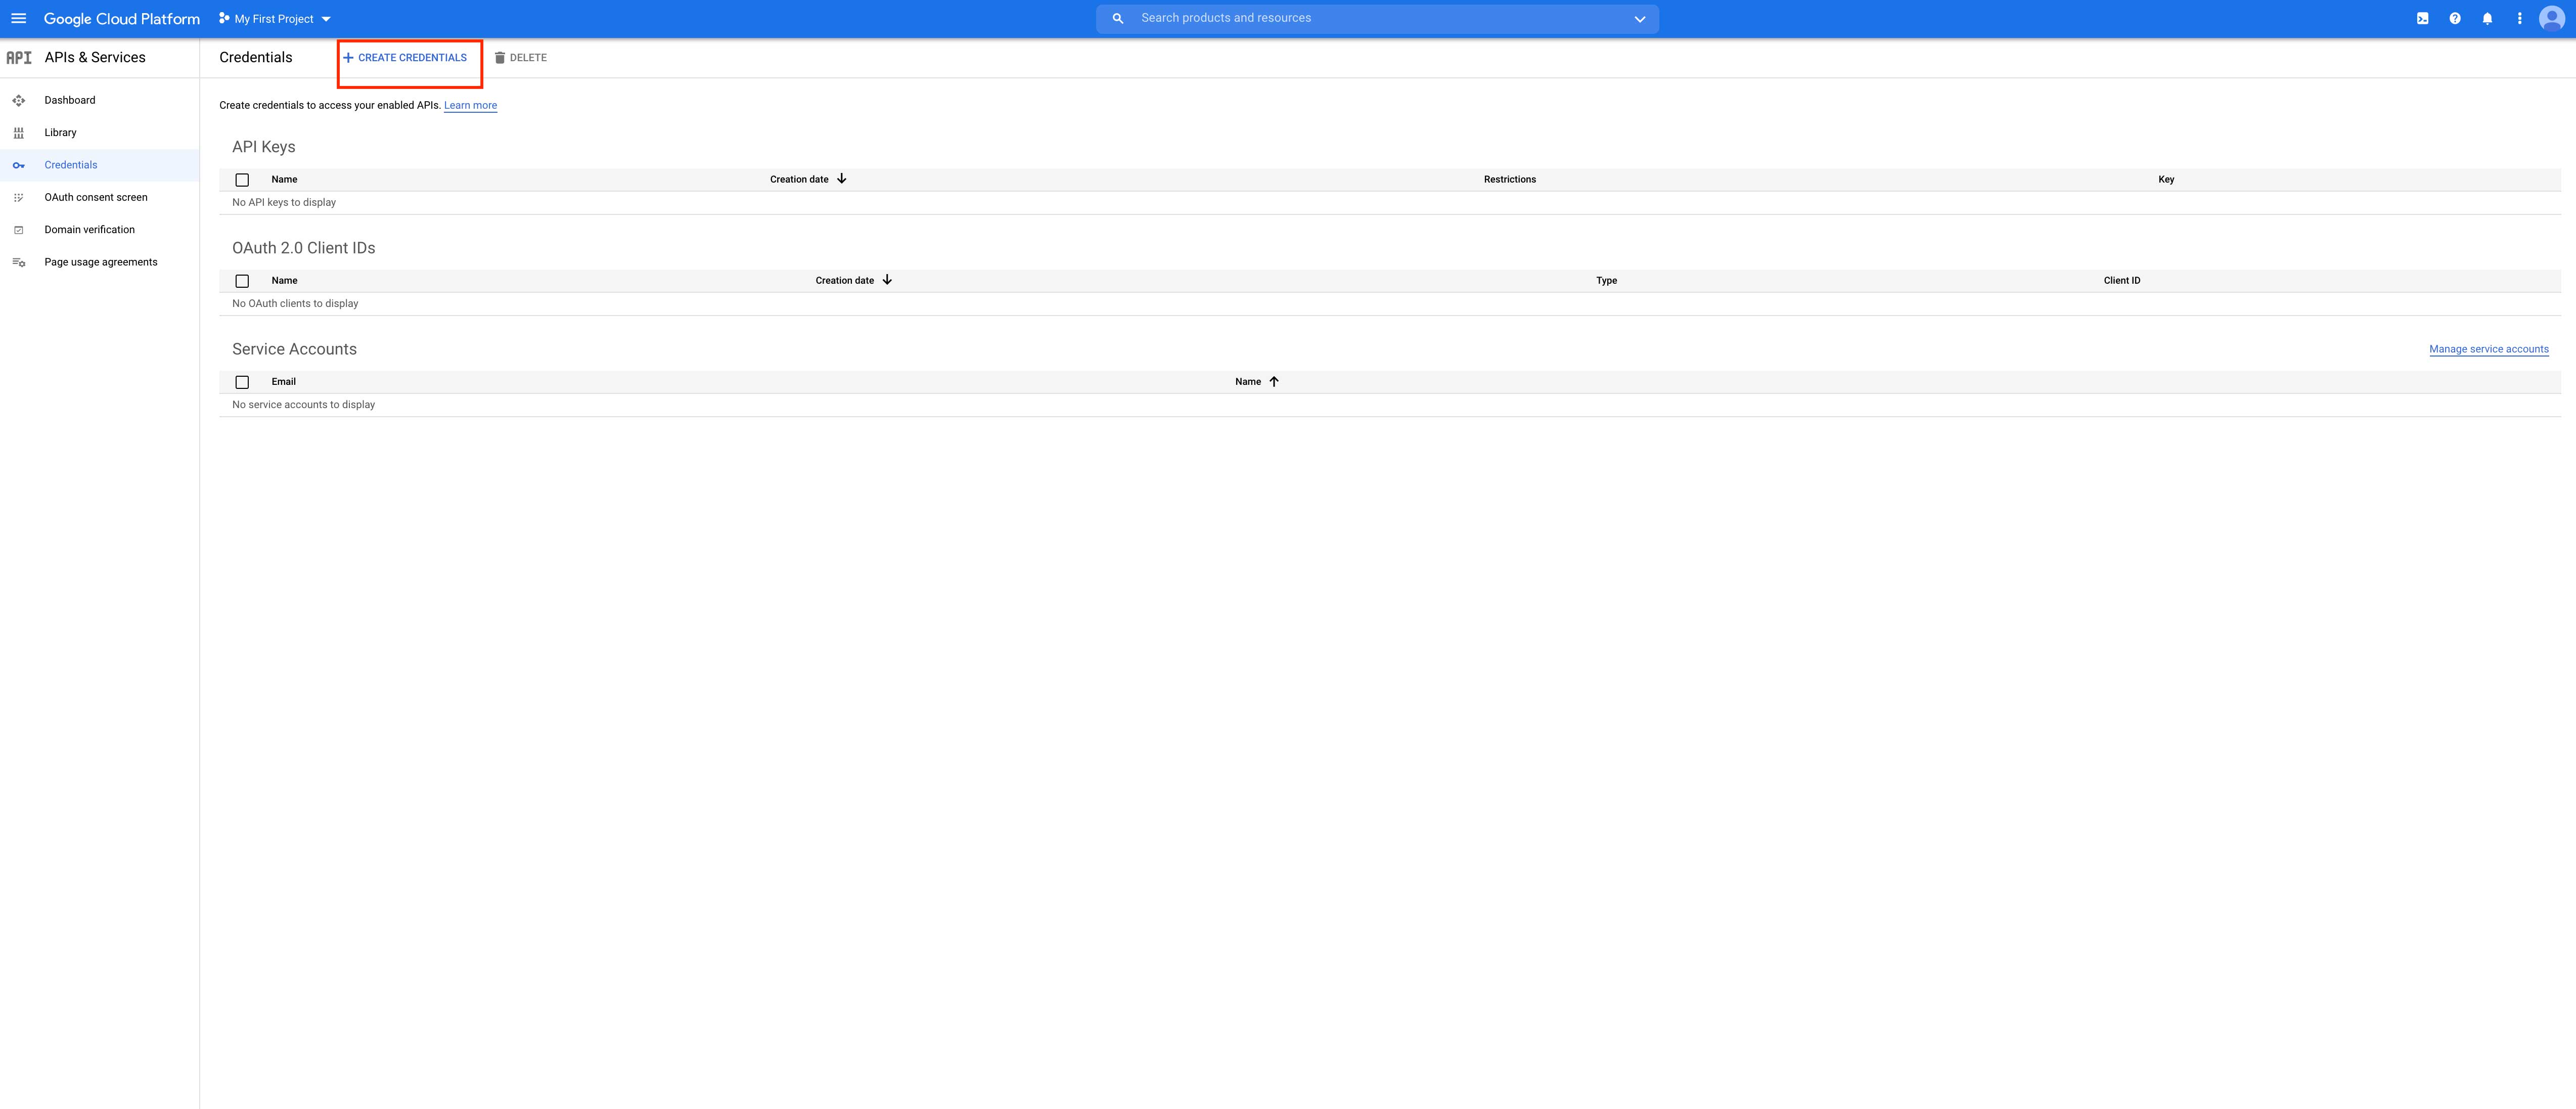
Step 6: Click on OAuth client ID.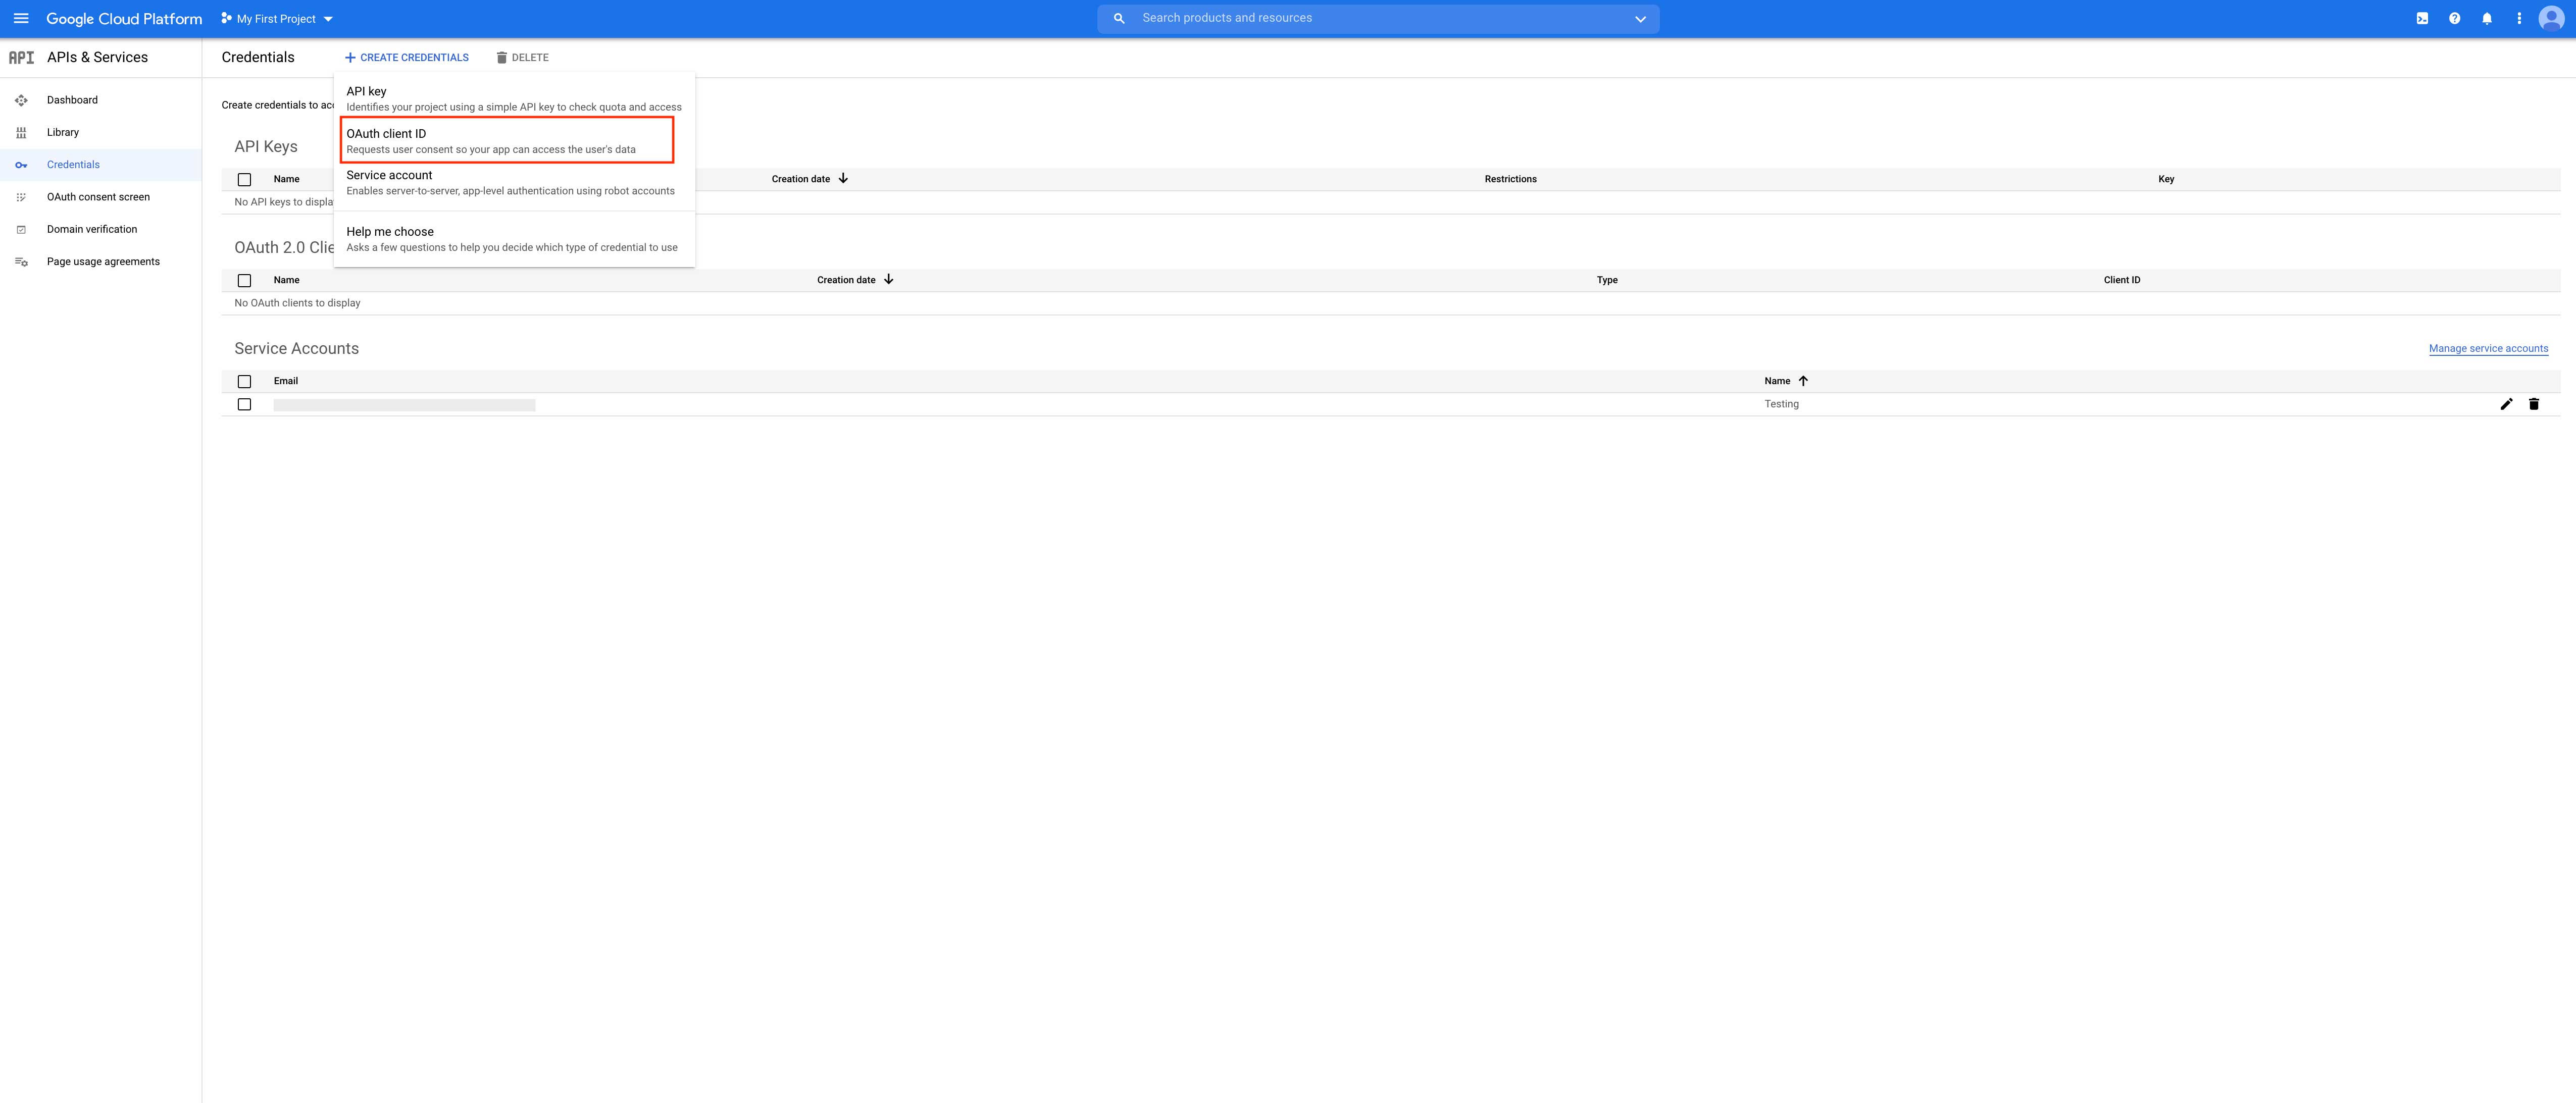
Step 7: Click on Configure Consent Screen.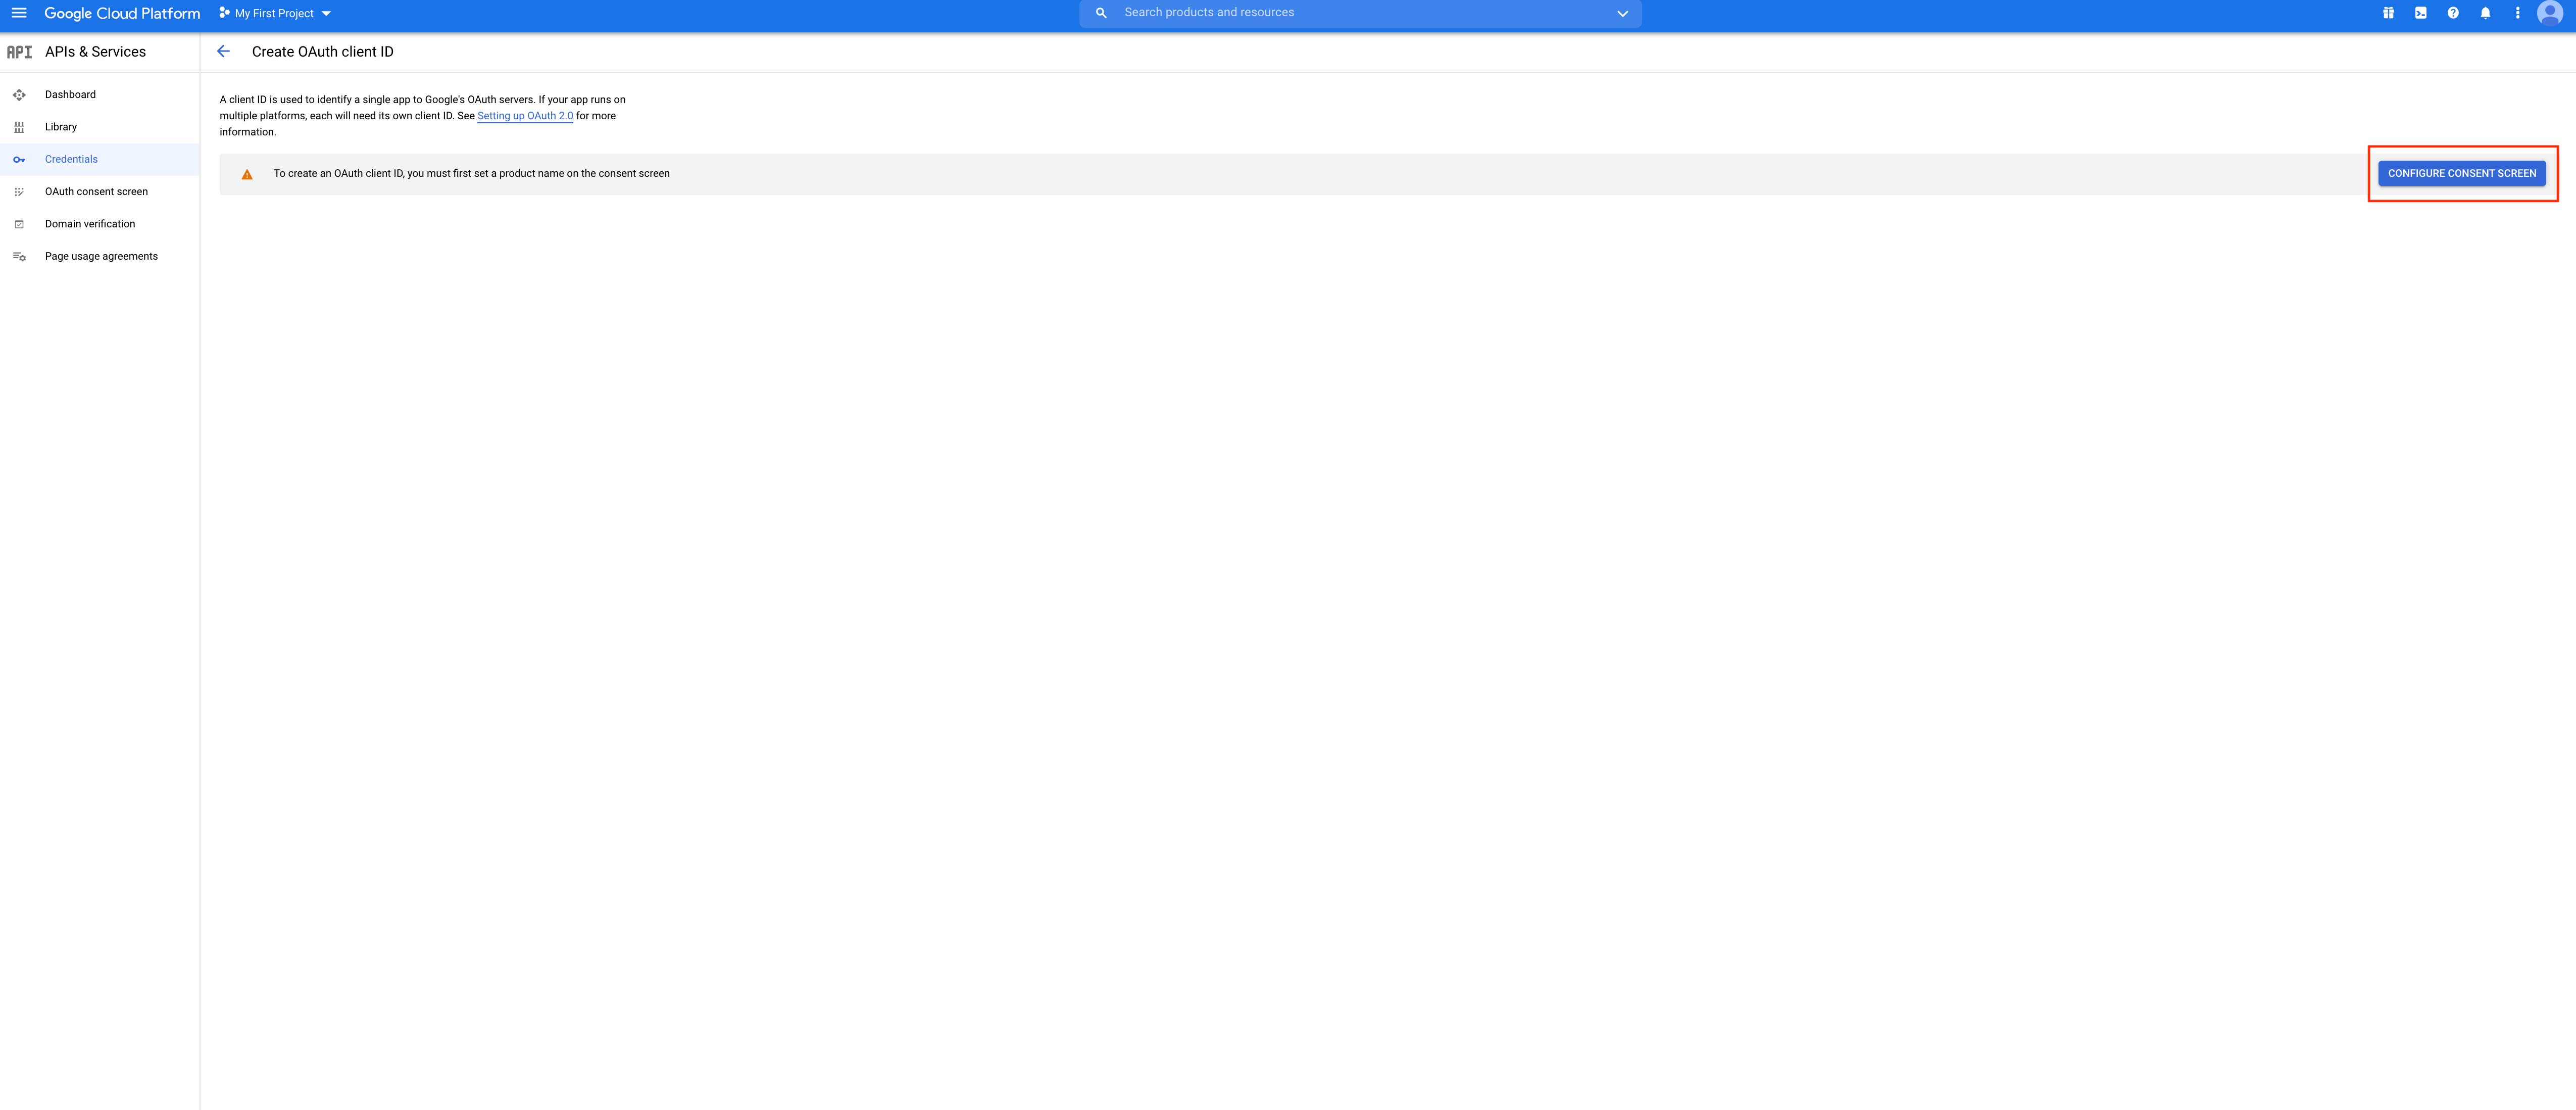
Step 8: Select user type Internal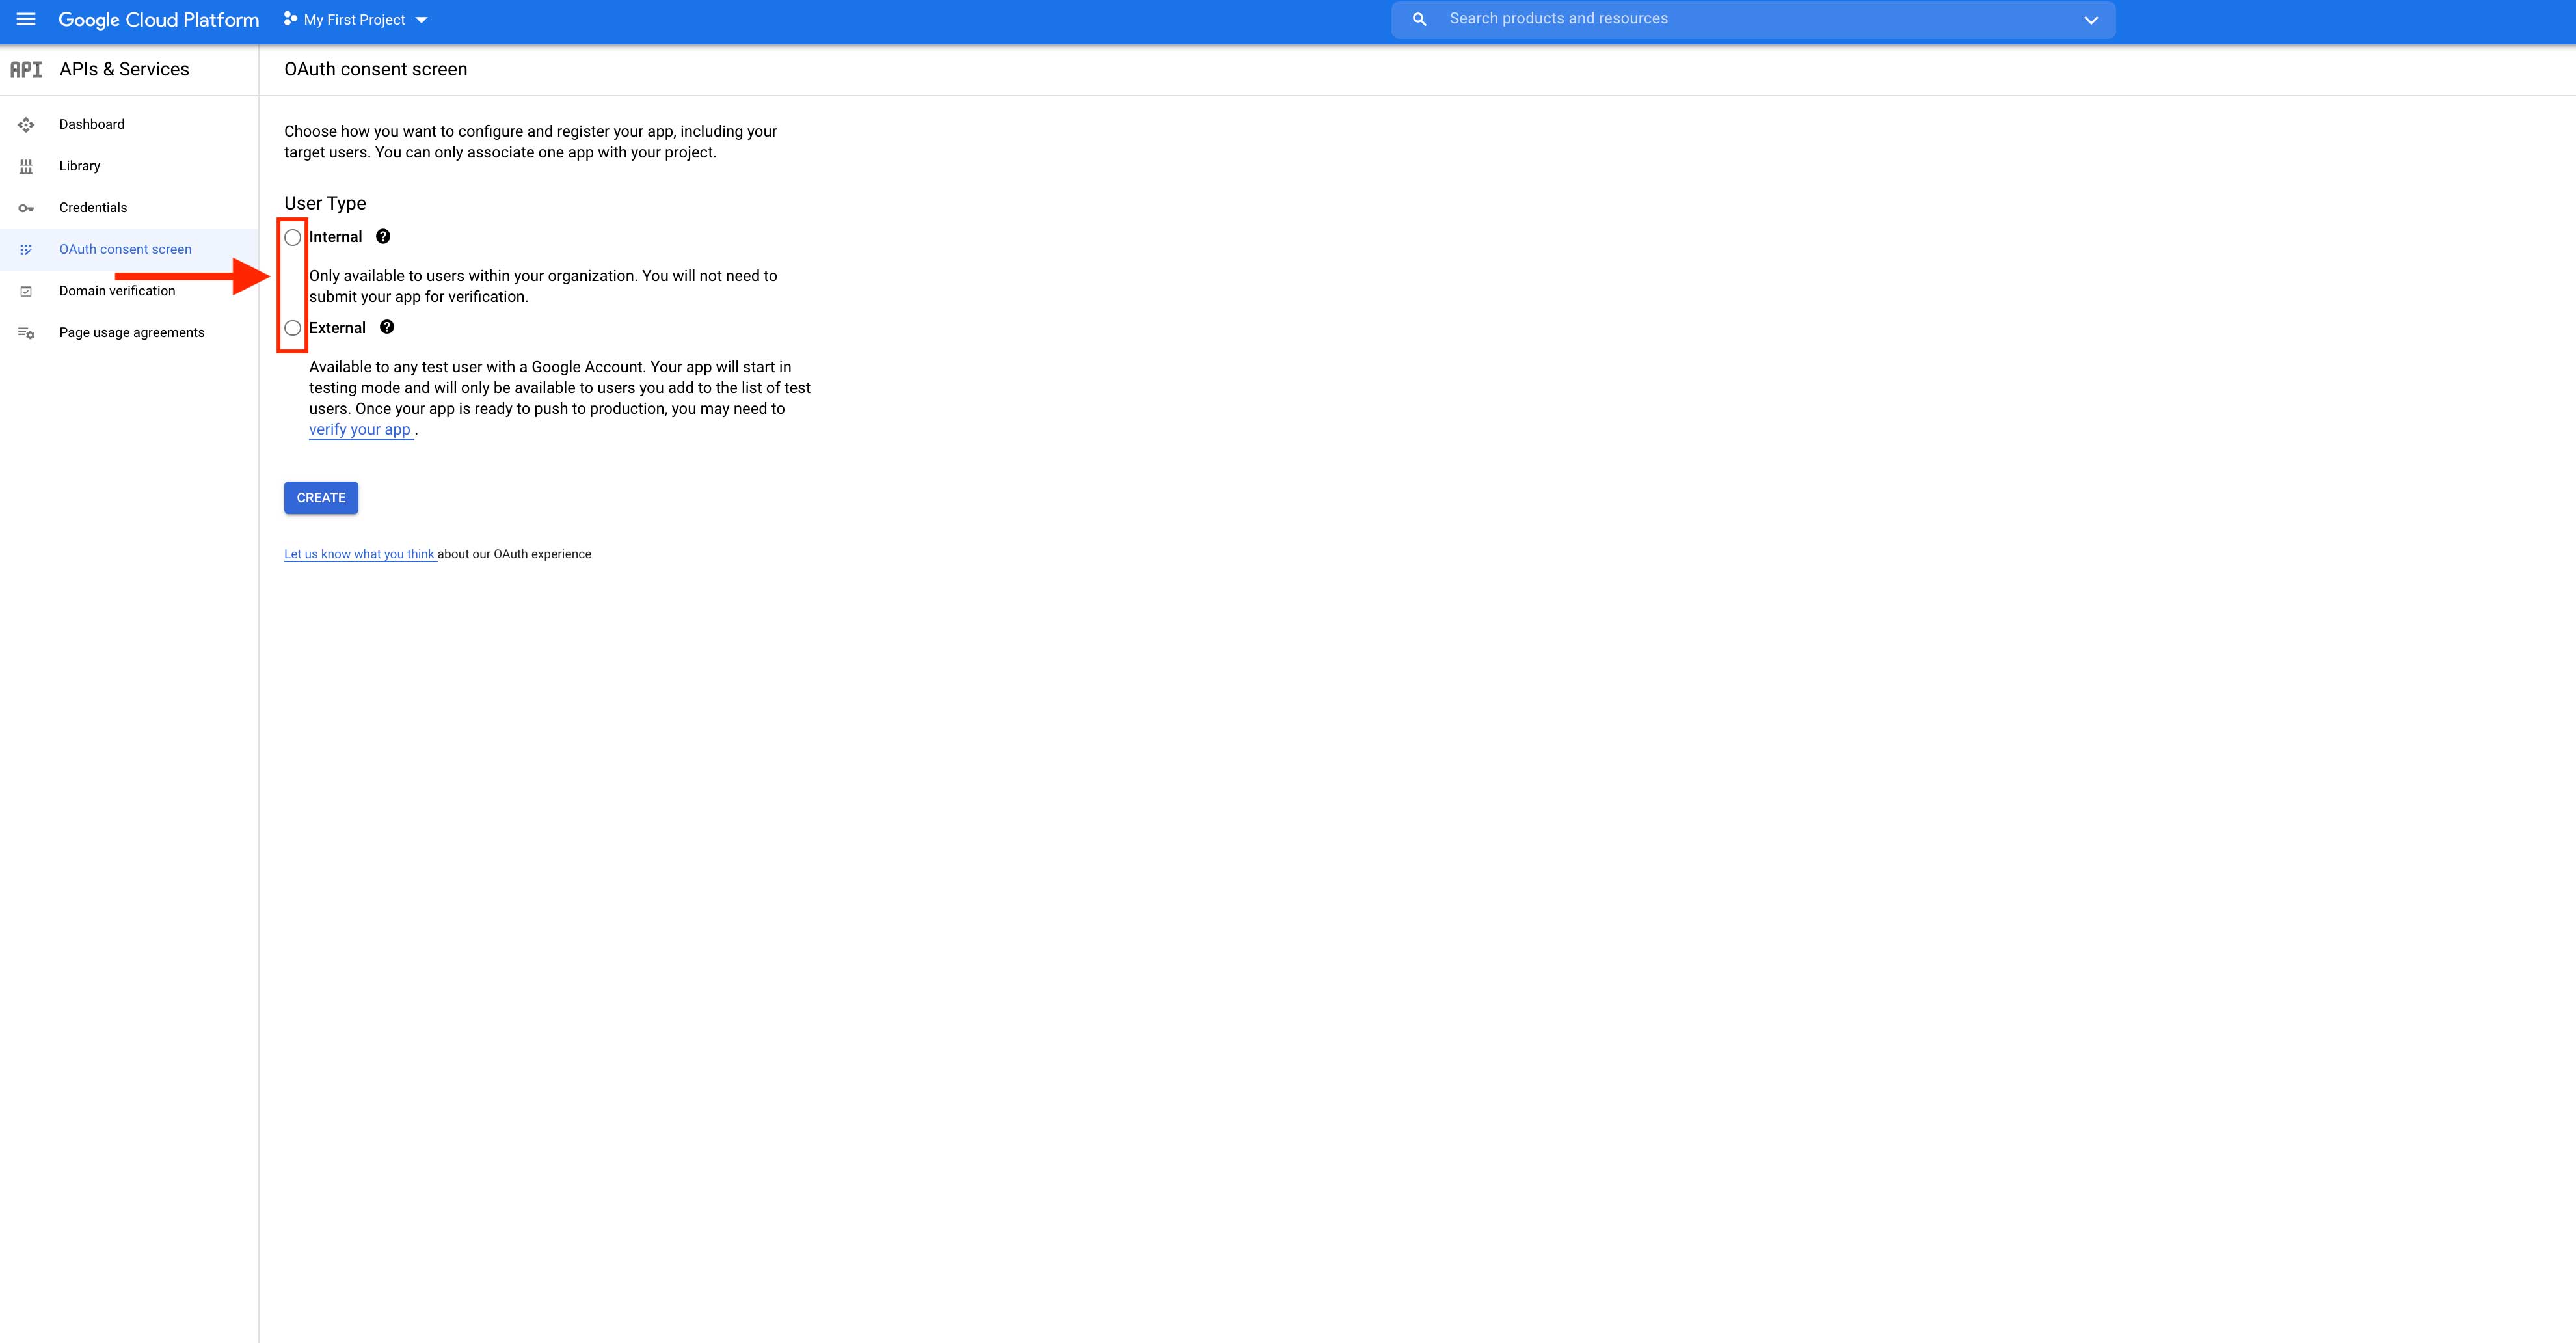
Step 9: After selecting the user type, click on Create.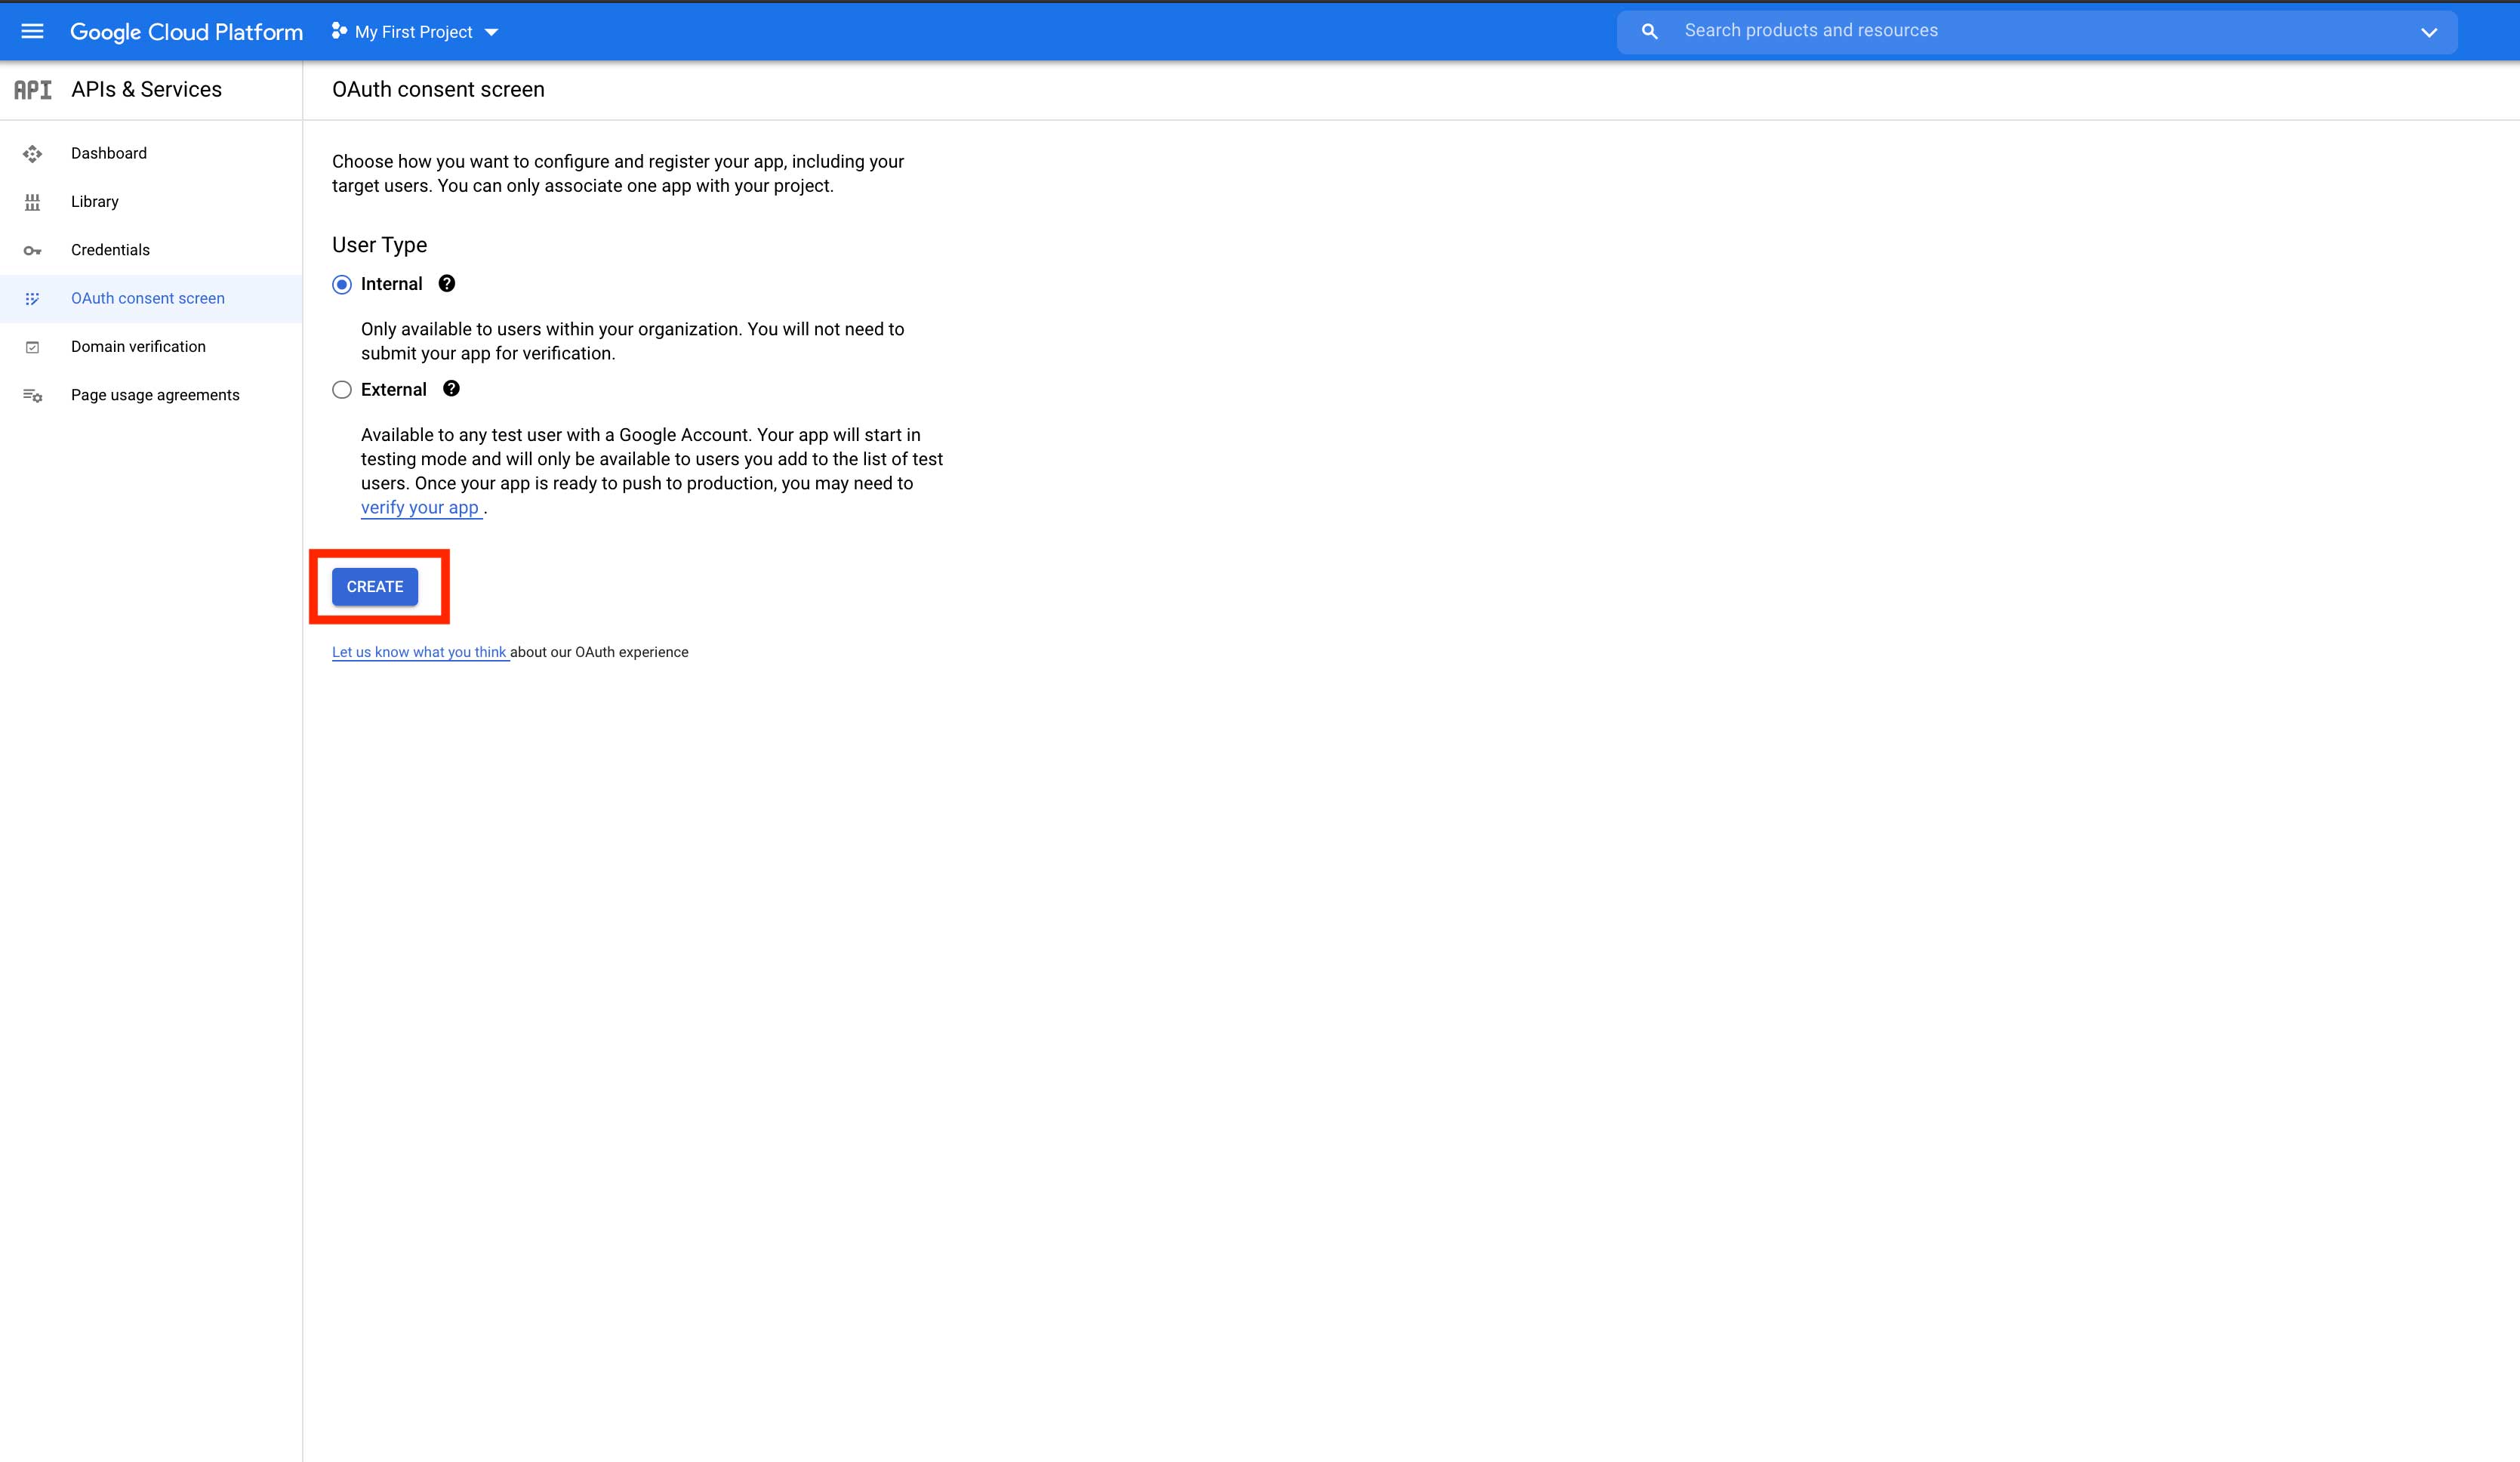
Step 10: Add required app information and developer contact information, then click on Save and Continue.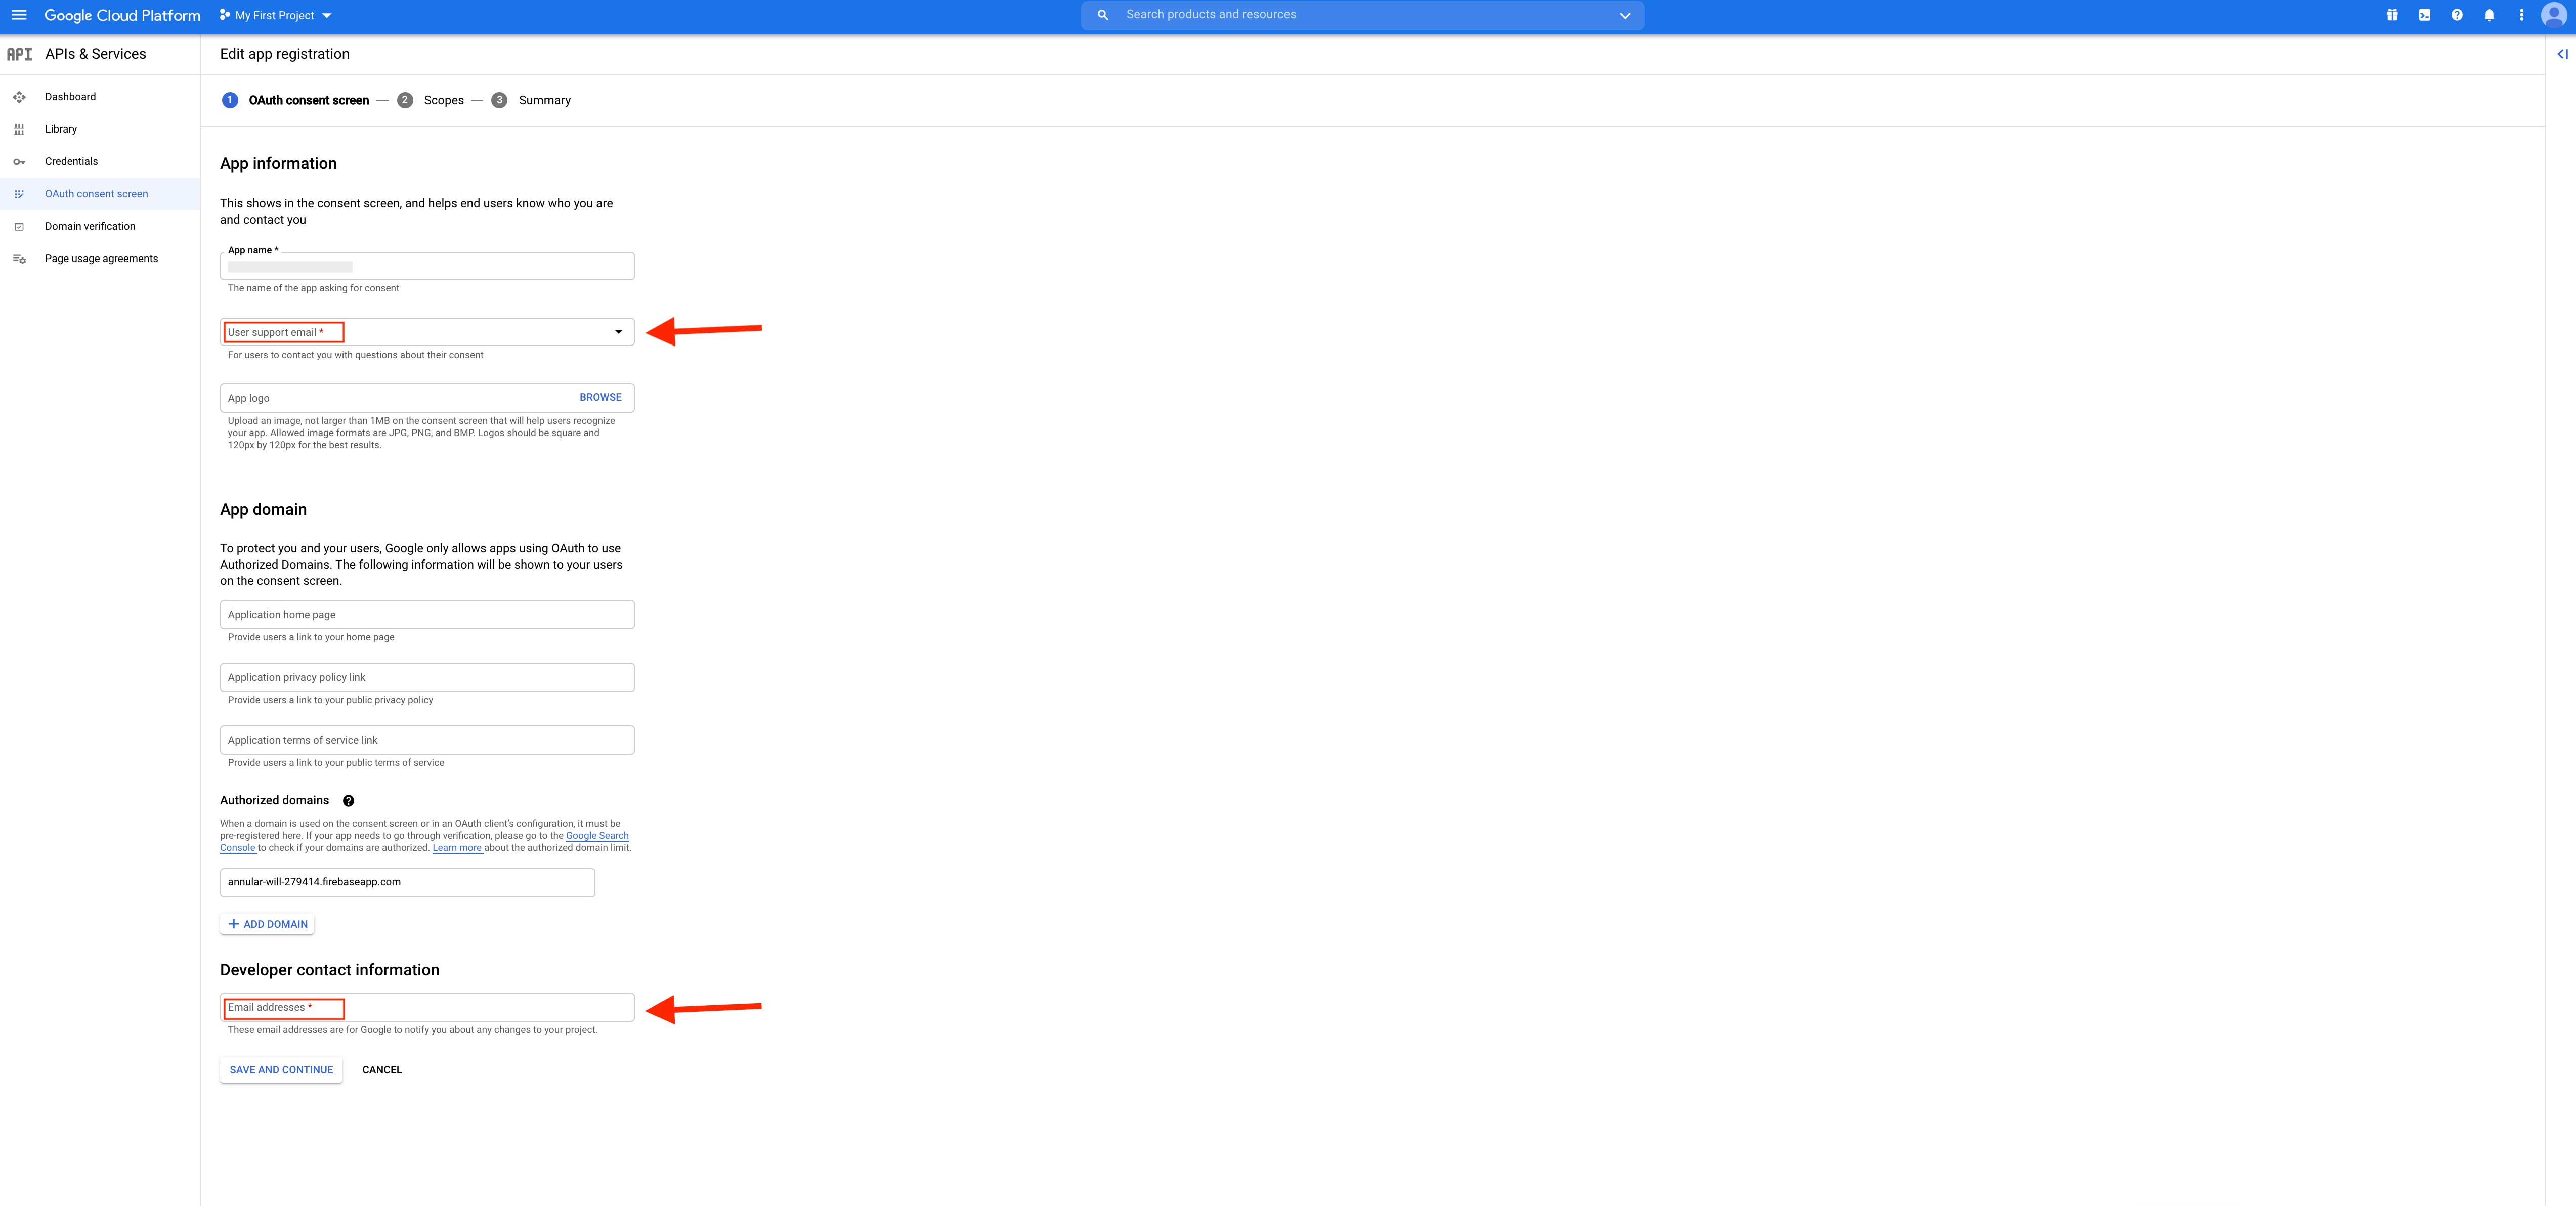
Step 11: On the scopes screen, click on Save and Continue.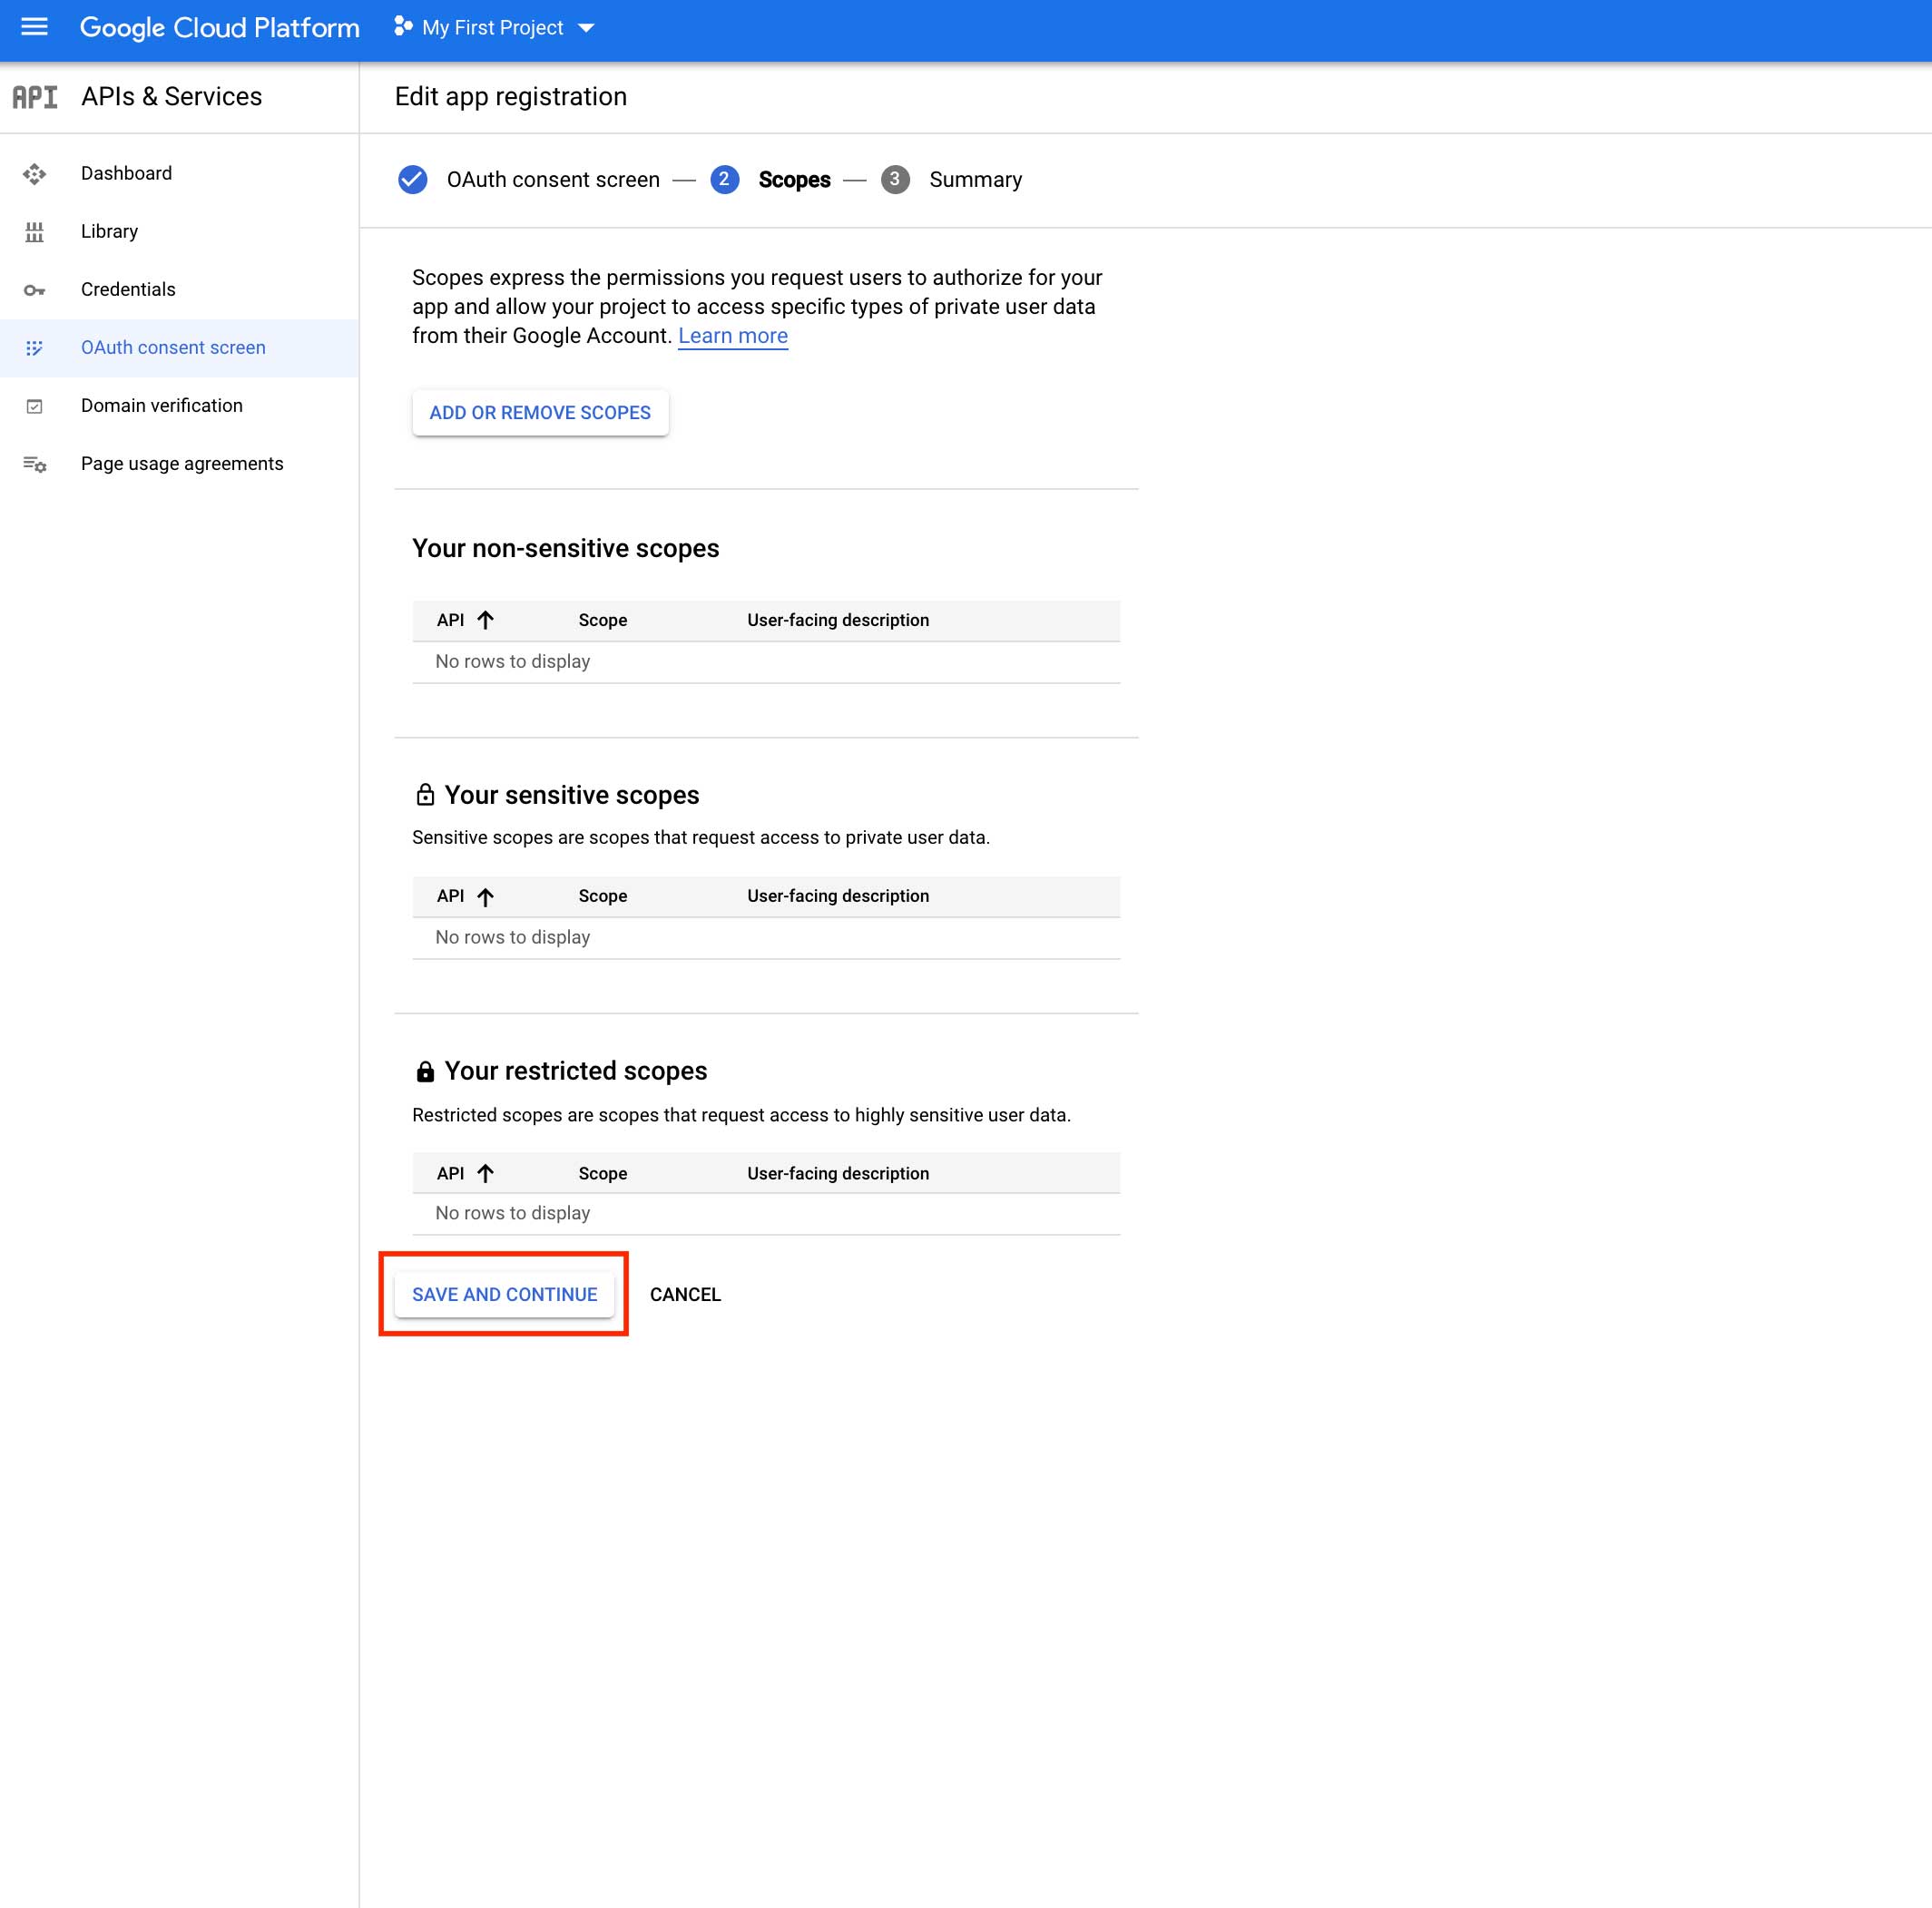
Step 12: Check the OAuth consent screen and scopes summary, then click on Credentials.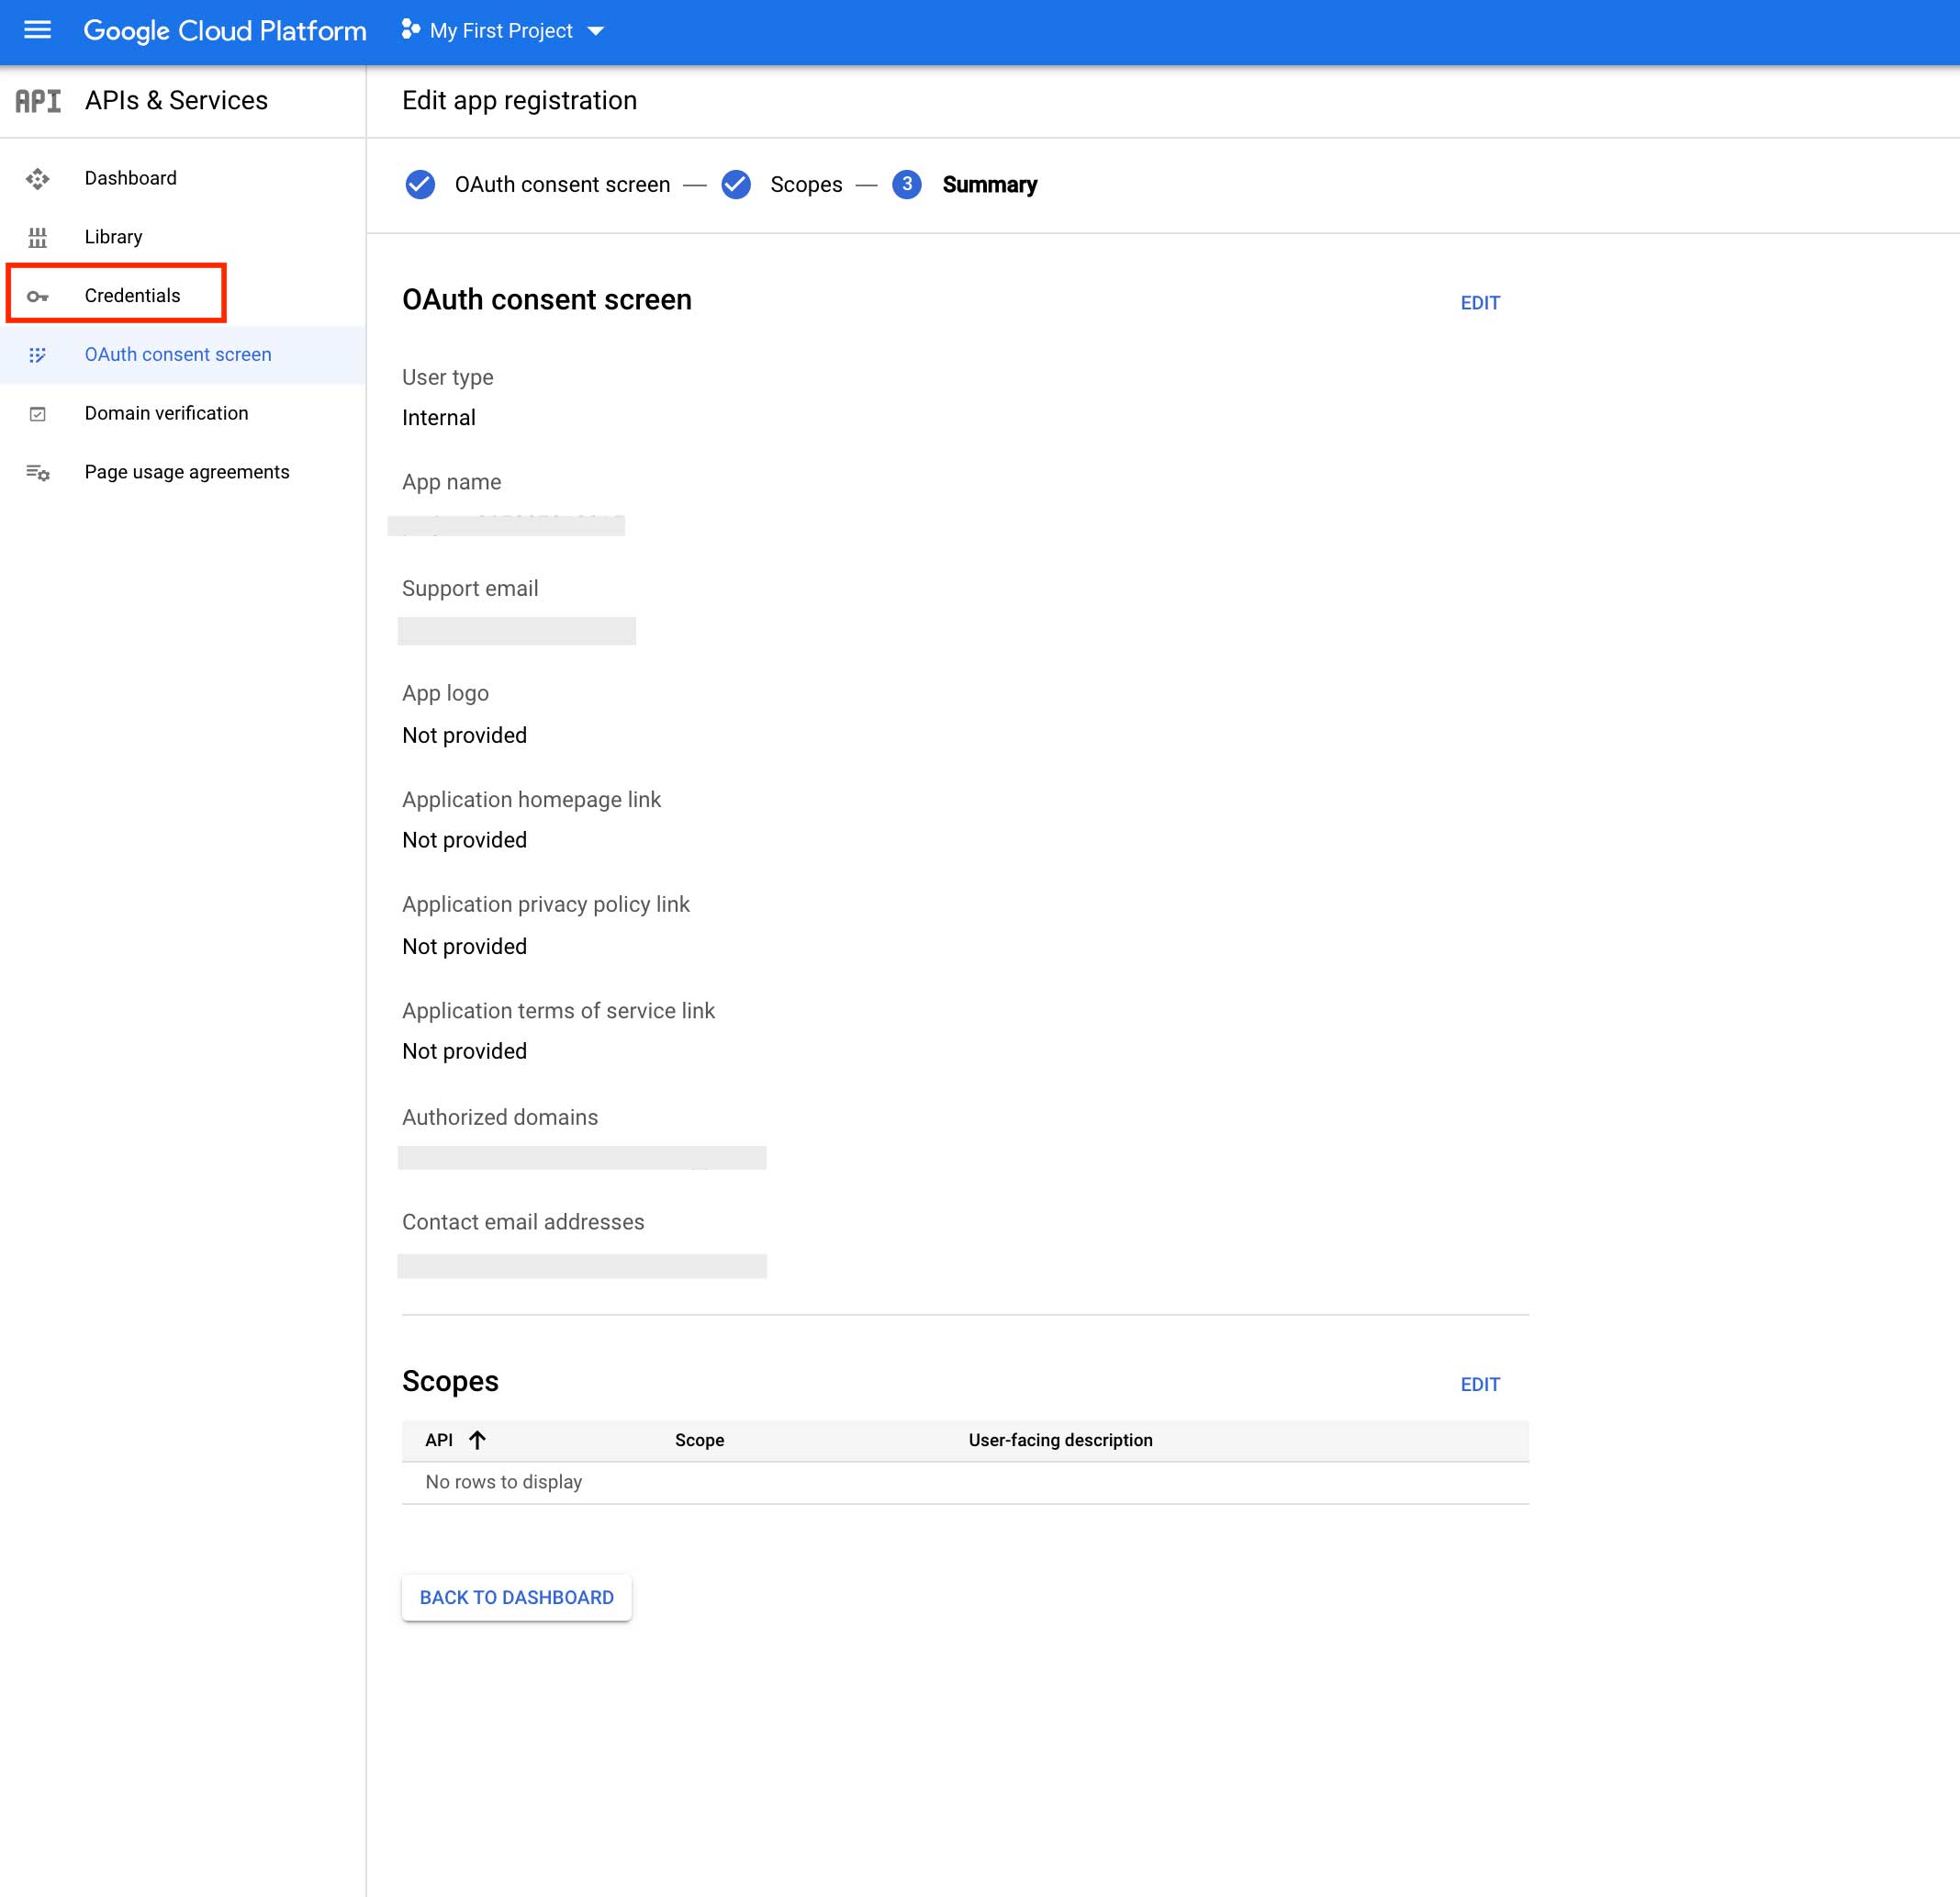
Step 13: On the credentials page, click on Create Credentials.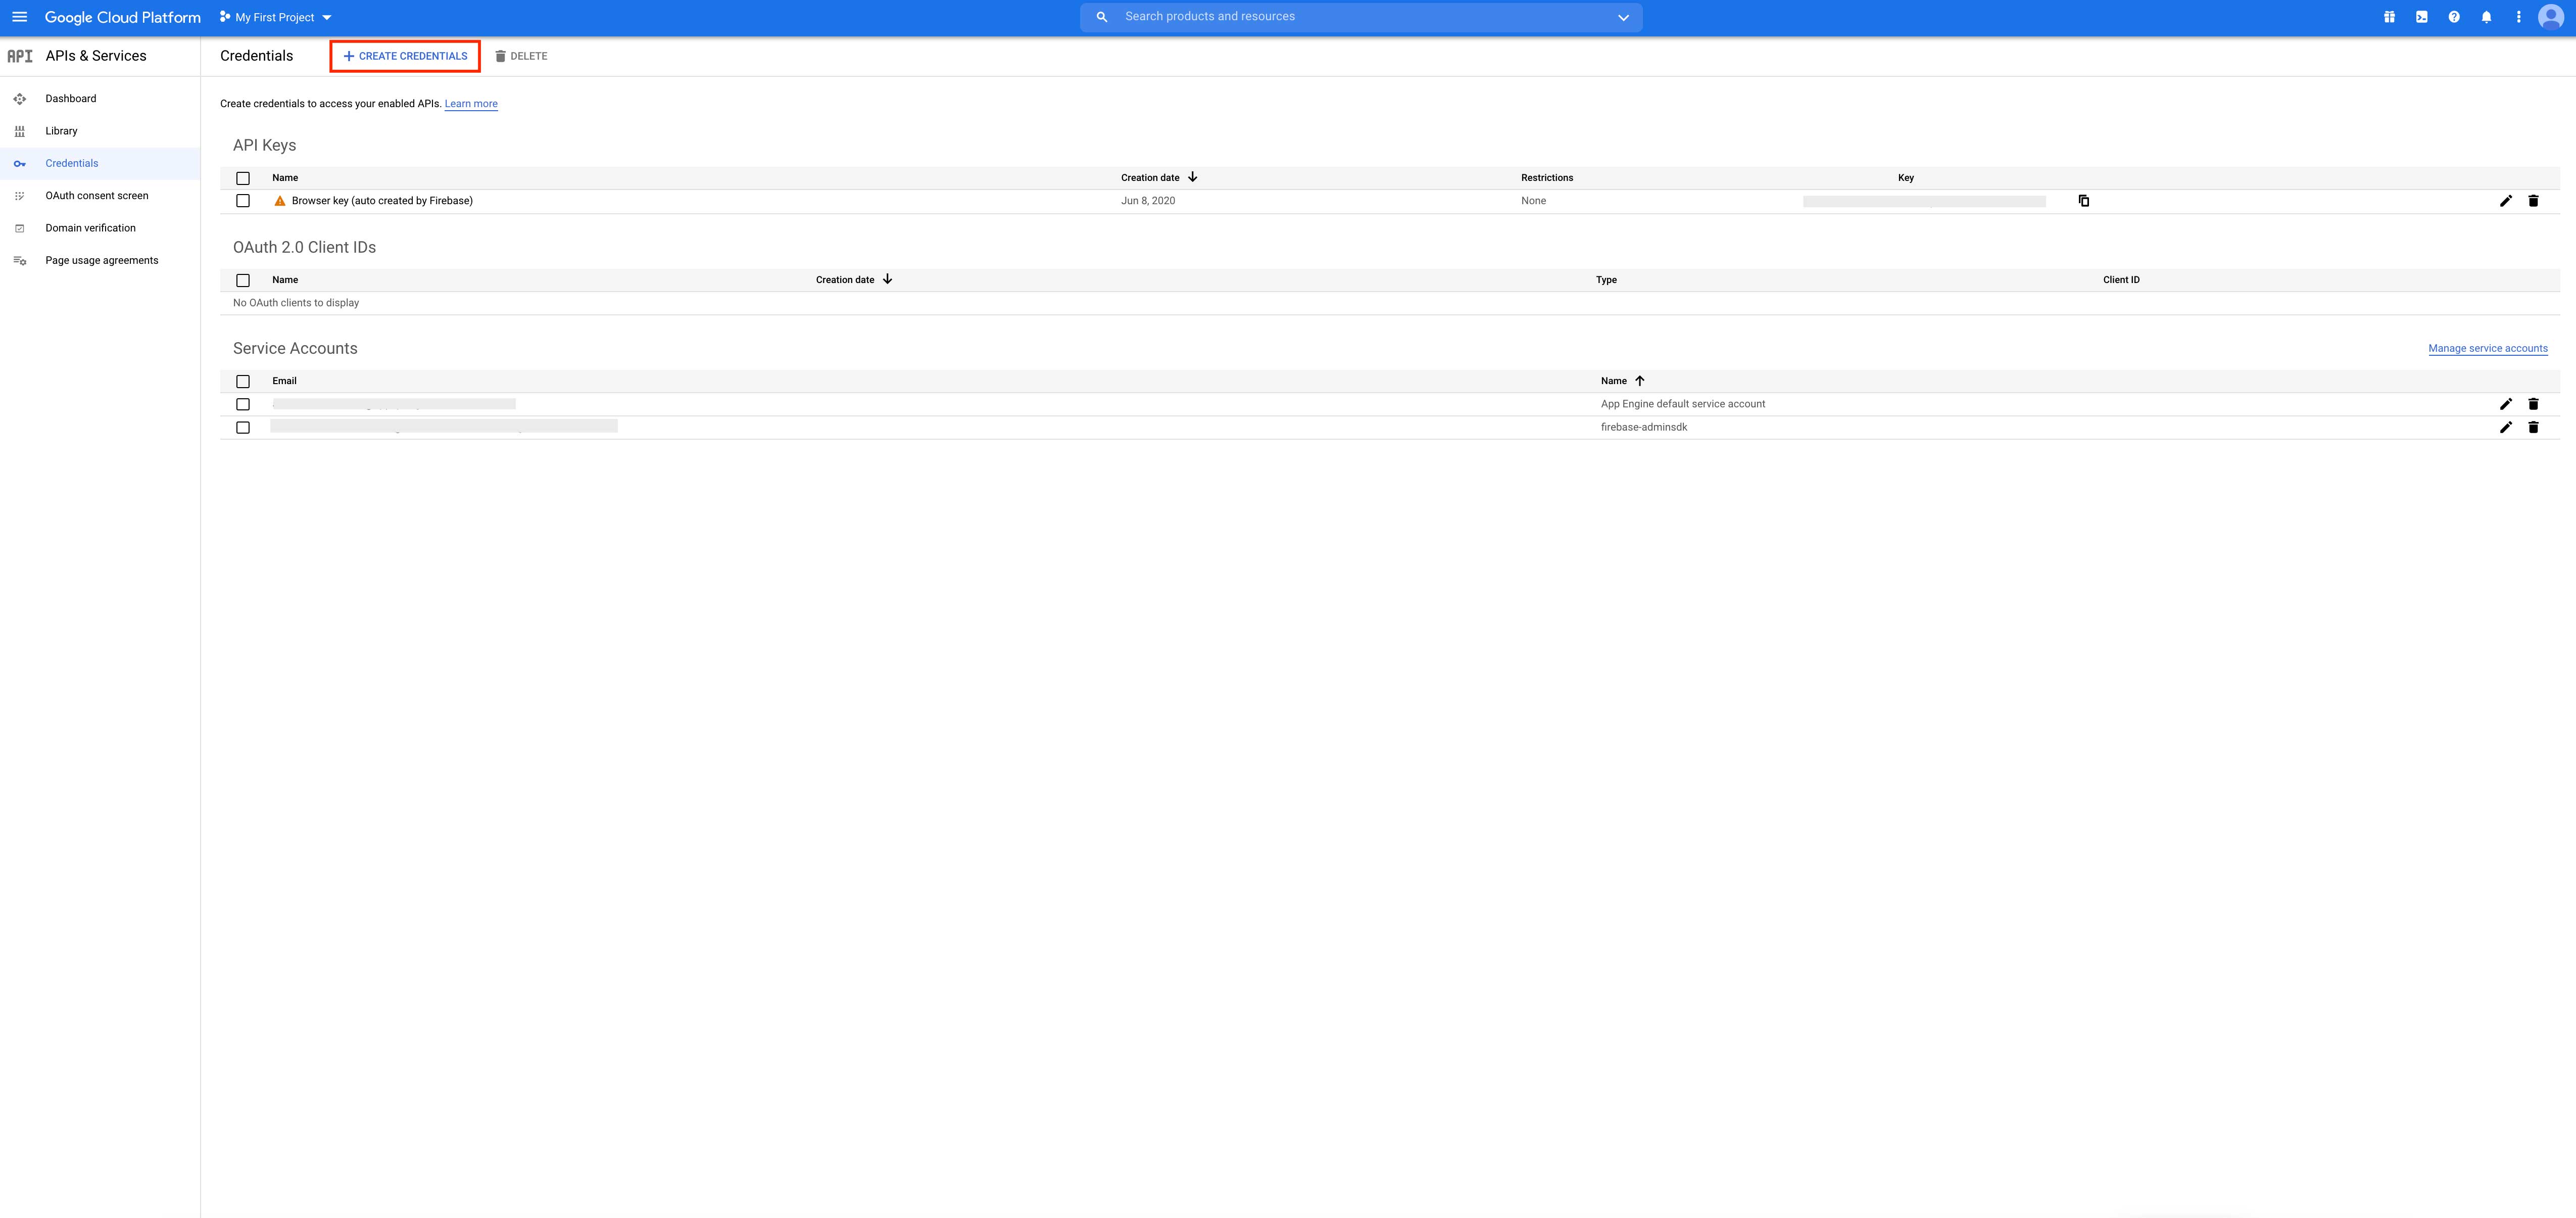
Step 14: Click on OAuth client ID.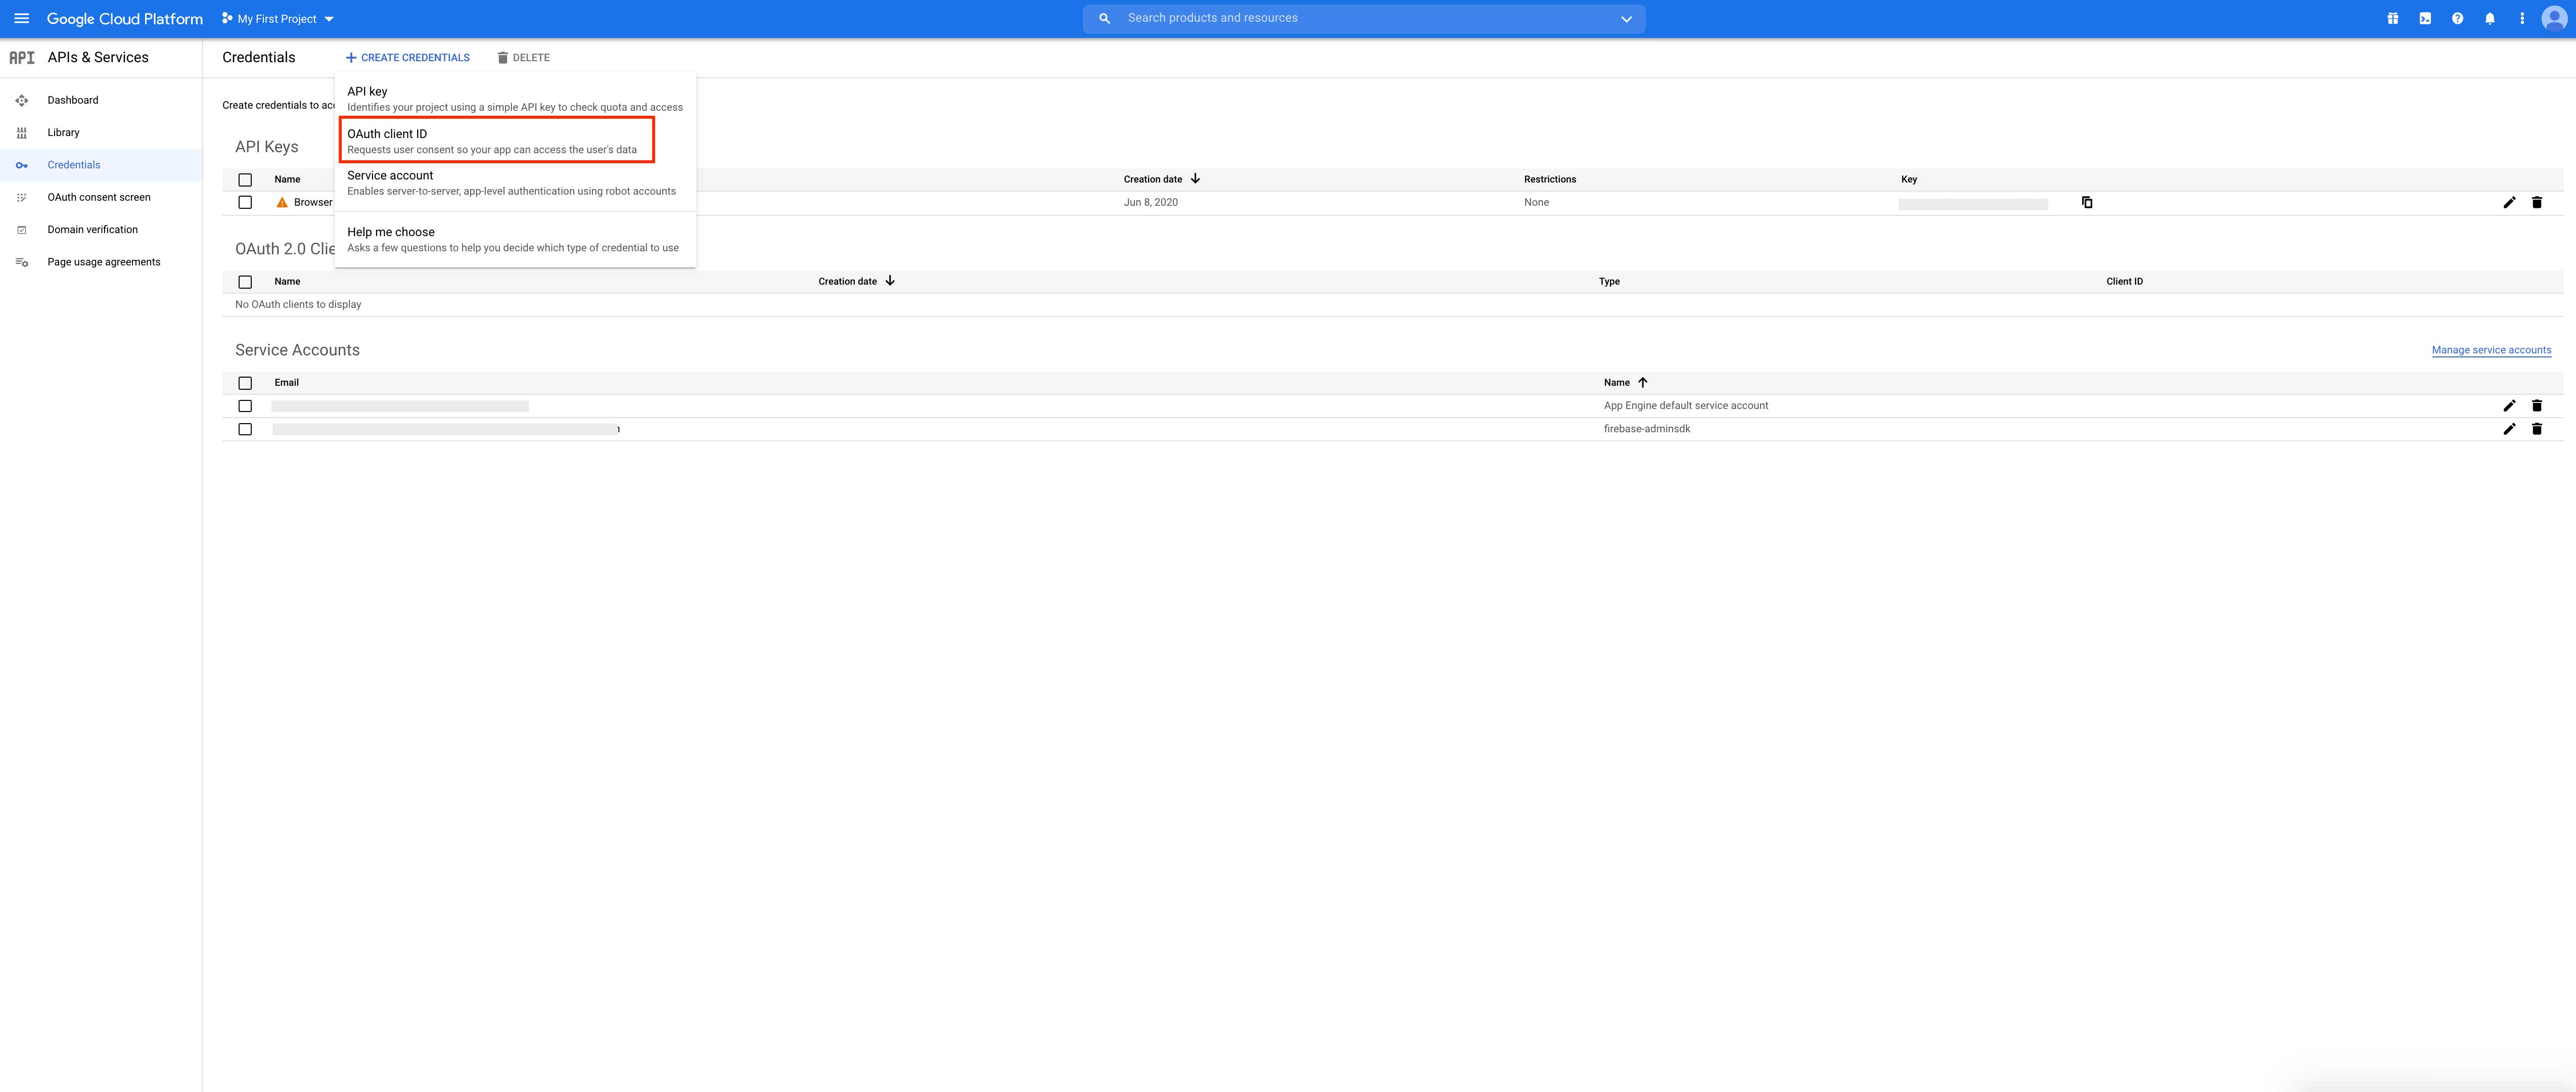
Step 15: Select the application type from the dropdown menu.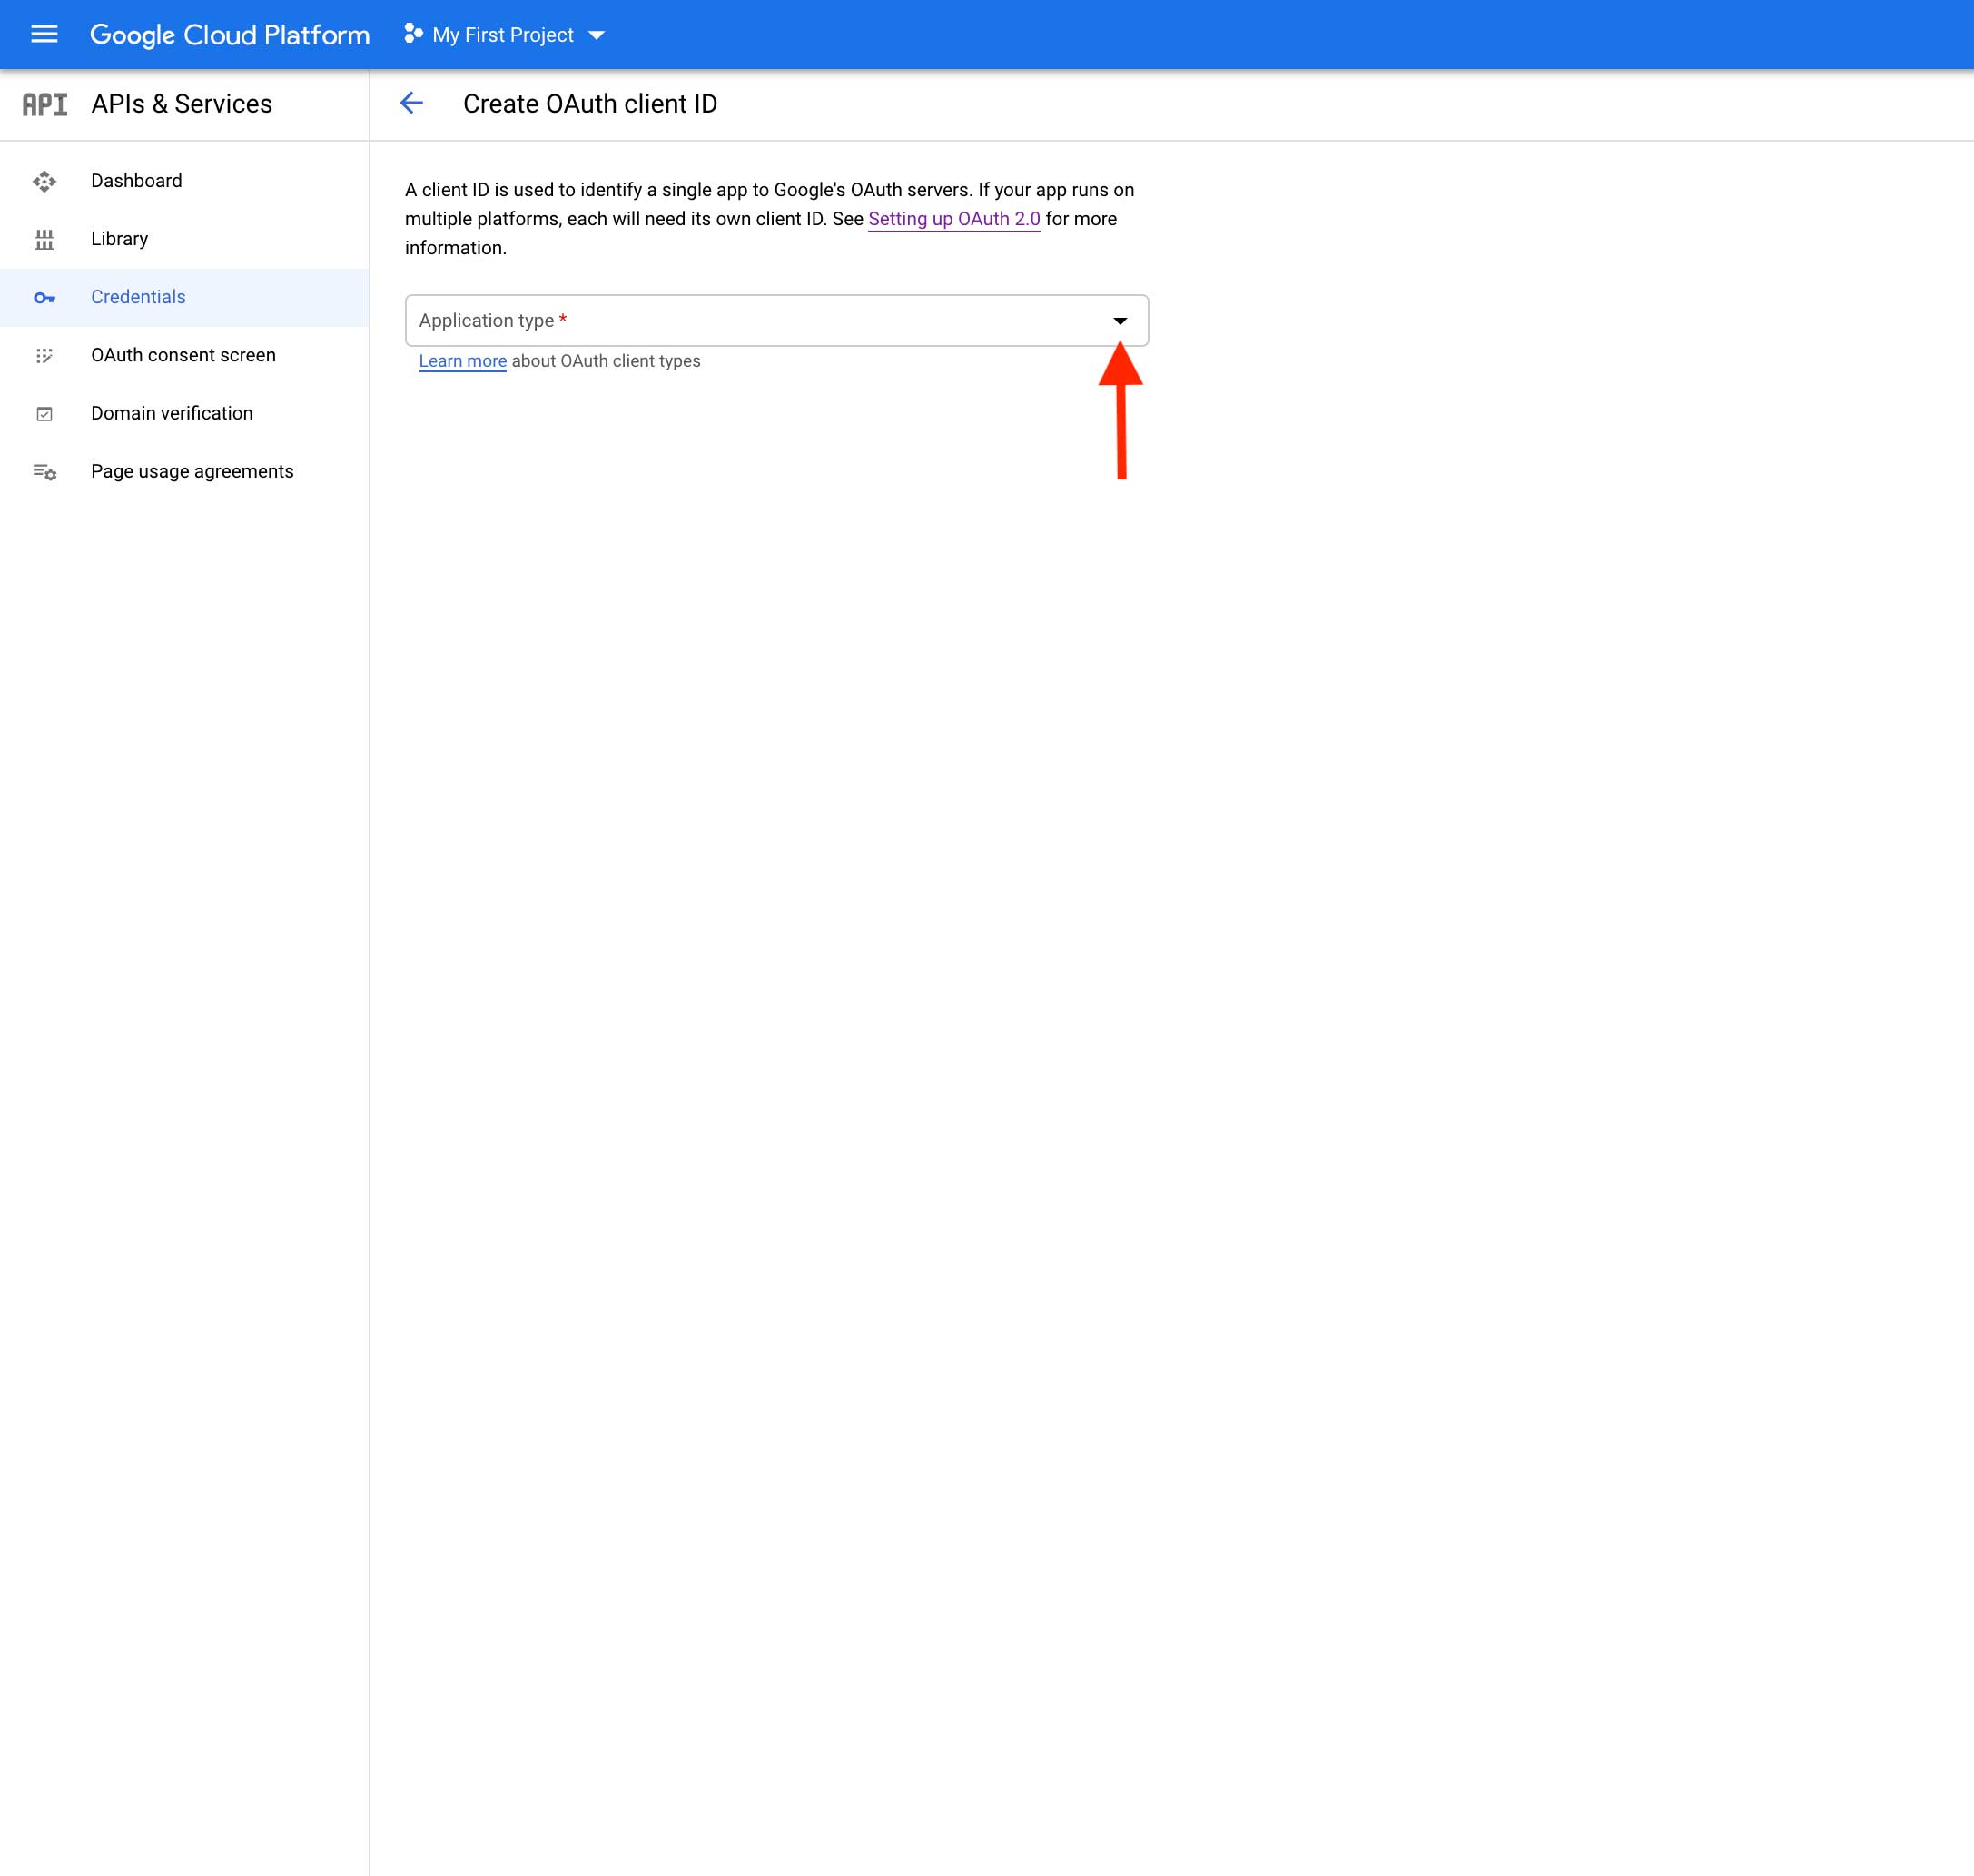
Step 16: Select Android as the application type.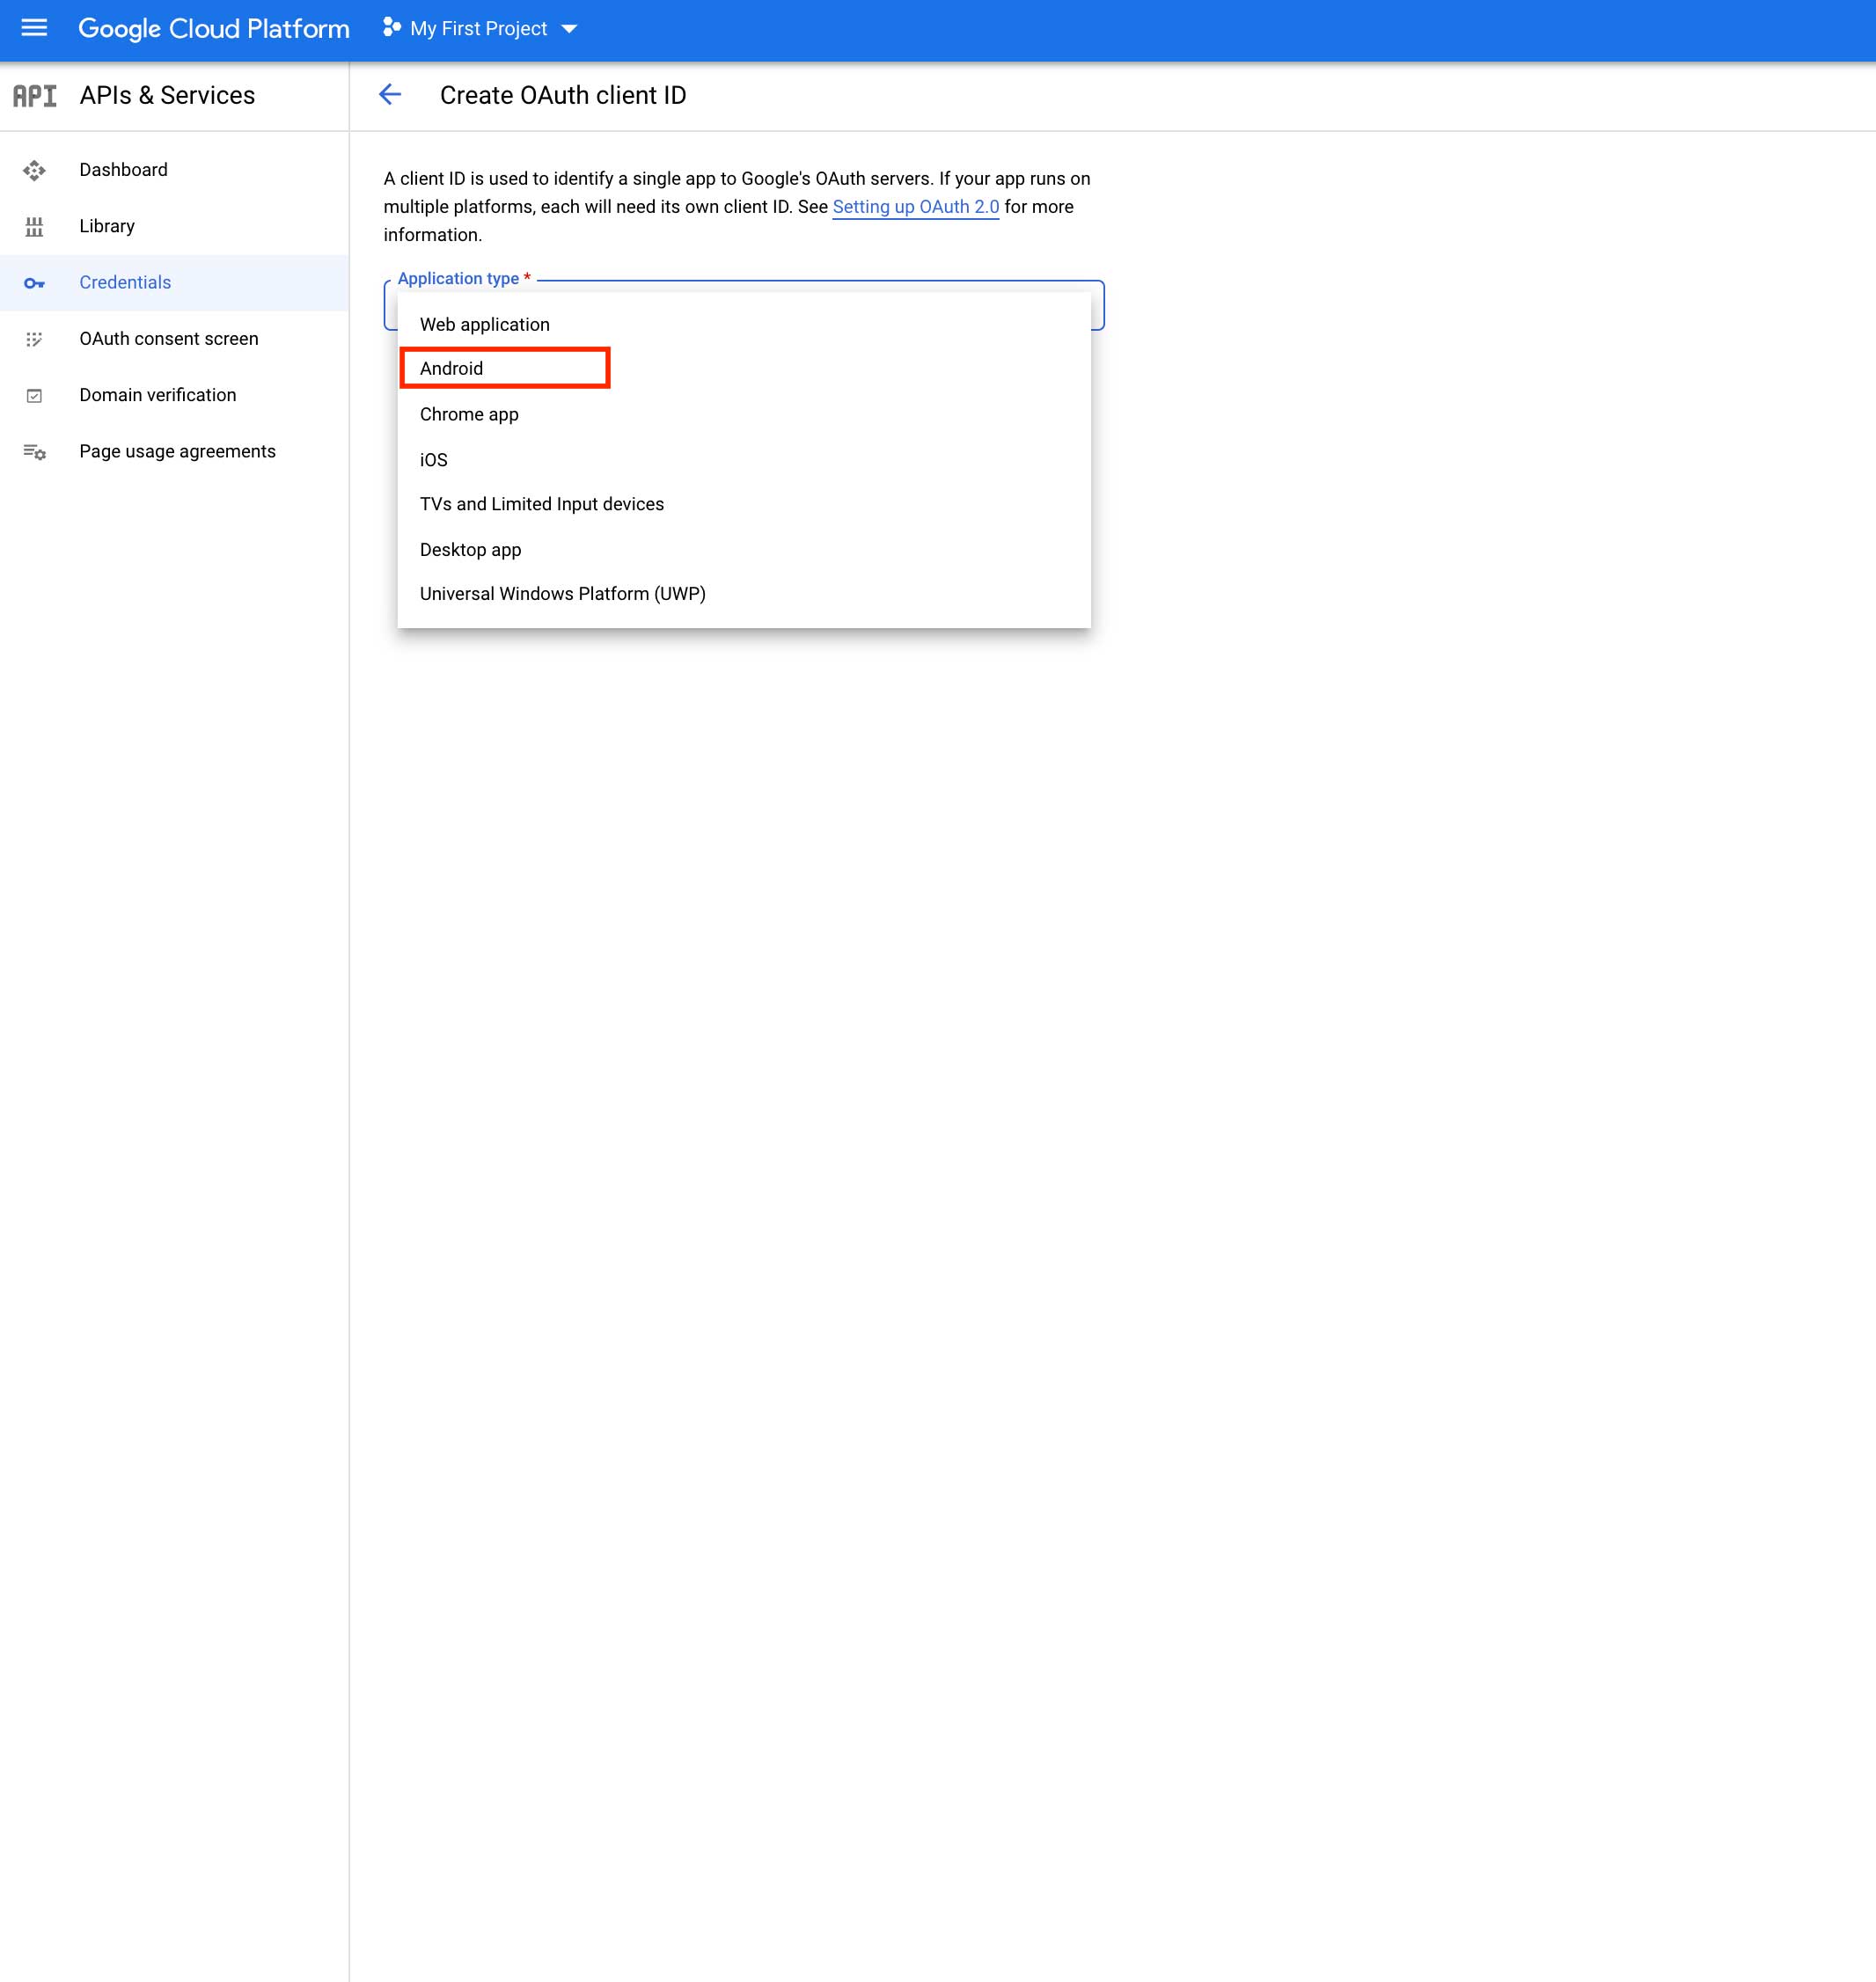
Step 17: Enter your package name and app's SHA-1 fingerprint.
Note : In SHA-1 field enter this : 55:A4:8E:1A:17:A0:67:C7:FB:22:EF:B3:63:95:58:EA:C0:FC:31:3F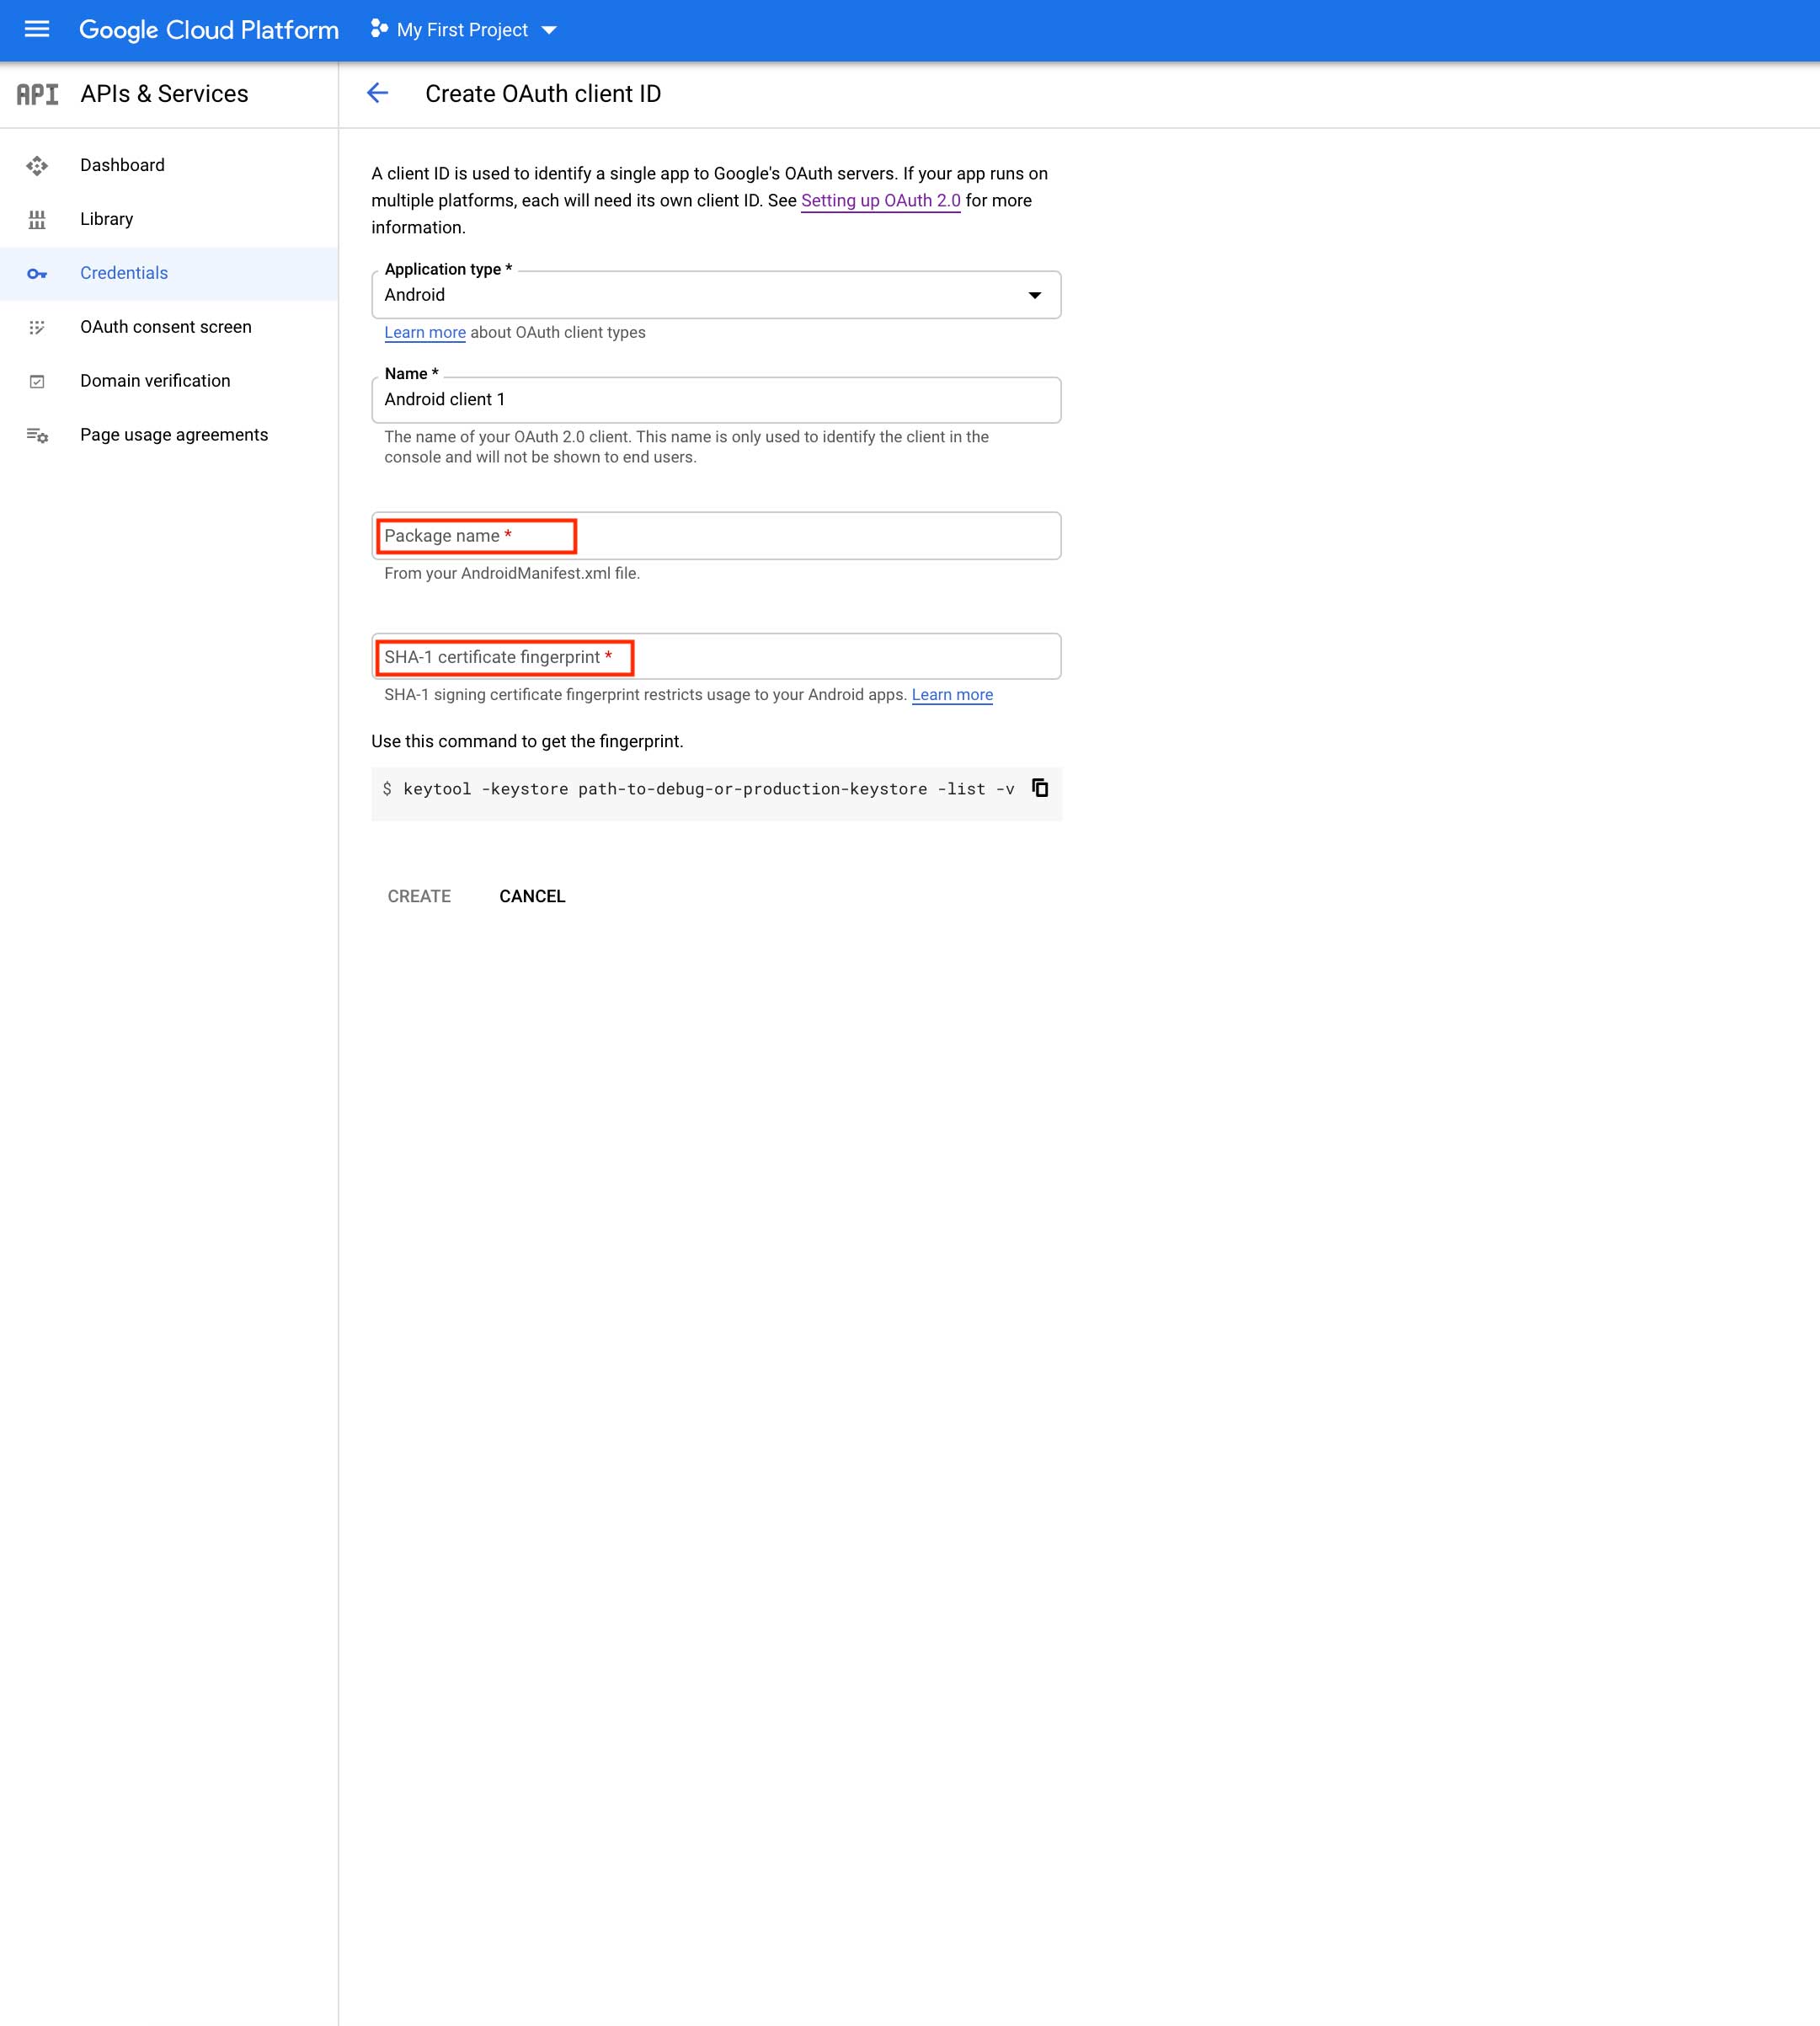
Step 18: Once you have provided the details, click on Create.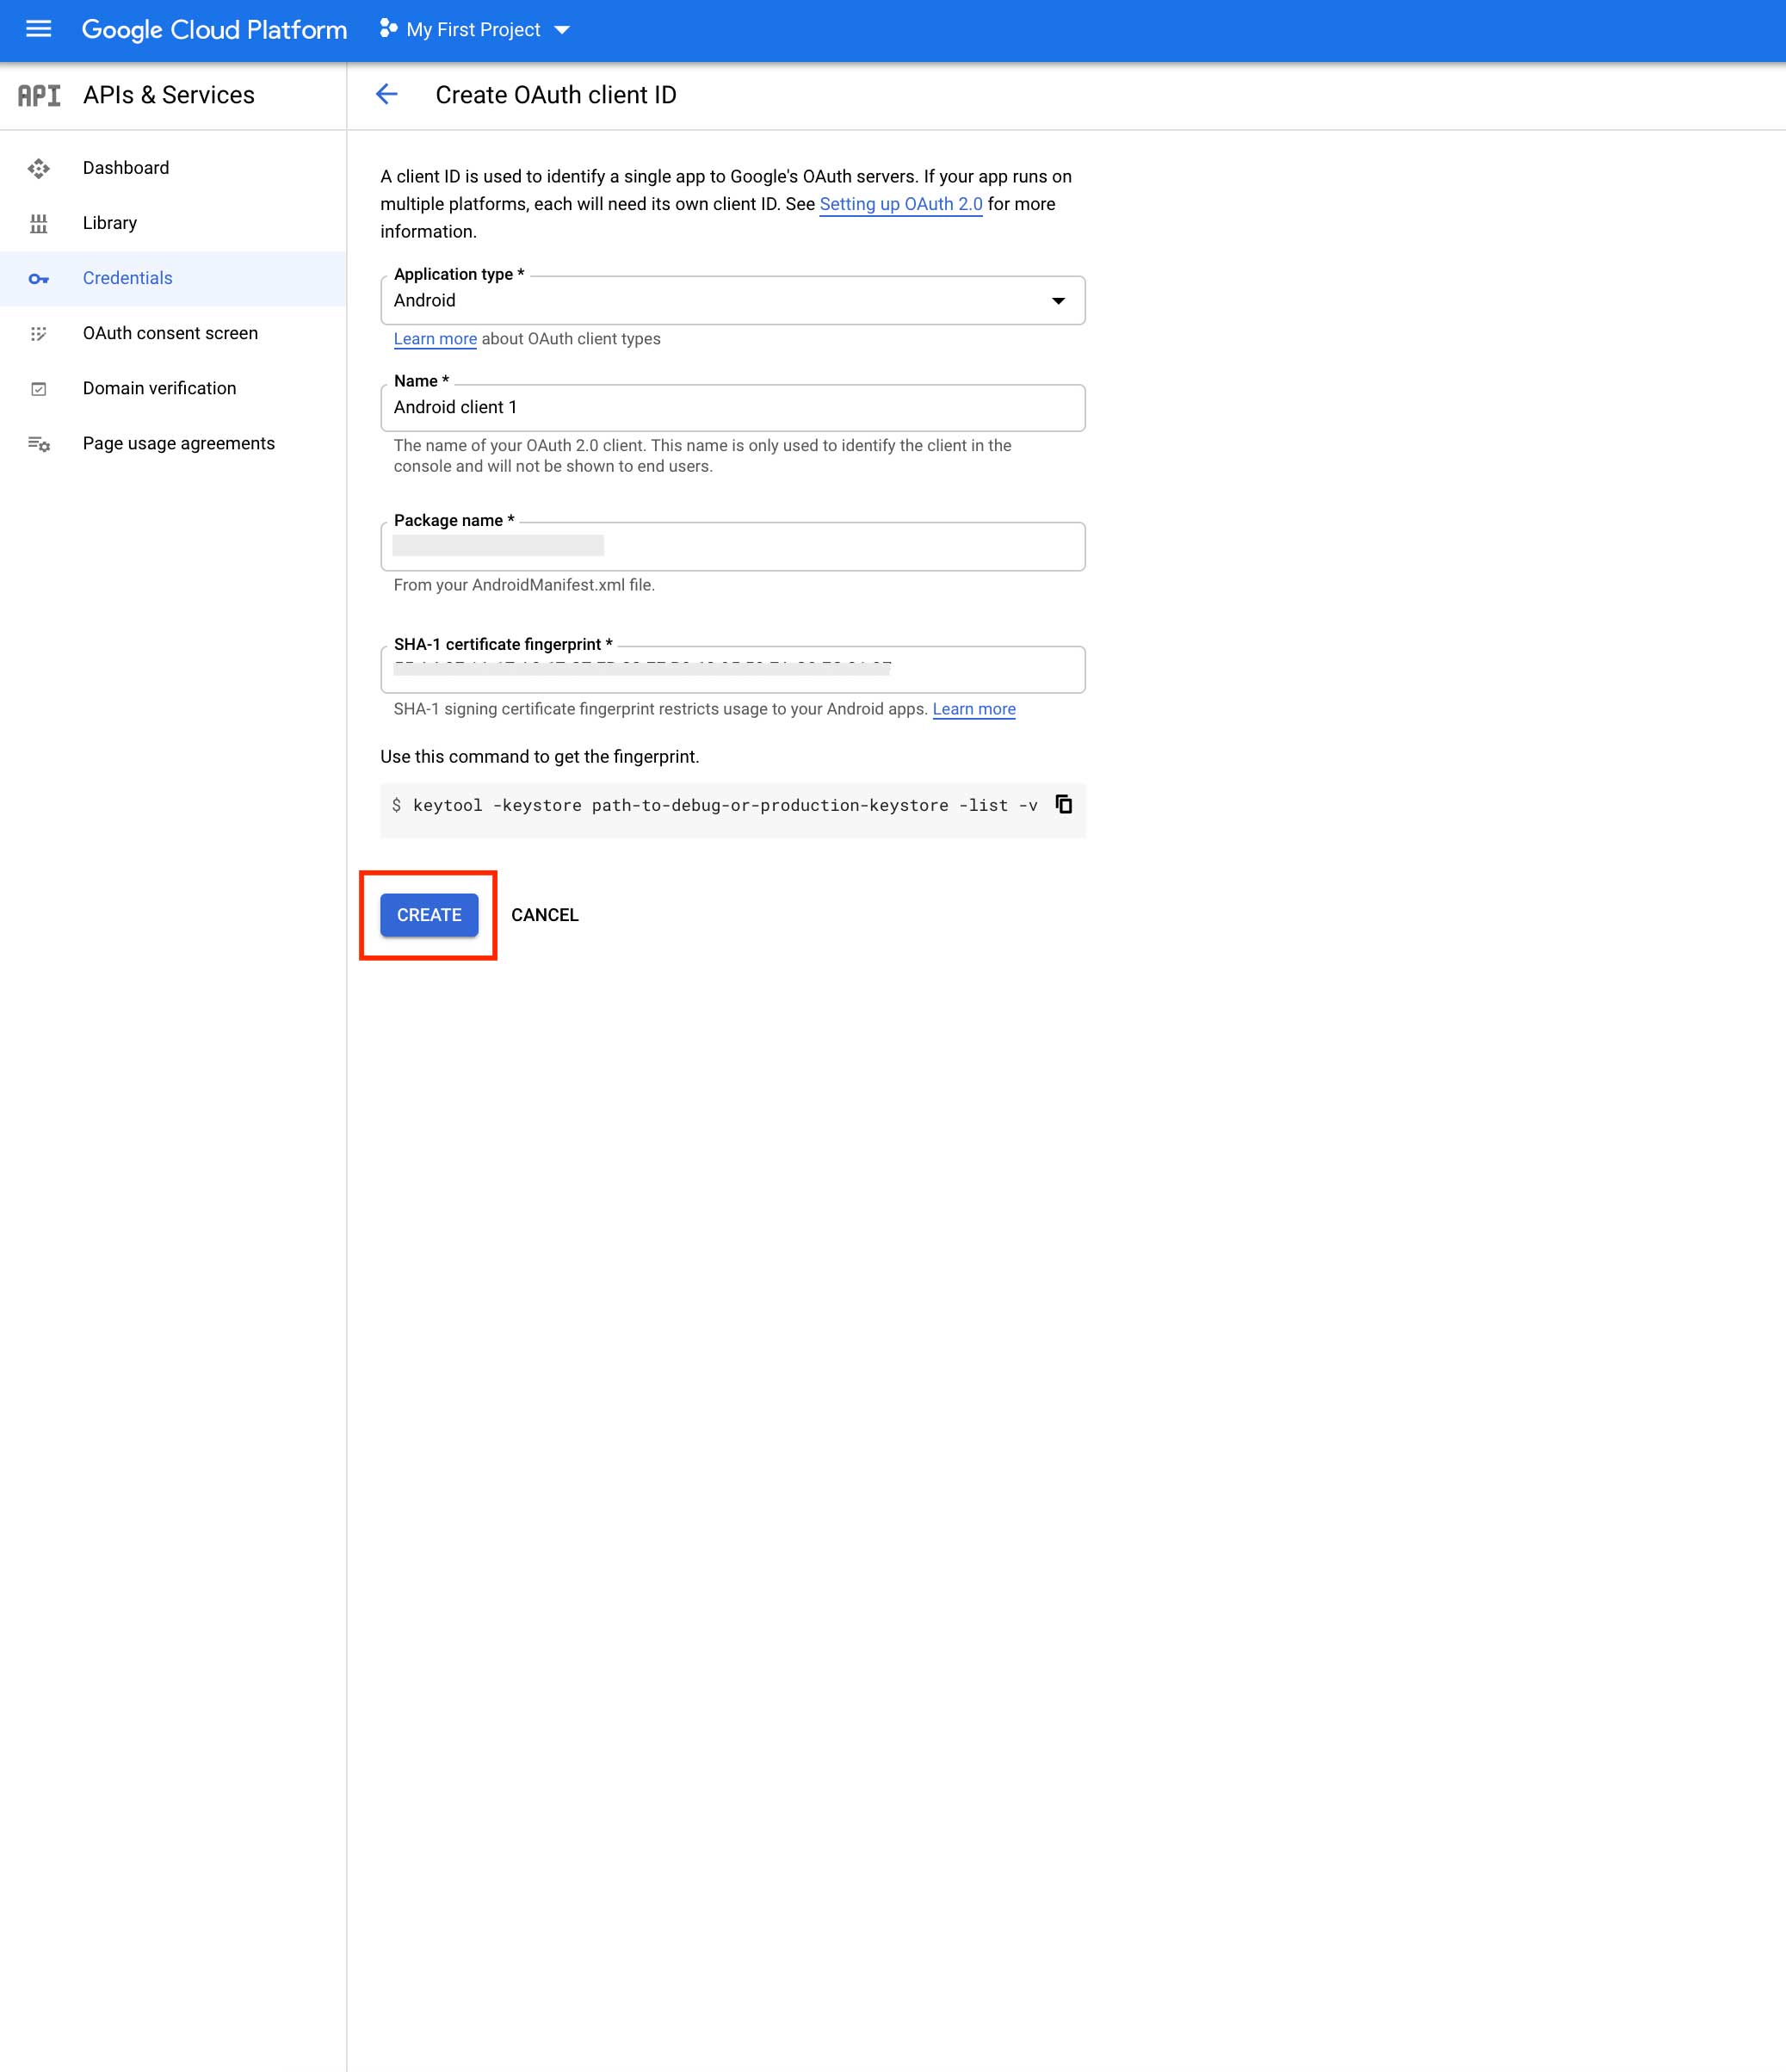
Step 19 : Here is your Android Client ID, copy it 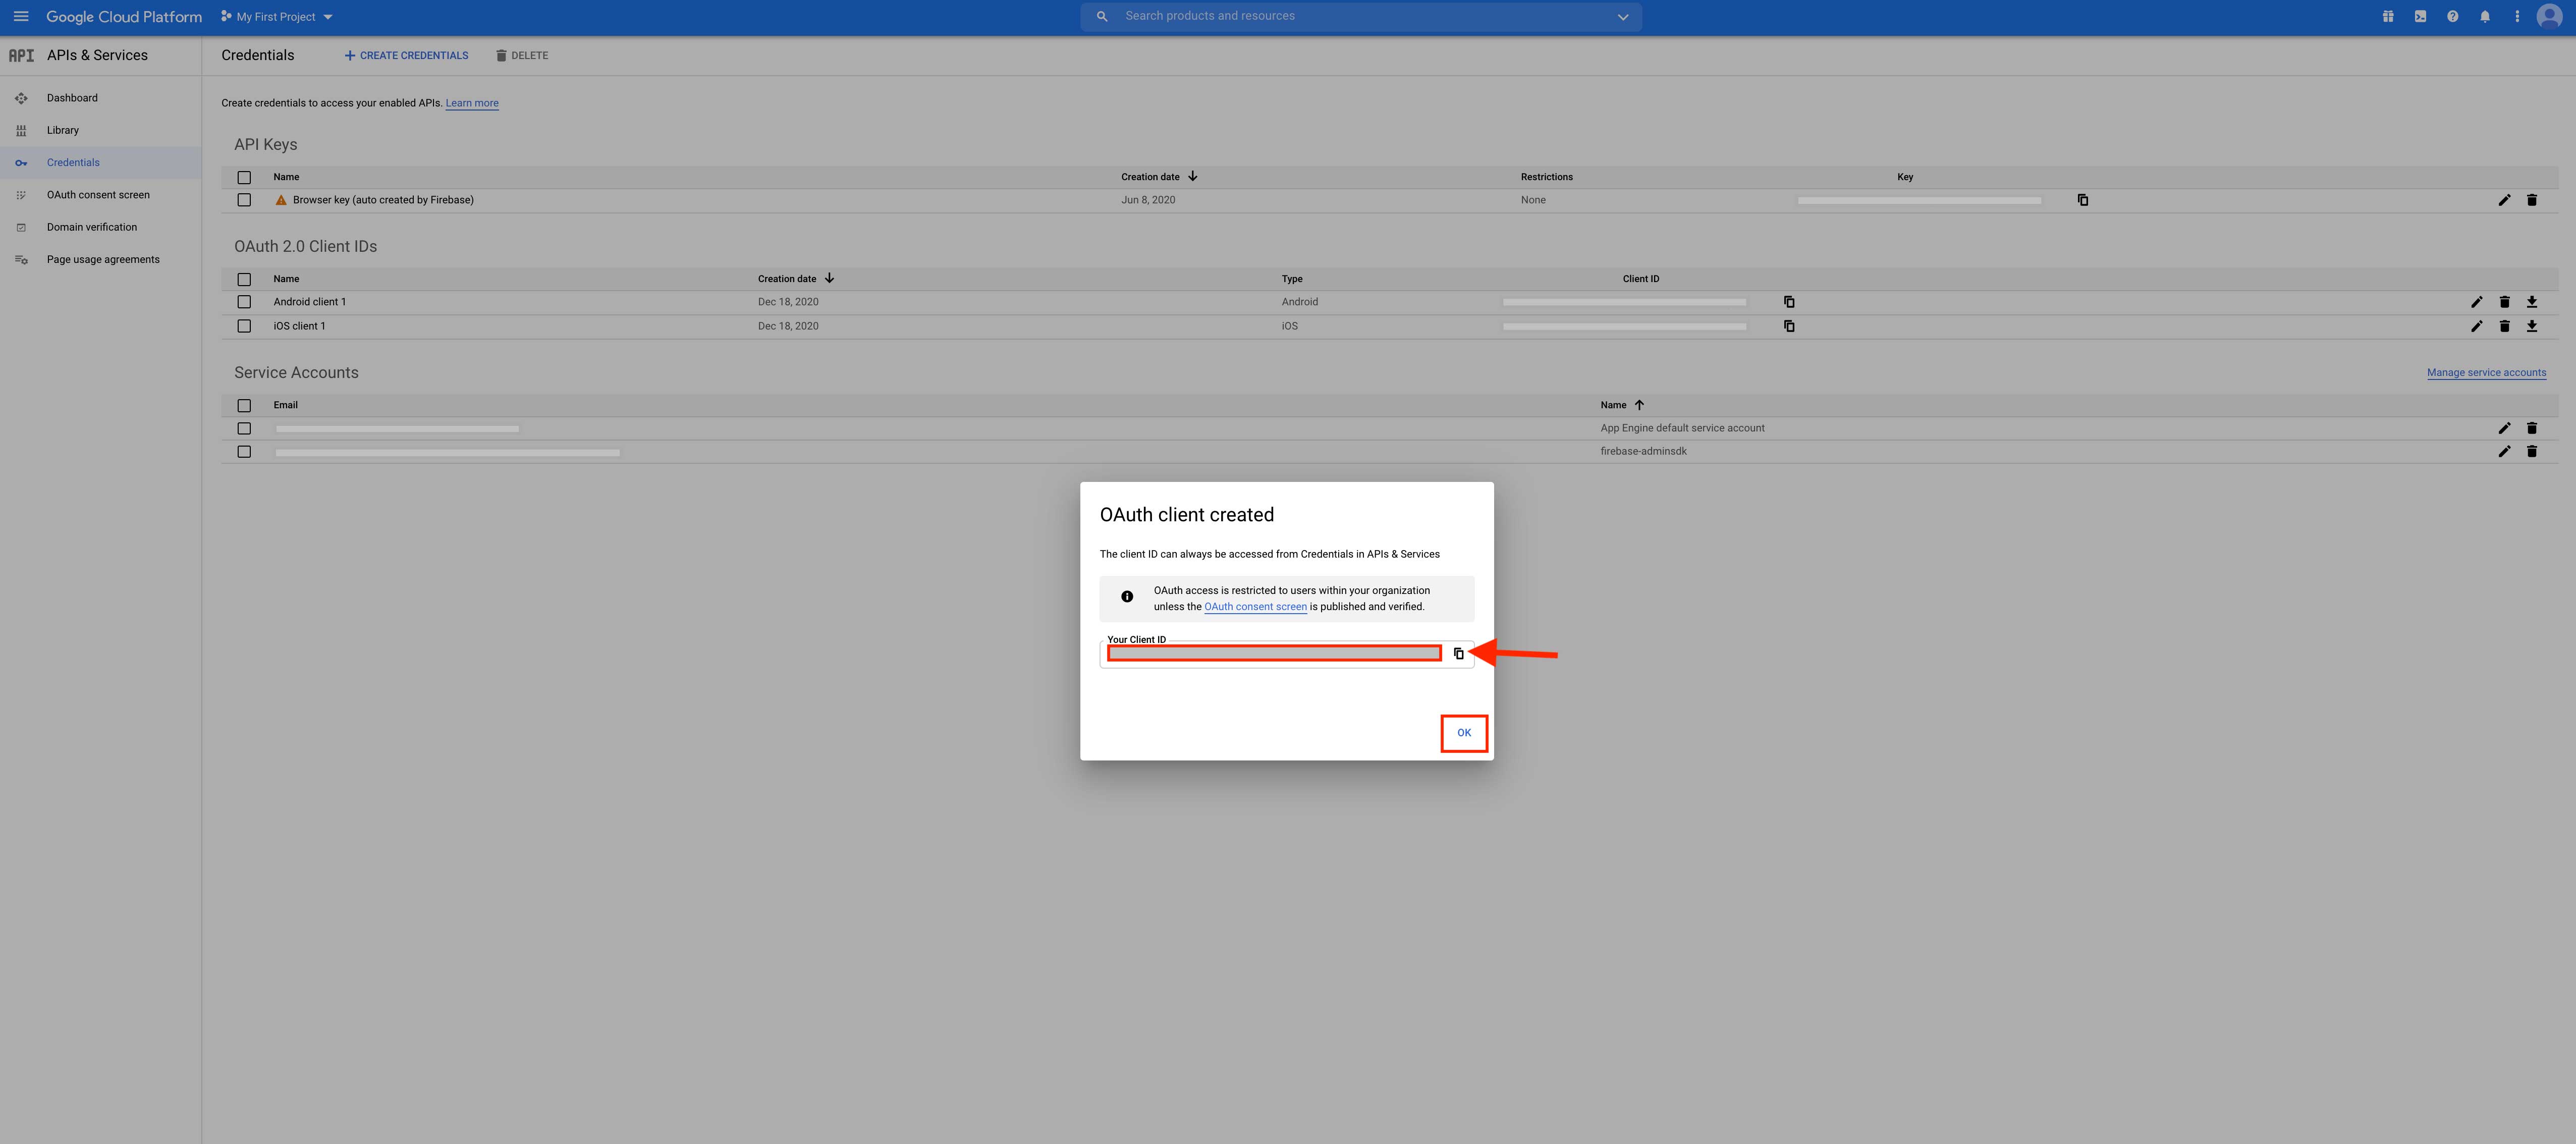
loading...
Related Articles
- How to Create and Verify a Payment Profile in Google Play Console?
- Appy Pie: How to create an iOS Distribution Certificate?
- Appy Pie: How to create an iOS Provisioning Profile?
- Appy Pie Font Licensing: What You Need to Know
- how to get your facebook app id to integrate facebook login into your android/ios app created with appy pie?
- How to Publish Your Android App on Google Play Store: A Step-by-Step Guide?
- Appy Pie: What are the Steps to Declare Trader or Non-Trader Status on the Apple App Store?
- Appy Pie: How to add Hyperlocal feature to your app?
- How to add and edit features in Appy Pie?
Still can’t find an answer?
Send us a ticket and we will get back to you.