Knowledge Base
How to set up WhatsApp Business Messages on Appy Pie Connect?
Vikas Singh
6 min readPublished on Date | Last updated on Date
This guide will take you through all the steps to integrate your WhatsApp Business Account with other apps and help automate your business tasks. Before you set up integrations for WhatsApp, you’ll need to configure WhatsApp Cloud APIs. Here is a simple guide to set up workflow integrations for WhatsApp Business using Appy Pie Connect’s custom editor:
Login to Connect dashboard
To get started, go to connectcloud.appypie.com/connects. You will be prompted to login if you aren't logged in.
Setup a Trigger app
Next step is to select the app through which you want to trigger a message.Appy Pie Connect’s custom editor makes the authentication and configuration steps smoothly.
Setup WhatsApp message trigger
Once the trigger setup is complete, you’ll have to setup and authenticate your Facebook developer account and go through the setup process:
- Select “WhatsApp Business” application for Action
2. Select action event “Send Message”
3. Authenticate your WhatsApp Business account
4. Select Business and a WhatsApp Account
5. Go to advanced options and configure to and from numbers. Add your business phone number in the “To” field and add a destination phone number or you can select from a google sheet as a trigger.
6. Select message templates or add a custom message.
7. Continue and Run test.
Setting up WhatsApp APIs - A step-by-step guide.
Set up Developer Assets and Platform Access
Go to https://developers.facebook.com/ and register as a Meta Developer
b. Enable 2FA for secure logins. Though this process is optional, it is advisable to enable two-factor authentication to keep your account and data secure from malicious hackers.
c. Once you have logged in, you only need to locate the green Create app button and click on it to get started.
i. Now, mark the type of your app you want to build as “Business” and then click “Next” by scrolling at the bottom right corner.
ii. Add the required app details and click on the green ‘Create app’ to move ahead. Next, you need to confirm the process by re-entering your password.
d. The next step in the process is to set up cloud APIs
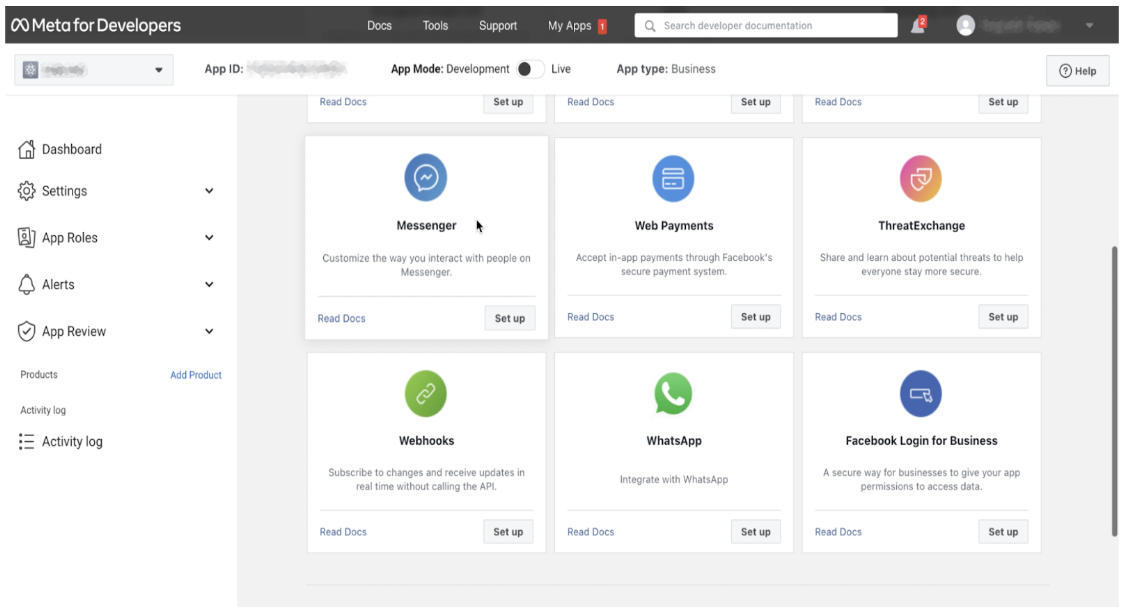
Next, you will see a list of apps, scroll down to find ‘WhatsApp’ on the list and click on ‘Setup’ to start setting up the cloud APIs.
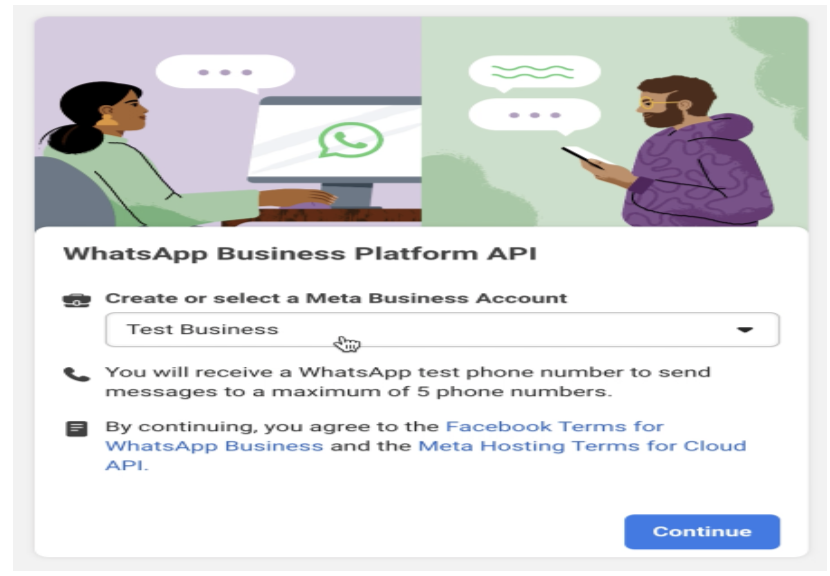
ii. Now you will see the option to select an existing Business Manager (if you have one). You can also let the onboarding process create a business manager for you automatically. Don’t worry, you can edit everything later, should you feel the need to.
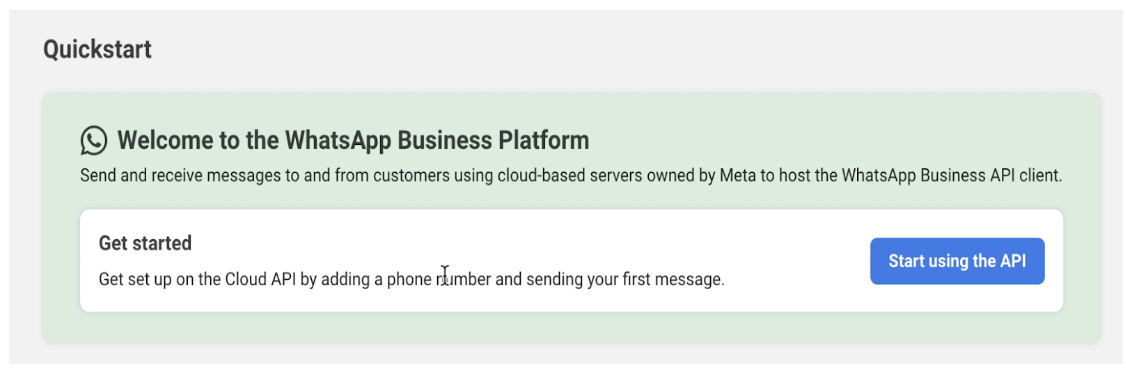
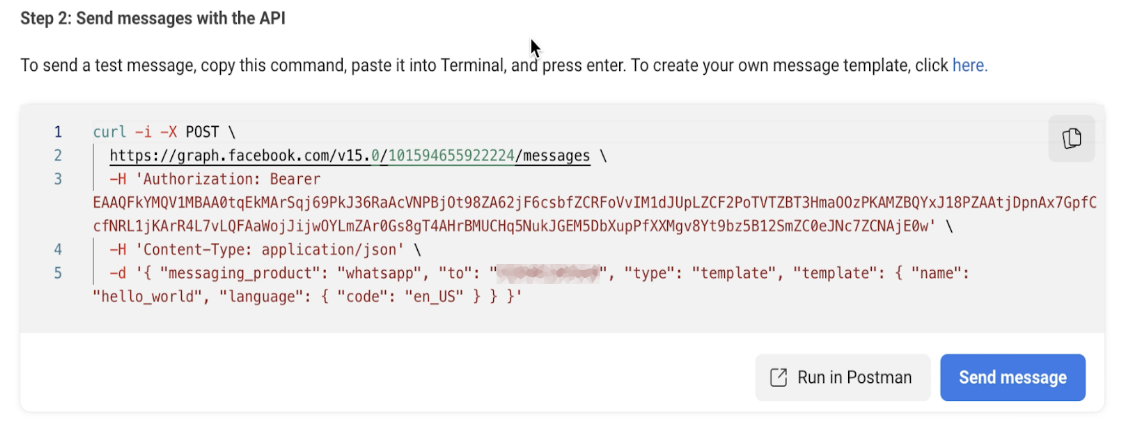
2. Send a test Message
In the WhatsApp Setup panel, click on ‘Start using the API’
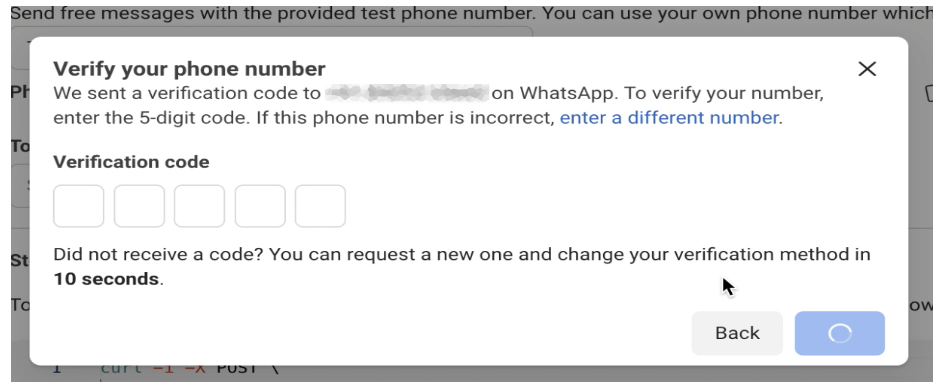
b. Select your test phone number in the ‘From’ field. Next, enter the recipient phone number you would like to message in the ‘To’ field. Now, follow the prompts on the screen to verify the receiver number.

c. After entering a recipient phone number, the code sample on the page will be updated to send a pre-approved message template to that number. Click on ‘Send Message’ to send the test message on the test mobile number.
3. Configure a webhook
Set up a Webhooks endpoint for your app to get alerted for every message you receive or when a message’s status changes.
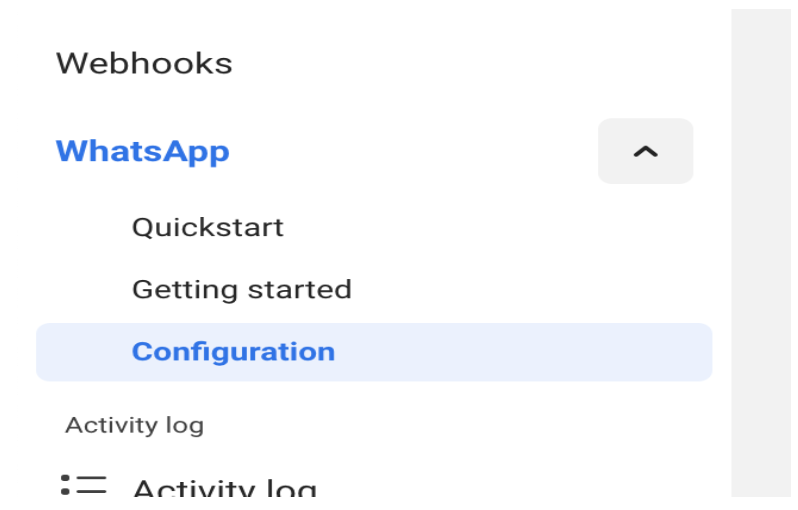
a. In your app dashboard, go to WhatsApp and click configuration. Go to the webhooks section and click on Configure a webhook option.
b. Next, add this Callback URL without the quotation marks “https://hooks.appypie.com/wabamessenger/instant”. Meta will be sending the events to this URL.
c. The second information you need to enter is the verify token. Add “connectwhatsapp”without the quotation marks. Now, click ‘Verify and Save’.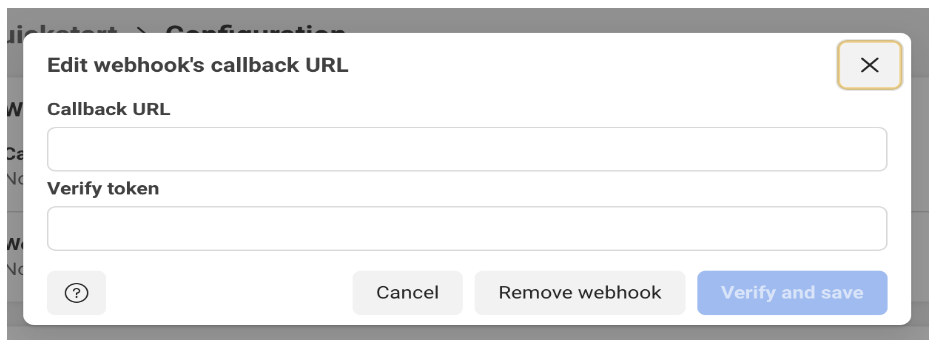
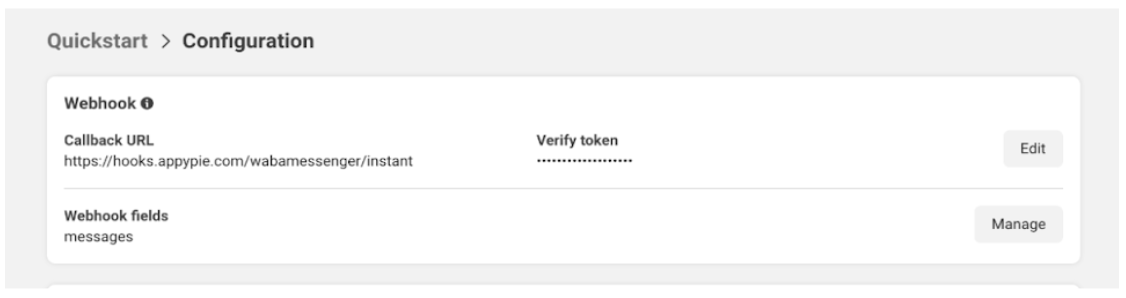
d. Go back to the app dashboard, click WhatsApp, and then ‘Configuration’. Under Webhooks, click ‘Manage’. A dialog box will open with all the things you can opt to get notified about. To receive messages from your users, click Subscribe for messages.
4. Receive a test message
Send a message to the test number you have used. You should immediately get a Webhooks notification with the content of your message!
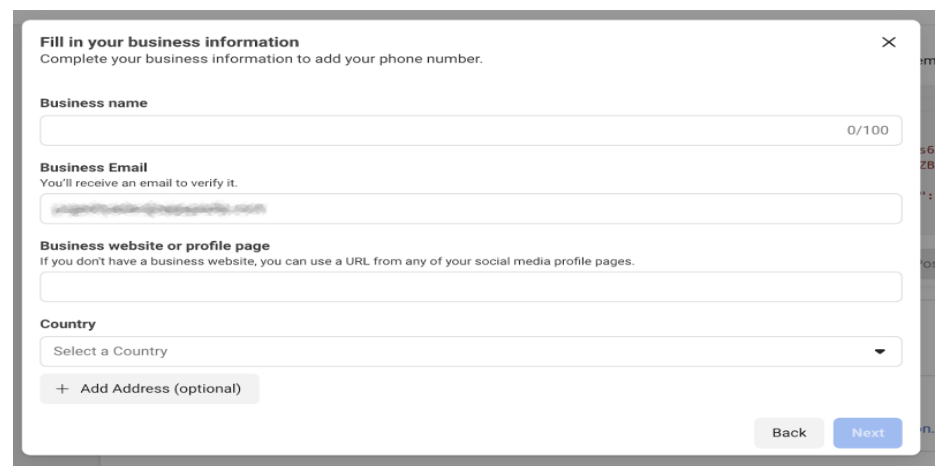
5. Add Phone number
Once you’re ready to use WhatsApp for a production use case, you need to use your own phone number to send messages to your users. You need to add this phone number to your WhatsApp Business Account.

6. Set up an Opt-in process
You are required to obtain user opt-in before sending proactive business-initiated messages.
7. Add payment method
If you’re a developer who is developing for yourself or your organization, you can add a credit card to your WhatsApp Business account as a payment method.
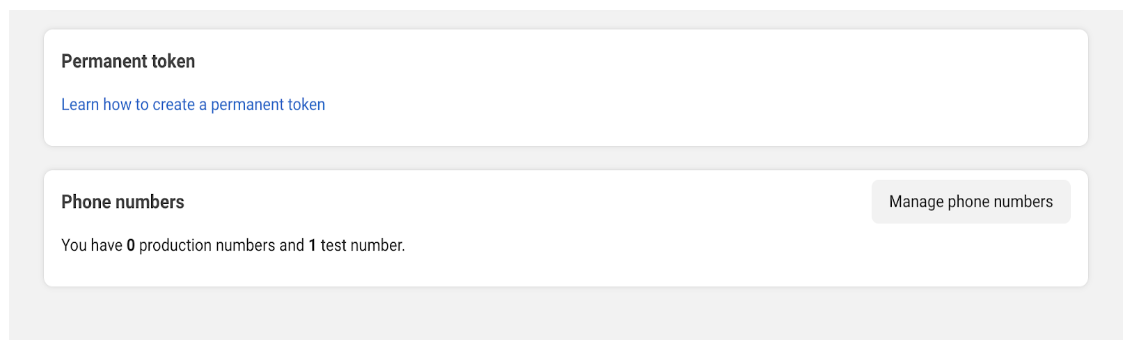
Go to App Dashboard > WhatsApp > Configuration.
b. Under Phone numbers, click Manage phone numbers.
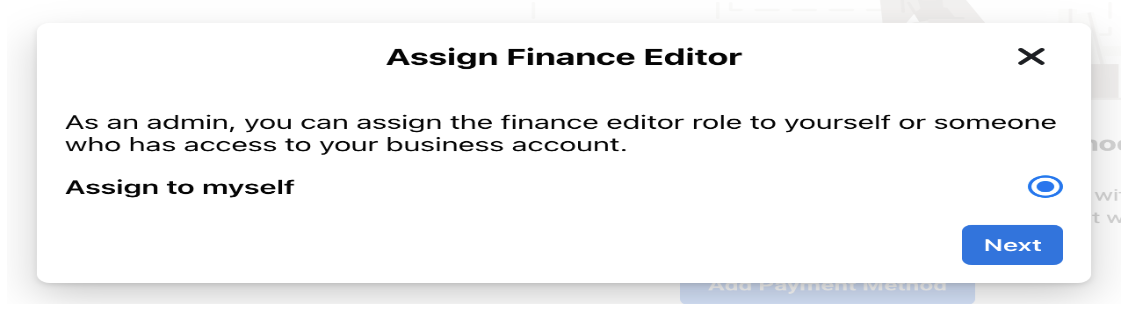
c. You will be redirected to your Business Manager account, where upi will have to navigate to Business Settings > Payment Methods you can click Add Payment Method to add your credit card. You may assign yourself as a financier for now but this can be changed later.
8. Send messages
To send any business-initiated messages, you need to use message templates. WhatsApp message templates are pre-approved message formats that businesses can use to send notifications or customer care messages to people that have opted-in for notifications.
You can either create a message template on your own or use one of the pre-approved templates.
loading...
Related Articles
- How to setup Login with Facebook in my Facebook Developer Account
- How can I setup PayPal web hooks using the PayPal Developer Portal
- How Can I Set Up Facebook Page Integrations With Appy Pie Connect?
- How Can I Set Up Facebook Messenger Integrations With Appy Pie Connect?
- How Can I Set Up Facebook Integrations With Appy Pie Connect?
- How Can I Set Up ClickUp Integrations With Appy Pie Connect?
- How Can I Set Up GitLab Integrations With Appy Pie Connect?
- How Can I Set Up Strava Integrations With Appy Pie Connect?
- How Can I Set Up RepairShopr Integrations With Appy Pie Connect?
Still can’t find an answer?
Send us a ticket and we will get back to you.