Knowledge Base
How to Use Revision History in Google Docs?
Akash Kumar
2 min readPublished on Date | Last updated on Date
When you edit a document, it is possible that you may not like the edited version. Google Docs’ version history lets you view all the recent and earlier versions of the document. If you do not like the edited paragraph then, it also enables you to restore your original document. This ‘Restore this Version’ feature is available by default, which means that you do not have to turn on any button. Those who are familiar using Microsoft Office, identify this feature as ‘revision history’.
Here is how to use revision history in Google Docs:
Step 1 : Go to Google Docs, click on the File then, Version history, and at last, click on ‘See version history’.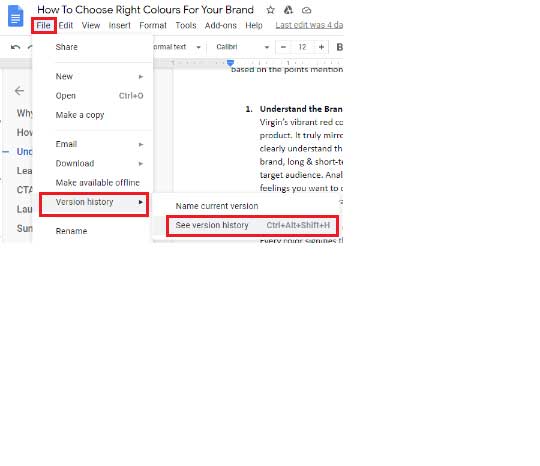
Step 2 : A new panel will appear to the right of your document, listing numerous versions of your document.
The list will include people’s names who have edited and made changes in the versions of your document.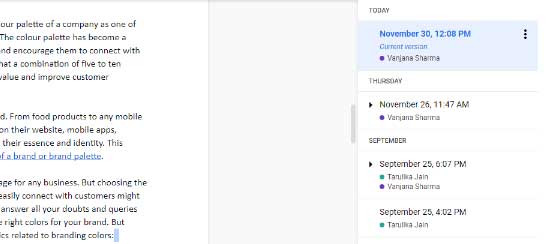
Step 3 : Double click on any version of your document to immediately view it.
As shown above, you can find who made the changes in the color next to their name in the current and earlier versions of the document.
To disable this highlighting, click on ‘Save Changes’.
Uncheck the box available at the bottom of the page. This helps you to view the version of your document without any visual clutter.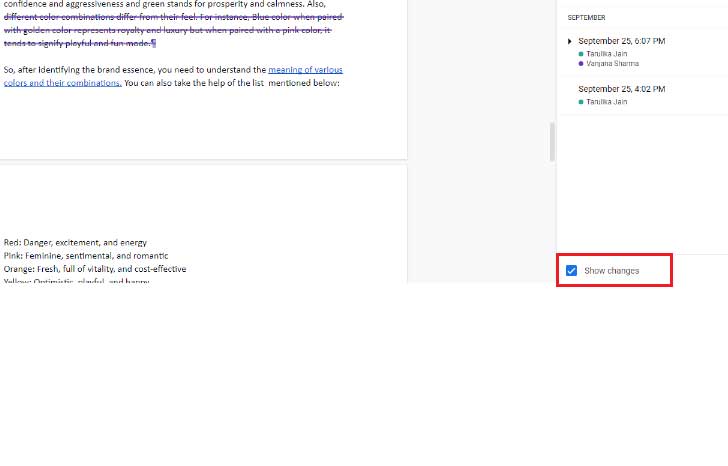
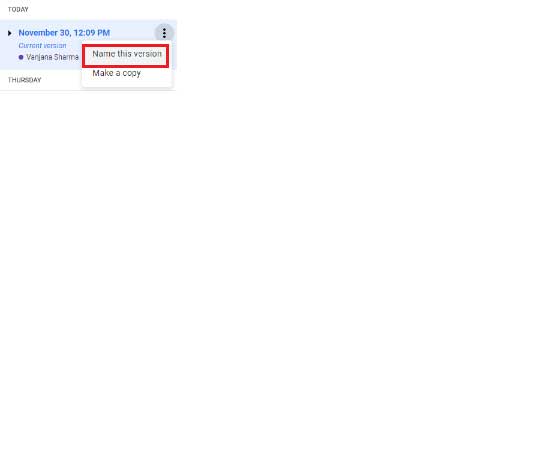
Step 4 : You can give any name to the version of your document by clicking on the 3 vertical dots.
Two options will appear: ‘Name this version’ and ‘Make a copy’.
- Click on the ‘Name this version’ option, it helps you keep track of changes.
- Click on the ‘Make a copy’ option, it helps you to create a new document in Google Docs.
How to Restore a Version of a Google Doc?
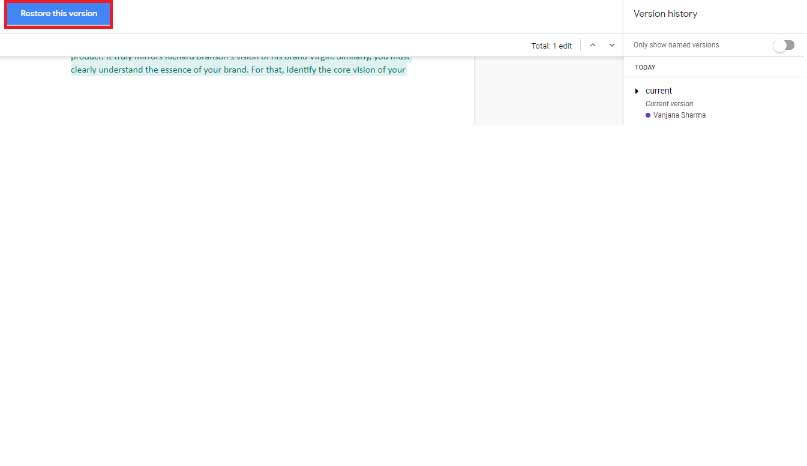
- On the top of the document, click on the ‘Restore this version’ button to restore the chosen version.
If you want to know more about Google Docs, check out our Google Doc Integrations for more ideas.
loading...
Related Articles
- How to setup Login with Facebook in my Facebook Developer Account
- How can I setup PayPal web hooks using the PayPal Developer Portal
- How Can I Set Up Facebook Page Integrations With Appy Pie Connect?
- How Can I Set Up Facebook Messenger Integrations With Appy Pie Connect?
- How Can I Set Up Facebook Integrations With Appy Pie Connect?
- How Can I Set Up ClickUp Integrations With Appy Pie Connect?
- How Can I Set Up GitLab Integrations With Appy Pie Connect?
- How Can I Set Up Strava Integrations With Appy Pie Connect?
- How Can I Set Up RepairShopr Integrations With Appy Pie Connect?
Still can’t find an answer?
Send us a ticket and we will get back to you.