Knowledge Base
How to Work with Images in Google Docs?
ZA
Akash Kumar
3 min readPublished on Date | Last updated on Date
Here is how you can work with images on Google Docs:
- One of the easiest ways to insert an image is simply dragging from your computer’s file browser and leaving it on the document. You will see the image uploaded where you left the cursor.
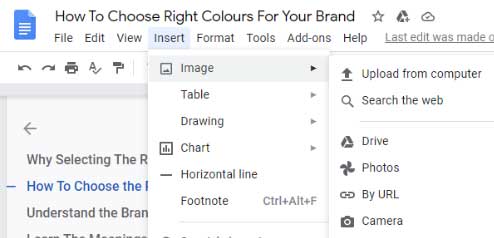
There are various other ways to insert images :
- You have to click on ‘Insert’ and then select image.
- Now click on ‘Upload from computer’ option and the picture you want to upload will be uploaded.
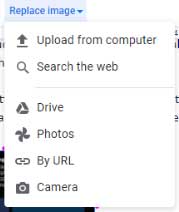
- You can also add image with other options; Search the web, Google Drive, Google Photos, by URL, and Camera.
How to Resize and Arrange Images in Google Docs?
- After inserting an image, you may want to resize or rearrange the picture according to your choice.
- You can resize or rearrange your images in Google Docs by simply dragging the blue borders of the picture.
- Google Doc offers you with three options; In Line, Wrap Text, and Break Text.
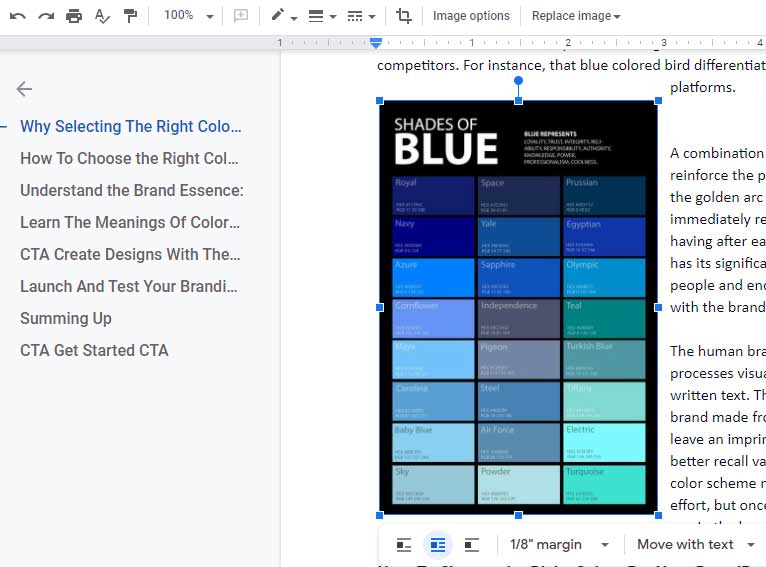
- The first icon at the bottom, In Line, considers the picture as a part of text. The text will appear either before the image or after the image. This option is a good fit for small pictures such as symbols.
- The second icon at the bottom, Wrap Text, wraps the text around the image.
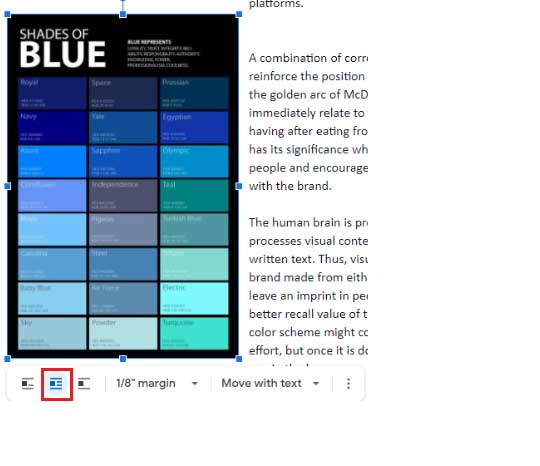
- The third icon at the bottom, Break Text, will divide the content below or above the picture.
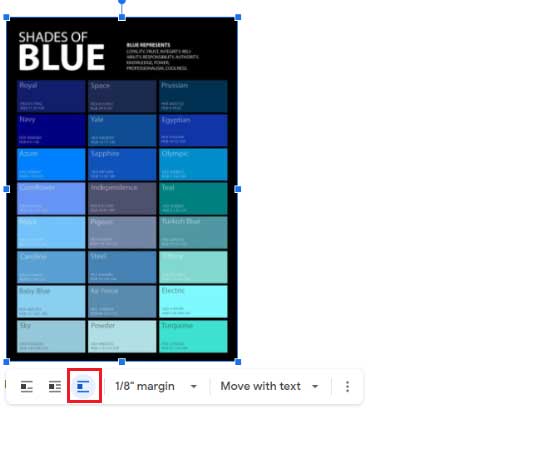
- With the help of these three options, you will be able to place your image properly.
How to Add a Border to an Image in Google Docs?
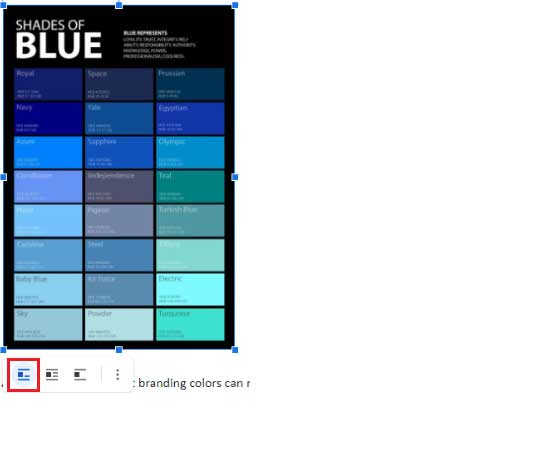
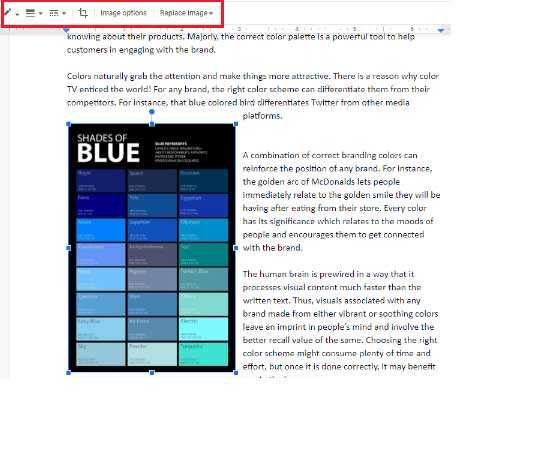
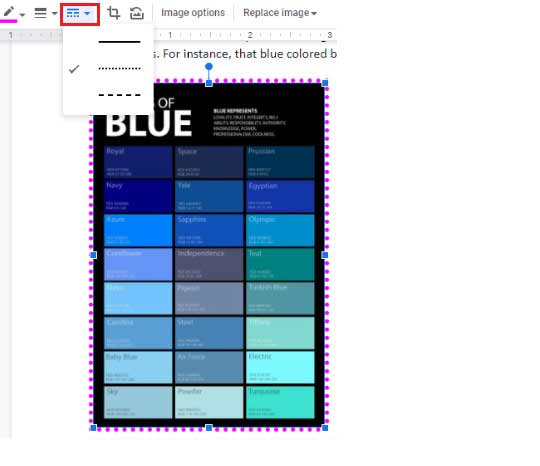
- The icons highlighted in the toolbar in the below image appear after the image is ready to view.
- The first Pencil icon from the left of the toolbar allows you to add a border to your uploaded image.
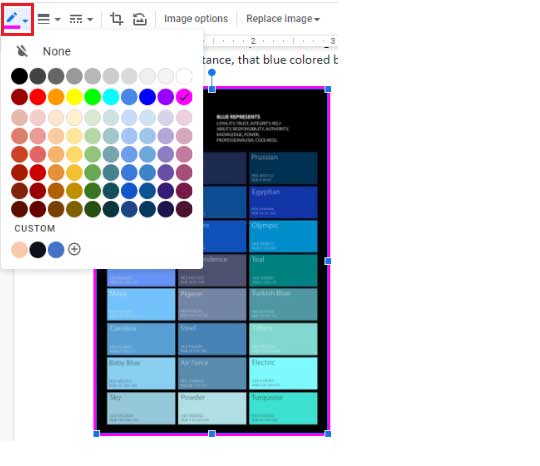
- The second icon from the left of the toolbar allows you to choose the size of the border depending on your choice.
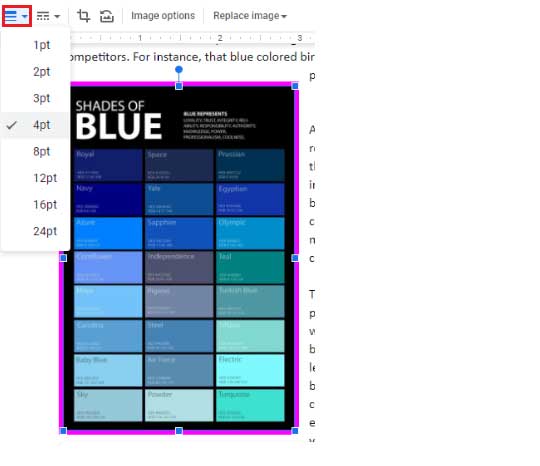
- The third icon from the left of the toolbar allows you to select the border types, whether it would be solid or have a pattern.
- The icon next to border types is the crop button. Click on the ‘Crop’ button to re-frame the image.
Drag the blue squares in the corners to crop out the sides.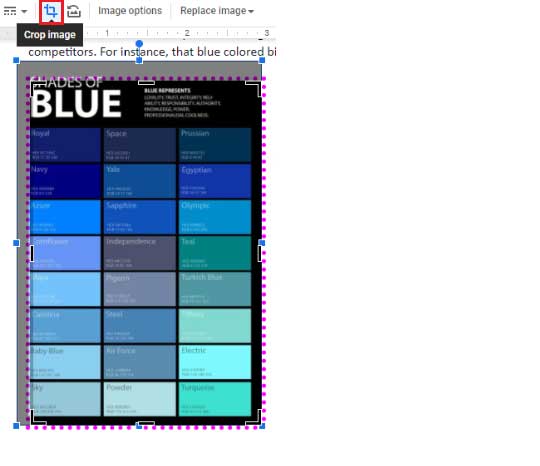
- If you wish to change anything in the picture like size & rotation, text wrapping, recolor or position then, simply click on the ‘Image Options’ button and the various options will appear.
Reset option is also available to make the image as it was before editing.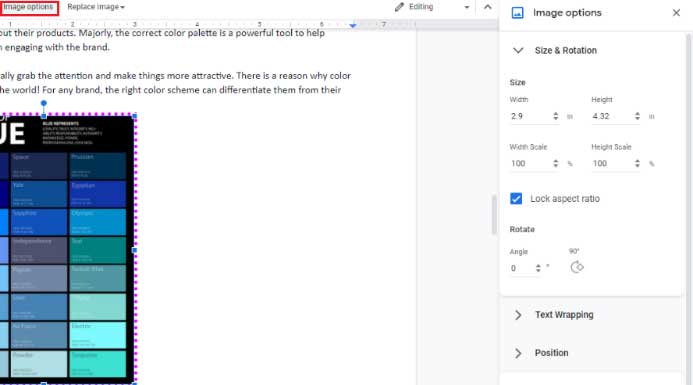
- To replace the image, click ‘Replace Image’ button then, select from the options to upload a new image.
Now that you know how to work with images in Google Docs, you can connect Google Doc to 150+ apps using Appy Pie Connect’s Google Doc integrations.
loading...
Related Articles
- How to setup Login with Facebook in my Facebook Developer Account
- How can I setup PayPal web hooks using the PayPal Developer Portal
- How Can I Set Up Facebook Page Integrations With Appy Pie Connect?
- How Can I Set Up Facebook Messenger Integrations With Appy Pie Connect?
- How Can I Set Up Facebook Integrations With Appy Pie Connect?
- How Can I Set Up ClickUp Integrations With Appy Pie Connect?
- How Can I Set Up GitLab Integrations With Appy Pie Connect?
- How Can I Set Up Strava Integrations With Appy Pie Connect?
- How Can I Set Up RepairShopr Integrations With Appy Pie Connect?
Still can’t find an answer?
Send us a ticket and we will get back to you.