Knowledge Base
The Ultimate Guide to using Calendly for your Online and Offline Scheduling Needs
Akash Kumar
7 min readPublished on Date | Last updated on Date
Scheduling is critical to the functioning of any business. Time management can ensure all tasks are completed according to schedule and employees are not burnt out. Calendly is an app that can help you spend less time locking down dates and more time preparing for the meetings.
What is Calendly?
Calendly is an app that is commonly used app that helps you schedule meetings without the back-and-forth emails. Users can use the app to schedule appointments, meetings, events, etc. Instead of using email chains and phone tag, you can send your availability with a Calendly link. You can use these links even if people booking time with you don't use Calendly.
People who wish to invite you to an event will be able to see all the available openings in your schedule and select the one that suits them best. This ensures the ideal time slot for both parties, eliminates time zone confusion, and avoids the strings of conversations about who is available when.
The Pricing for Calendly
Calendly is free for the basic option which includes unlimited events but only one type of event. Free users can also integrate Calendly with other calendars. The Premium plan ($8/user/month) gives you more customization options, allows you to schedule all types of events, removes Calendly branding from your display, and more. The Pro plan ($12/user/month) adds SMS notifications and invitee redirections, plus more native integrations.
How to Set Up Your Calendly Account?
Open Calendly home page and click on Sign Up. You can also log-in to Calendly with your Google account. You can skip any part of the sign-up process, but filling in the information now lets you make the most of the entire app right away.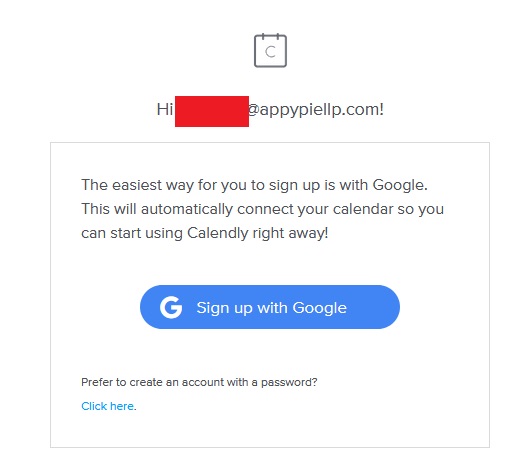
Once you’ve set up your own account, you can then set up your Calendly URL and selecting your time zone. You should keep in mind that the Calendly URL will be part of the link you send to your all event invitees, so make sure it's something descriptive and professional.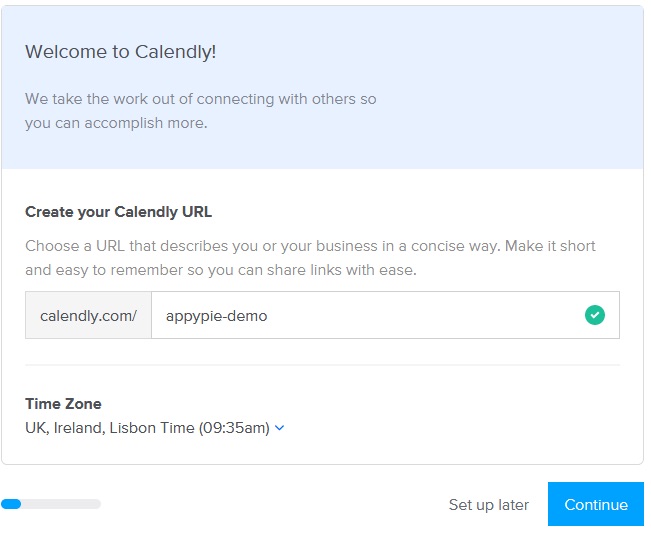
Next, you need to set up general availability. You can change it at any time so it's okay to be vague for now.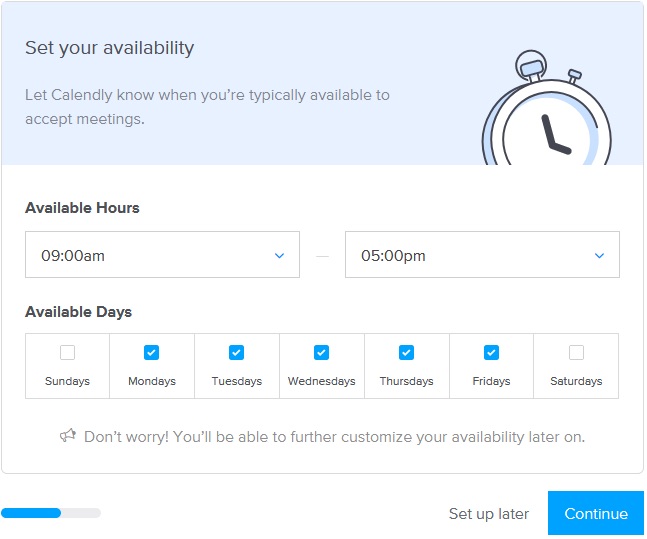
Calendly then asks about work duties to personalize your customer support if you need it. And finally, Calendly ends the onboarding by urging you to create your first event.
How to Create an Event or Meeting Slot in Calendly?
You should think of events as time slots when using Calendly. You can define how those time slots are used and who sees them. You can set up traditional, one-time meetings with Calendly. If you create a few different event types, for when you're available, your invitee can choose the one they like best. If you're scheduling a lot of one-time meetings you can set up your Calendly schedule with all your open time slots and let the invitees pick themselves on a first come, first serve basis.
How to Customize Event Types/Time Slots in Calendly?
Customizing event types can be quite an easy task. Even if you skipped this step in the onboarding, you can set up a new event anytime from your Calendly dashboard. You can either choose one of the default one-on-one events for 15, 30, or 60 minutes or you can also create a new event. To do so, click + New Event Type.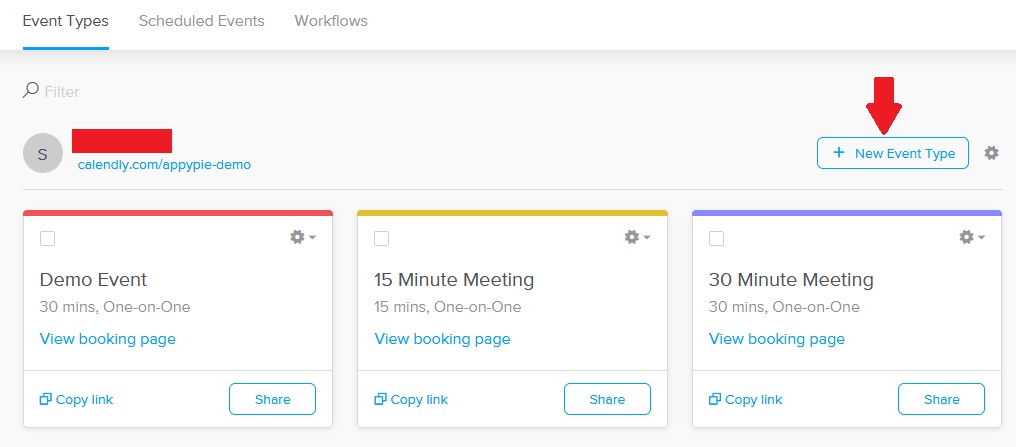
Here you need to choose between a one-on-one event and a group event. Click the Create button for the type of event you want to create.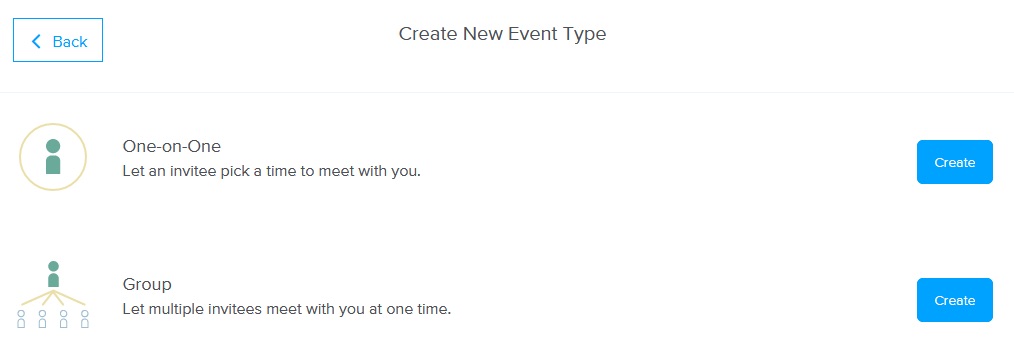
Once you’ve clicked on create, you need to enter some basic information: the name of the event, location, and description. It also gives you the opportunity to customize the event URL and color-coding. For group events, you also specify the maximum number of attendees.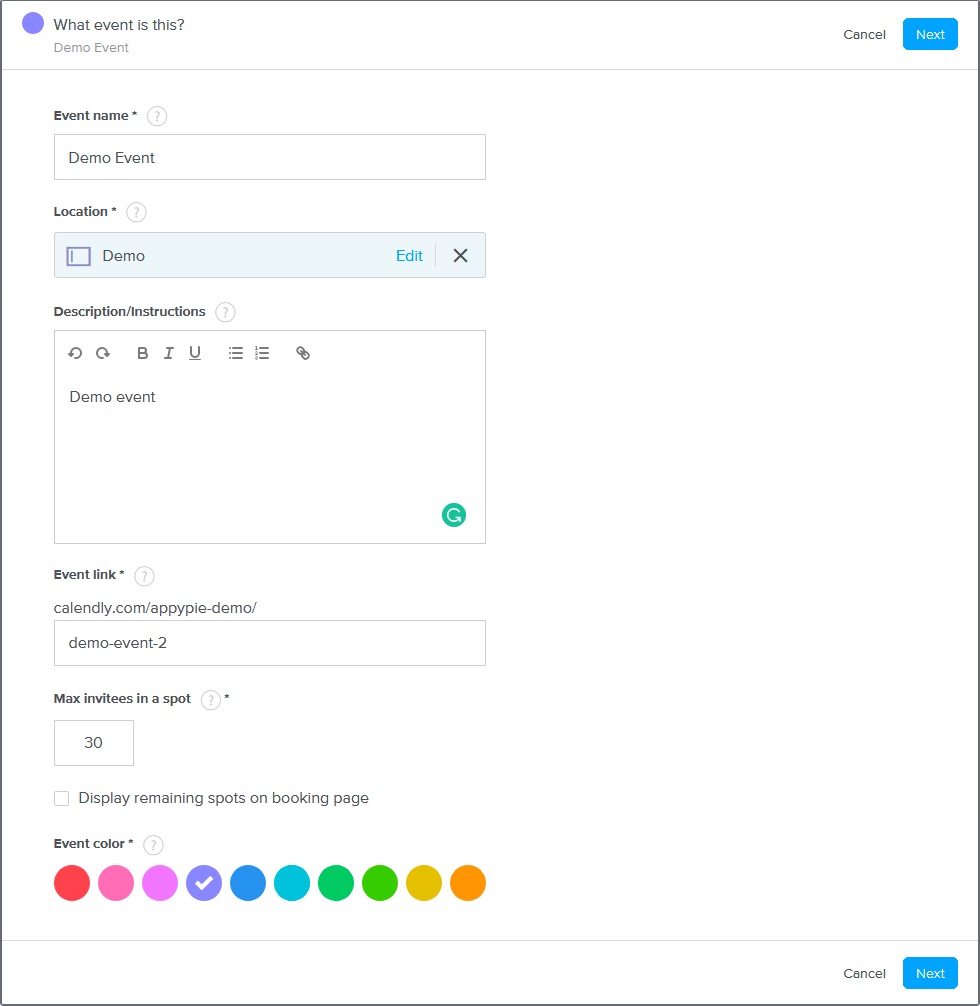
In the next window, you need to set the duration of the event itself, as well as how long people can sign up for the event.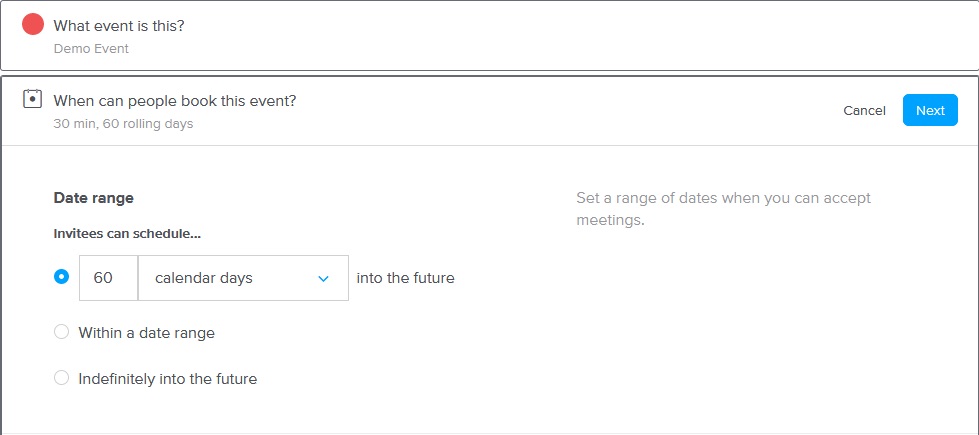
In the next window, you need to select the duration of the event, and the duration in which people can sign up for the event.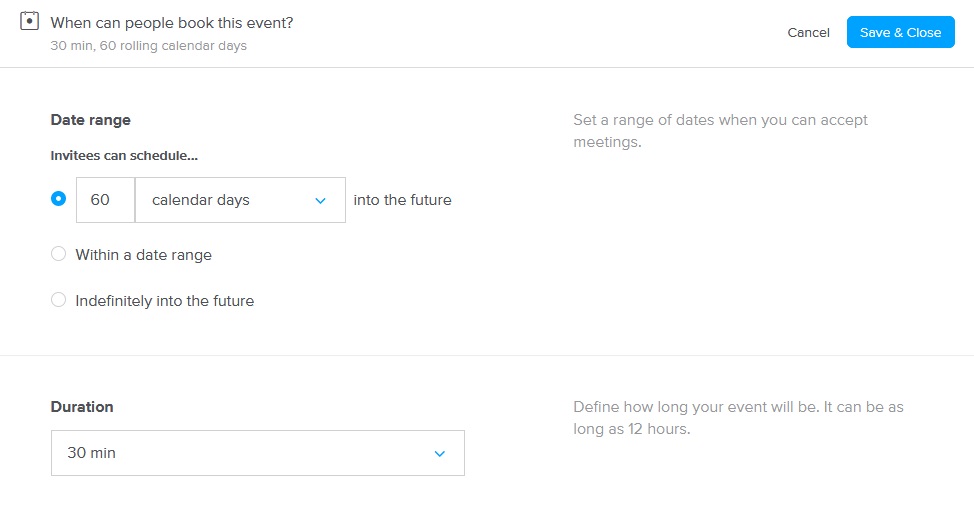
Below that, you need to customize your availability for the event if it's different than your default. You can also add buffer time for before and after the event.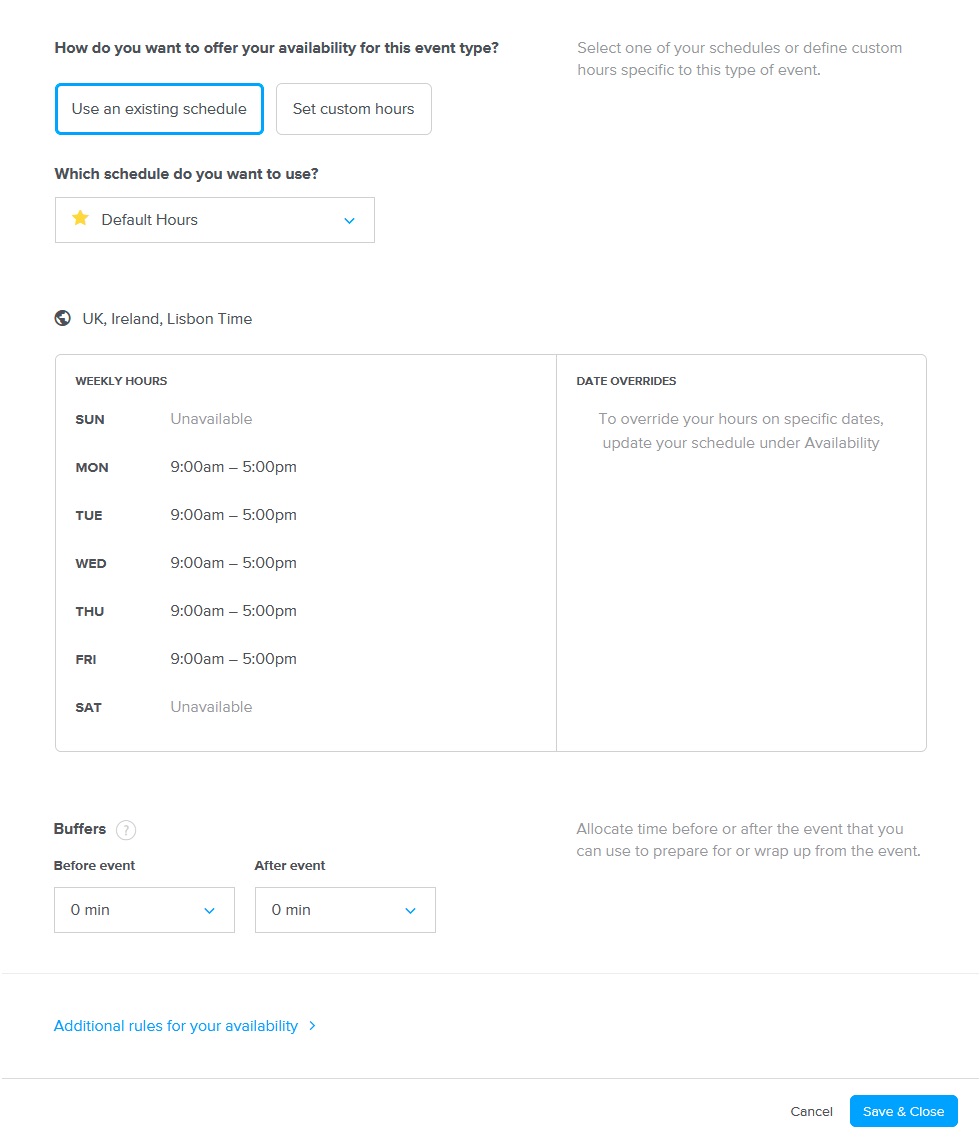
Before you click on the Save & Close button, go to the top of the page and turn the event on. Then click on Save & Close button.

How to Invite People to Events and Share Your Calendly Link?
Once you’ve personalized your event Types and created your ideal schedule, you can invite other people to join or book for your event. You have to send the right link to people so that they can see their options and select the best time for them.
Open your account dashboard and click the Event Types tab. Find the event type you want to share, and click Copy Link. This automatically copies the link, you can paste it into your invitation.
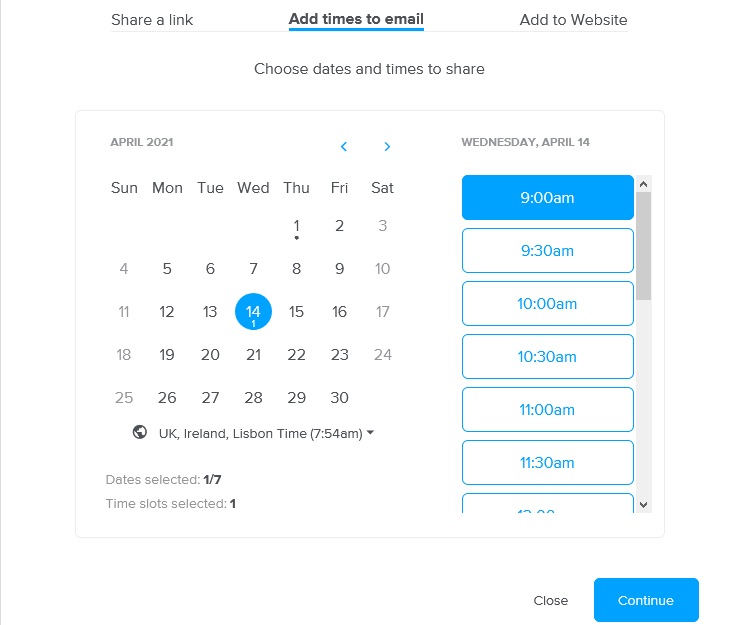
You can also click on the Share button to view additional options for sharing your links.
How to Share Your Entire Calendar?
You can also allow the recipient to schedule which type event they want to schedule. For example, the recipient can choose whether to schedule a half-hour or full-hour meeting. To give the recipient the choice, you can send them link to your public Calendly page. To do that, find the link on your Calendly page and then copy and paste it manually.
You can also copy the link by clicking on the gear icon and select Copy Link.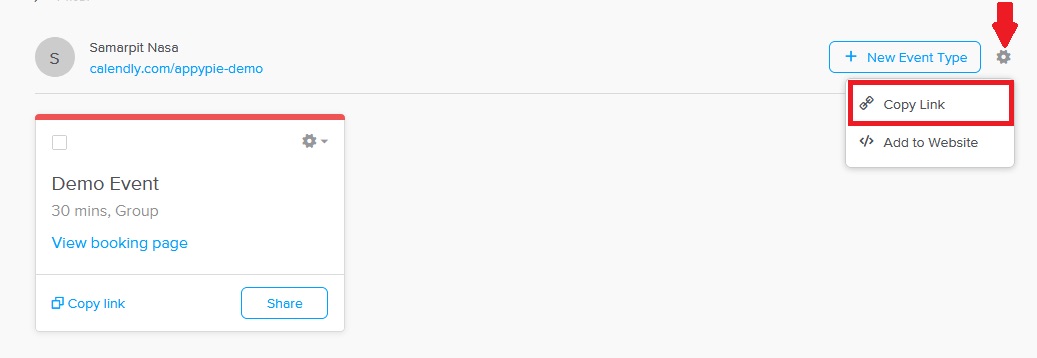
You can paste it directly into an email, social media post, blog post, SMS message, or any other form of communication.
What do Invitees See in Calendly?
Once your invitees click the link, they will see the details of your event and a calendar.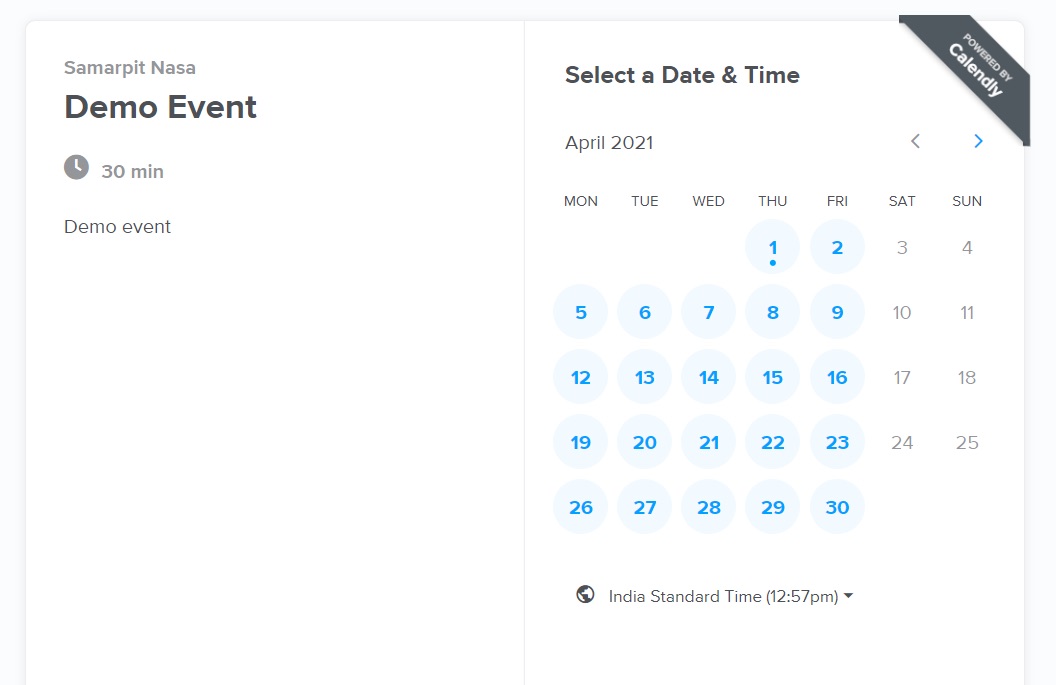
Only days open for booking are clickable and displayed in blue, and select the day they prefer. Once they’ve selected the day they want, invitees can see the time slots available.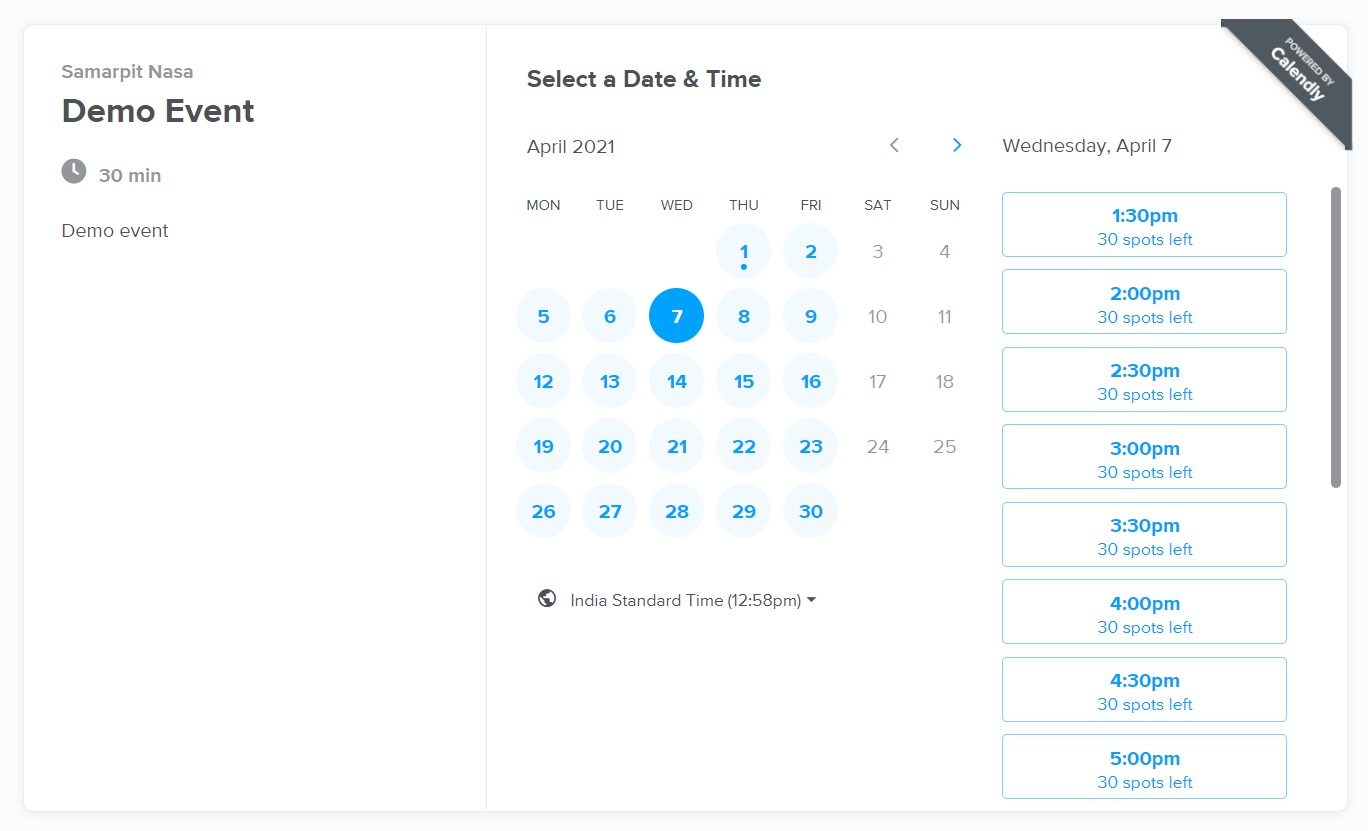
These times automatically adjust for the time zones. Selecting a time slot changes its color and reveals a confirmation button. Upon clicking the Confirm button, a new window opens that requests the name and email address of the invitee. Once the recipient enters the details, they can click the Schedule Event button to finalize the booking.
How to Integrate Calendly with Other Calendars?
You can add new calendars to your Calendly account at any time. Click on account icon in the upper right corner and select Calendar Connections in the dropdown menu.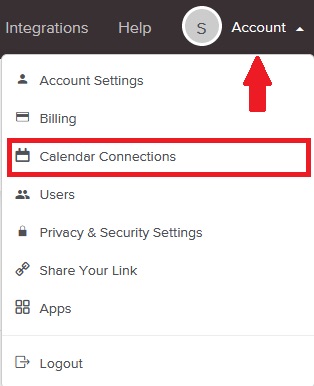
Choose the calendar you want to integrate, and click the corresponding Connect button. You can integrate all these calendars even if you have a basic plan.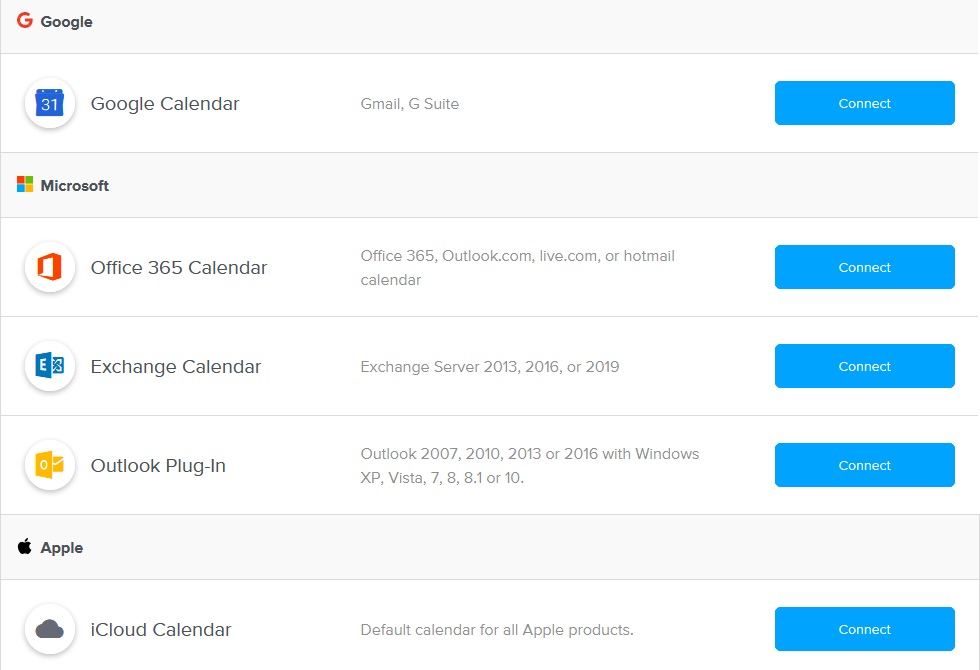
Clicking con connect will lead you to a new window, where you will need to log in to the corresponding calendar account. Once you have logged in to the other calendar, you will be redirected to the Calendar Connections page, where you can see the connected calendar. You can also fine-tune its implementation restrictions or remove the calendar by clicking Disconnect.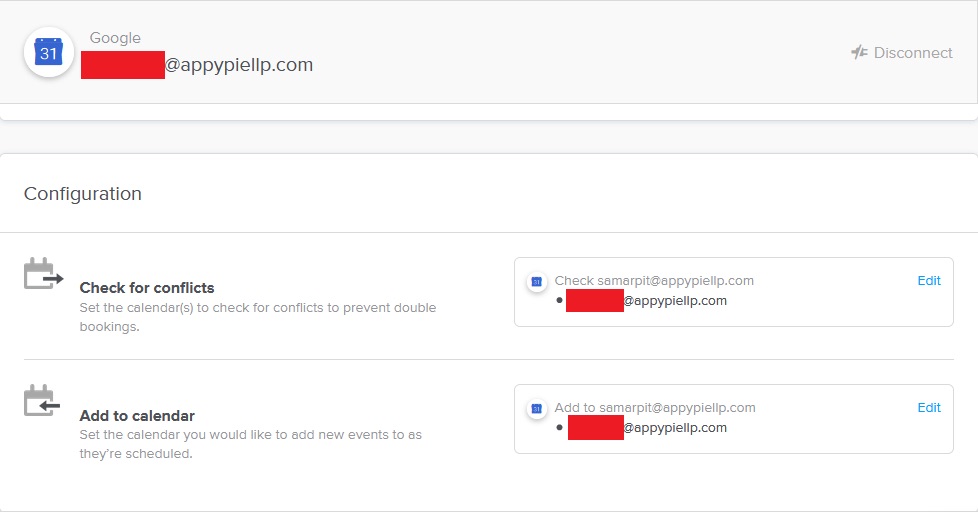
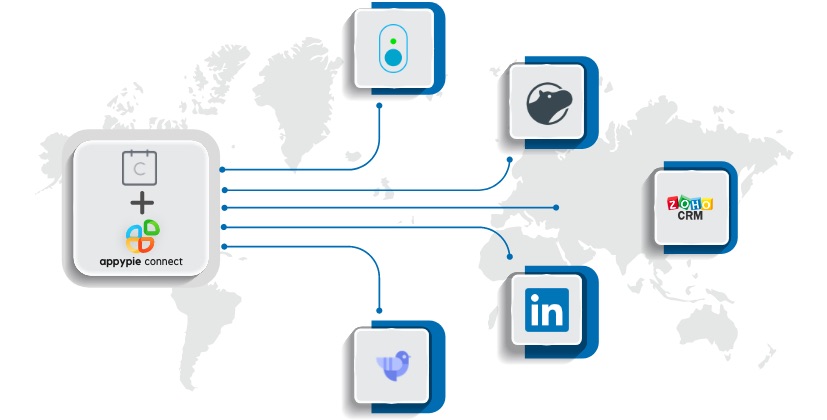
How Calendly works with Appy Pie Connect?
- Automatically create a video conference whenever someone books your time on Calendly
- Connect Calendly to your CRM, email marketing tool, or contact management app to automatically add people to your contacts list when they book you on Calendly.
- Automatically create a task in your to-do list or task management app whenever someone schedules a meeting
loading...
Related Articles
- How to setup Login with Facebook in my Facebook Developer Account
- How can I setup PayPal web hooks using the PayPal Developer Portal
- How Can I Set Up Facebook Page Integrations With Appy Pie Connect?
- How Can I Set Up Facebook Messenger Integrations With Appy Pie Connect?
- How Can I Set Up Facebook Integrations With Appy Pie Connect?
- How Can I Set Up ClickUp Integrations With Appy Pie Connect?
- How Can I Set Up GitLab Integrations With Appy Pie Connect?
- How Can I Set Up Strava Integrations With Appy Pie Connect?
- How Can I Set Up RepairShopr Integrations With Appy Pie Connect?
Still can’t find an answer?
Send us a ticket and we will get back to you.