Knowledge Base
How to Deploy livechat widget on webflow website builder?
Akash Kumar
2 min readPublished on Oct 08 2021 | Last updated on Aug 21 2023
Following are the steps to deploy Appypie’s live chat widget in a website created in webflow :
Step 1 : Open webflow website builder and click on View Dashboard.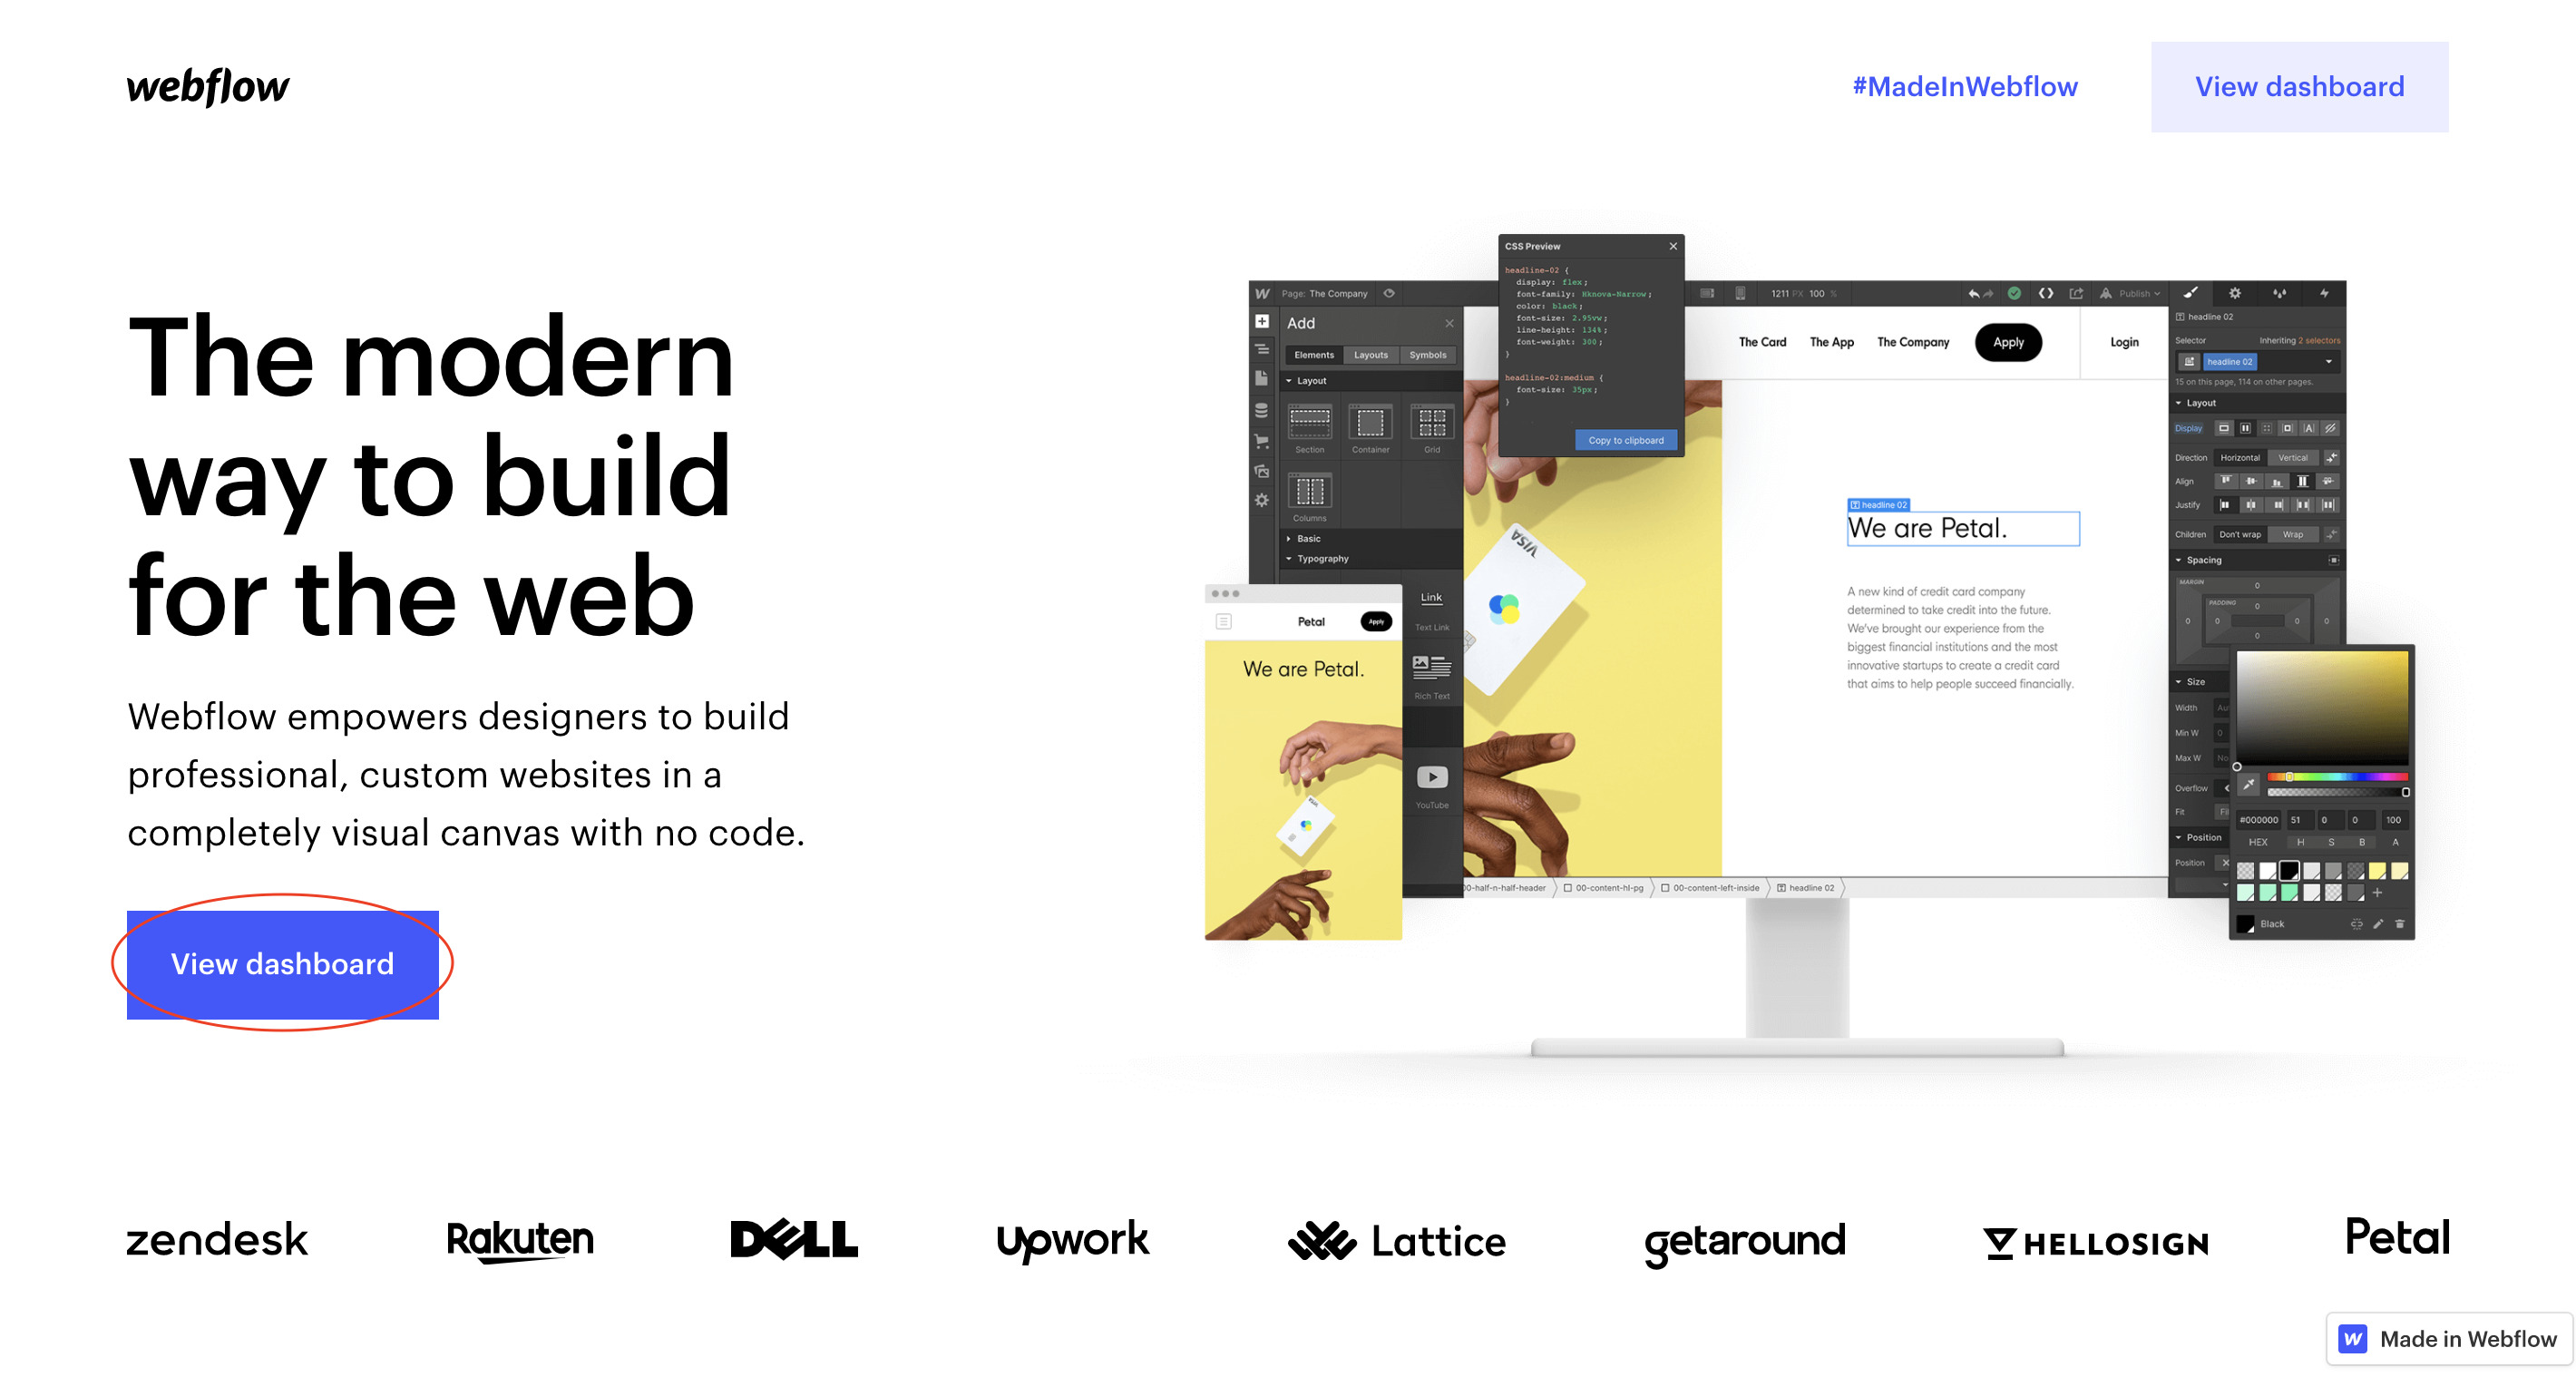
Step 2 : Click on your project that you’ve built on the website.
Step 3 : Now clickonthe ‘+’ icon(Add elements)on the top leftcorner.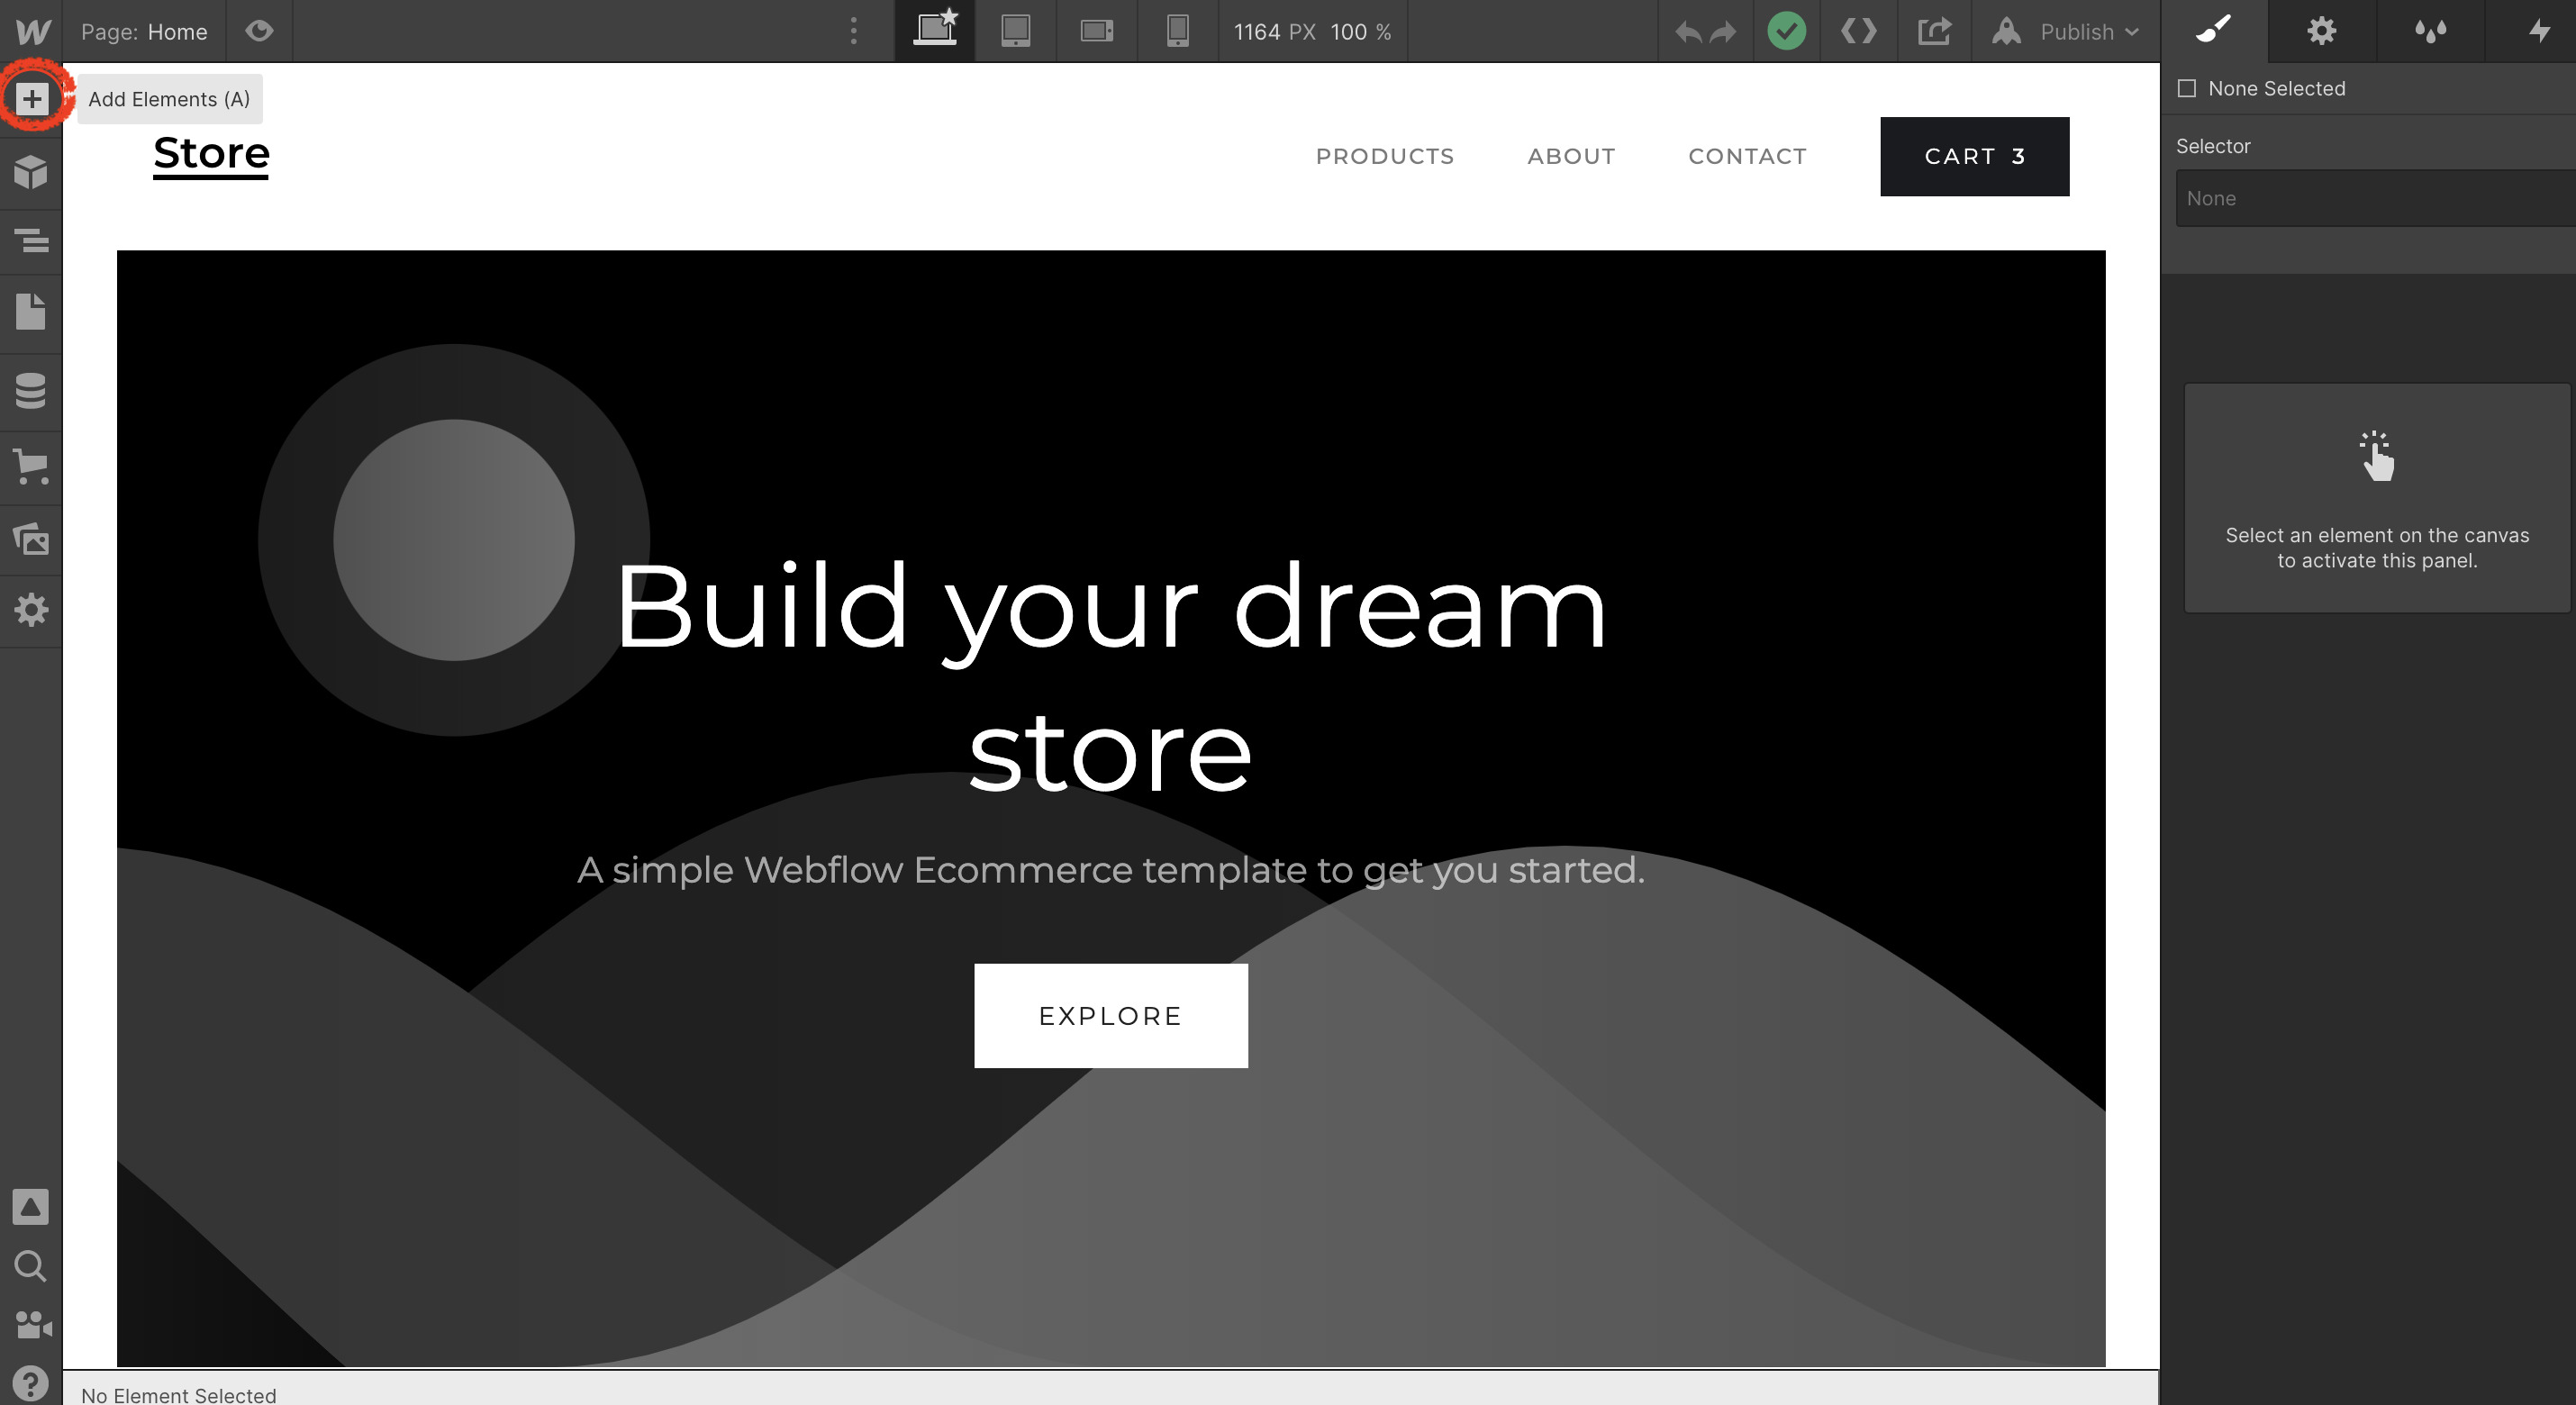
Step 4 : Click on embed from the Add elements section from the top left tab.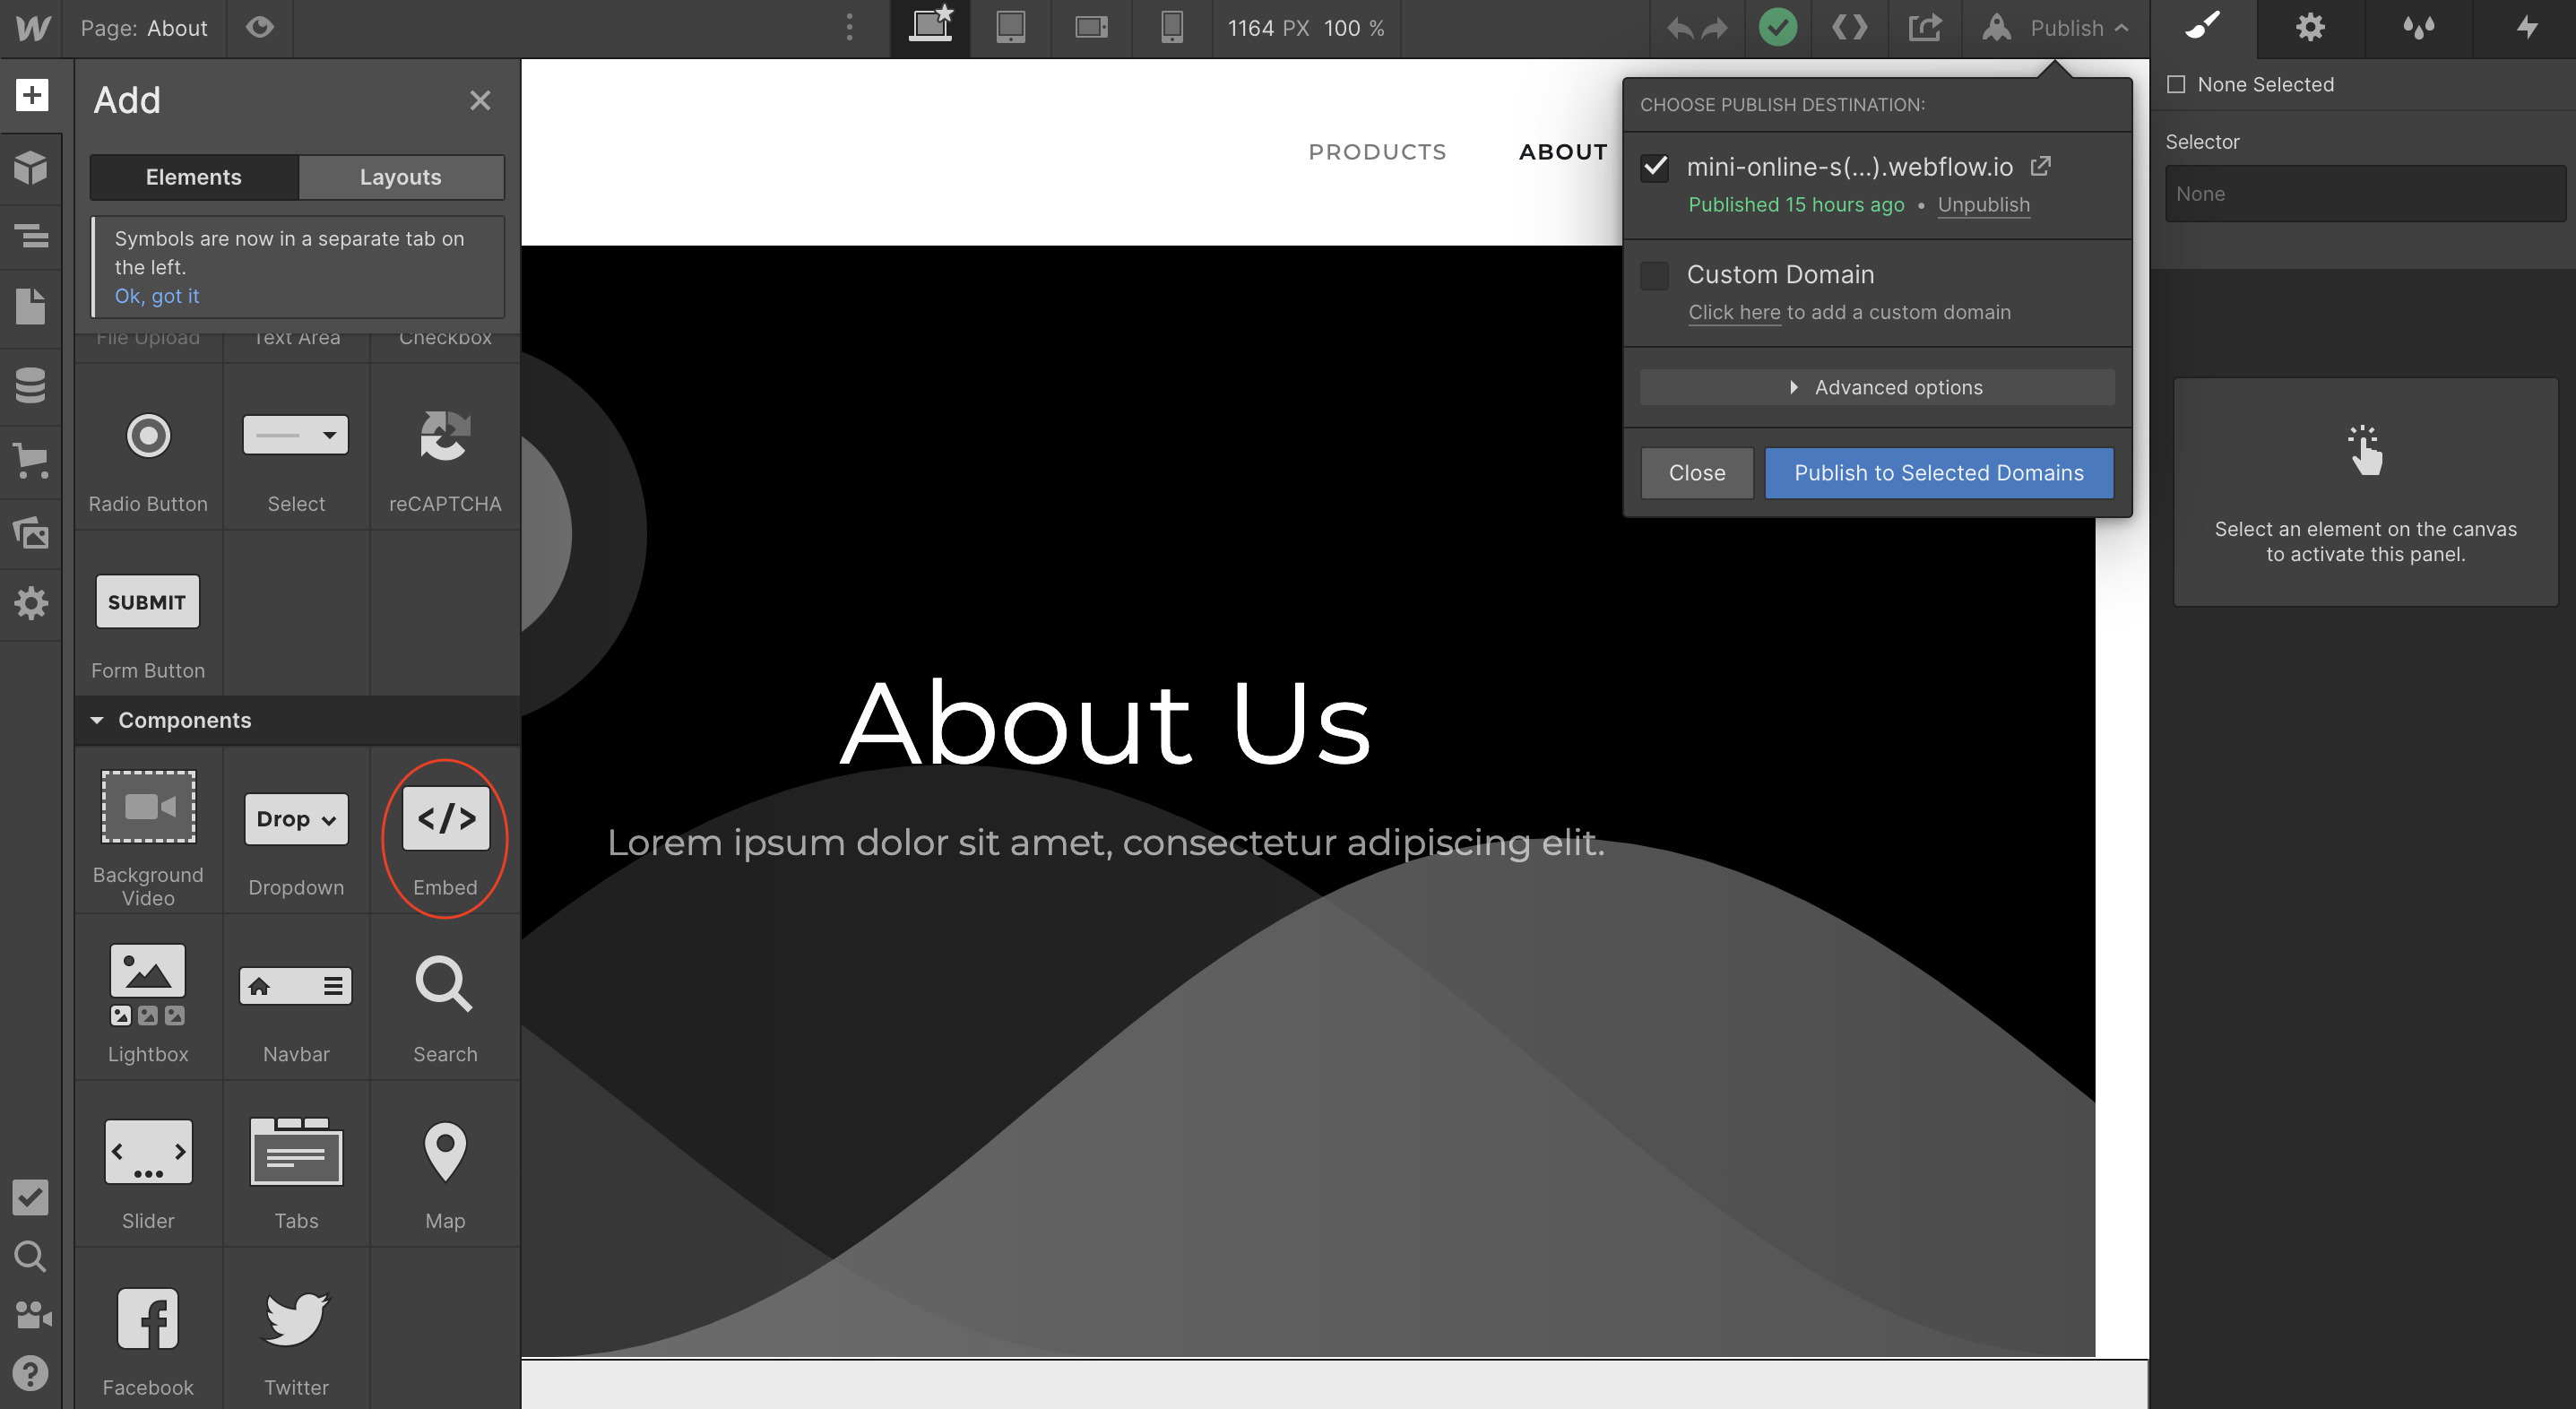
Step 5 : Log on to Appypie Livechat, click on the settings icon and then select the Install widget.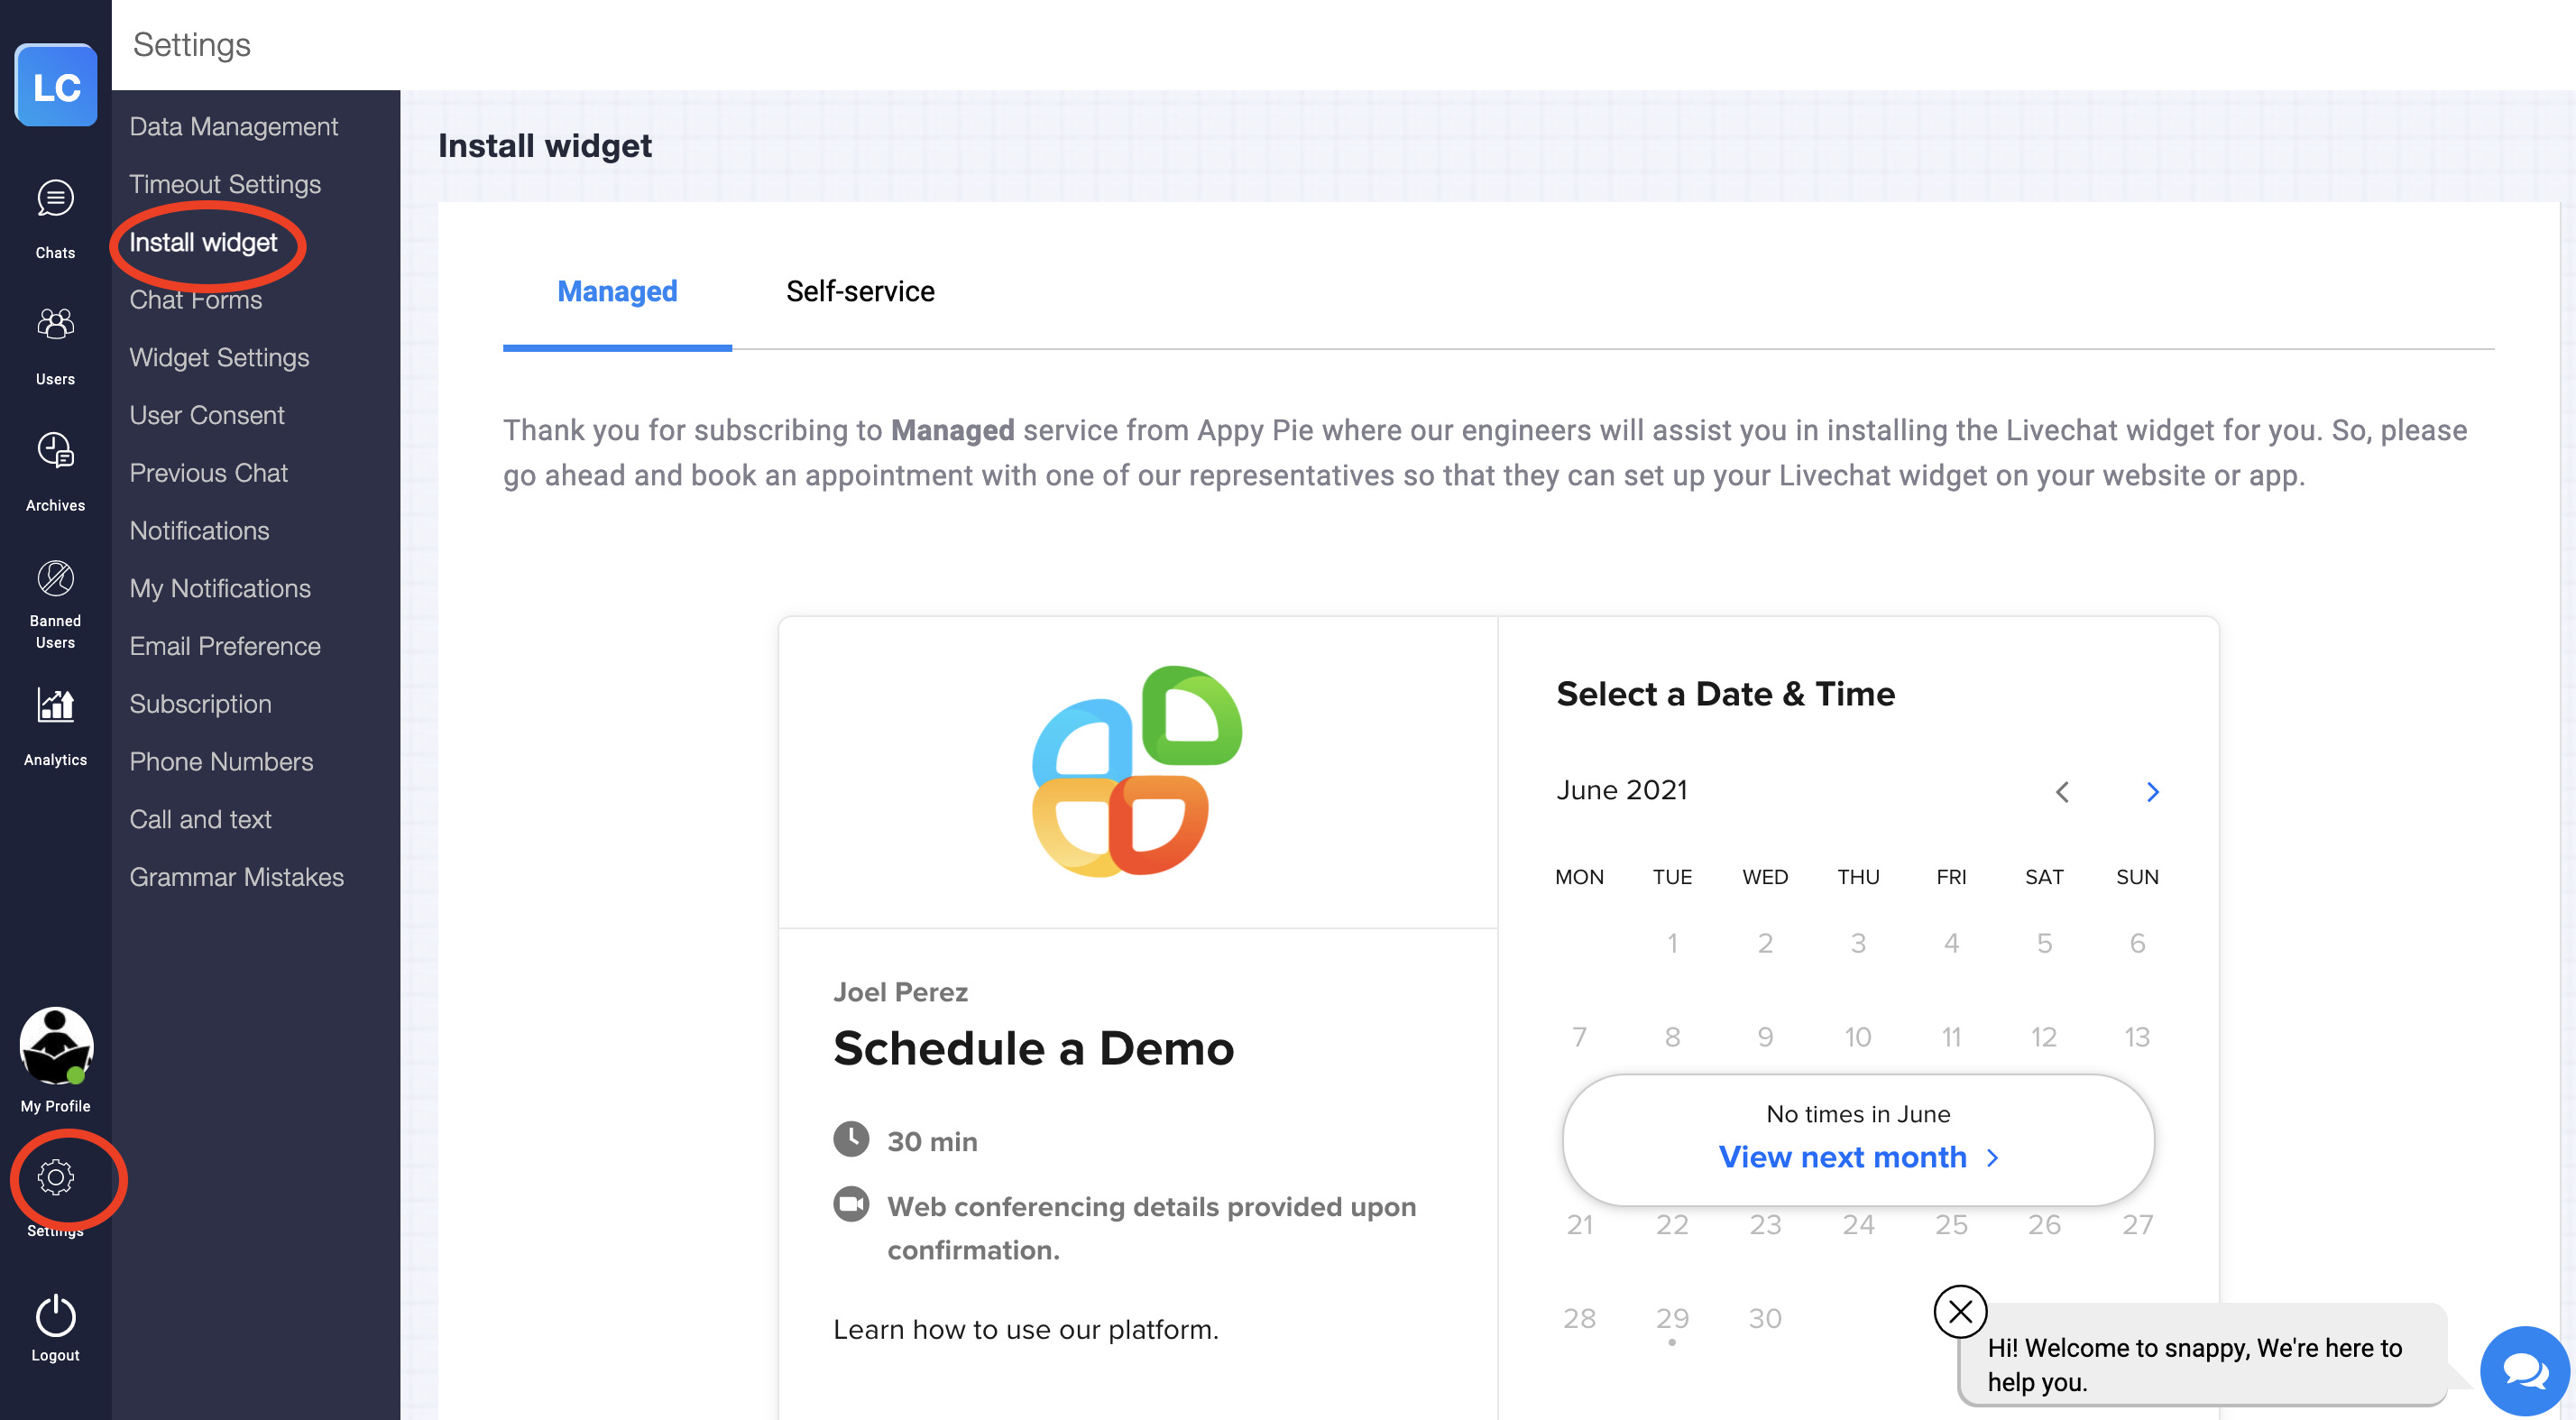
Step 6 : Click on the self-service section under the Install widget section and then click on Install widget on a custom website.
Step 7 : Click on the set up install widget section and then click on copy code to copy the livechat widget.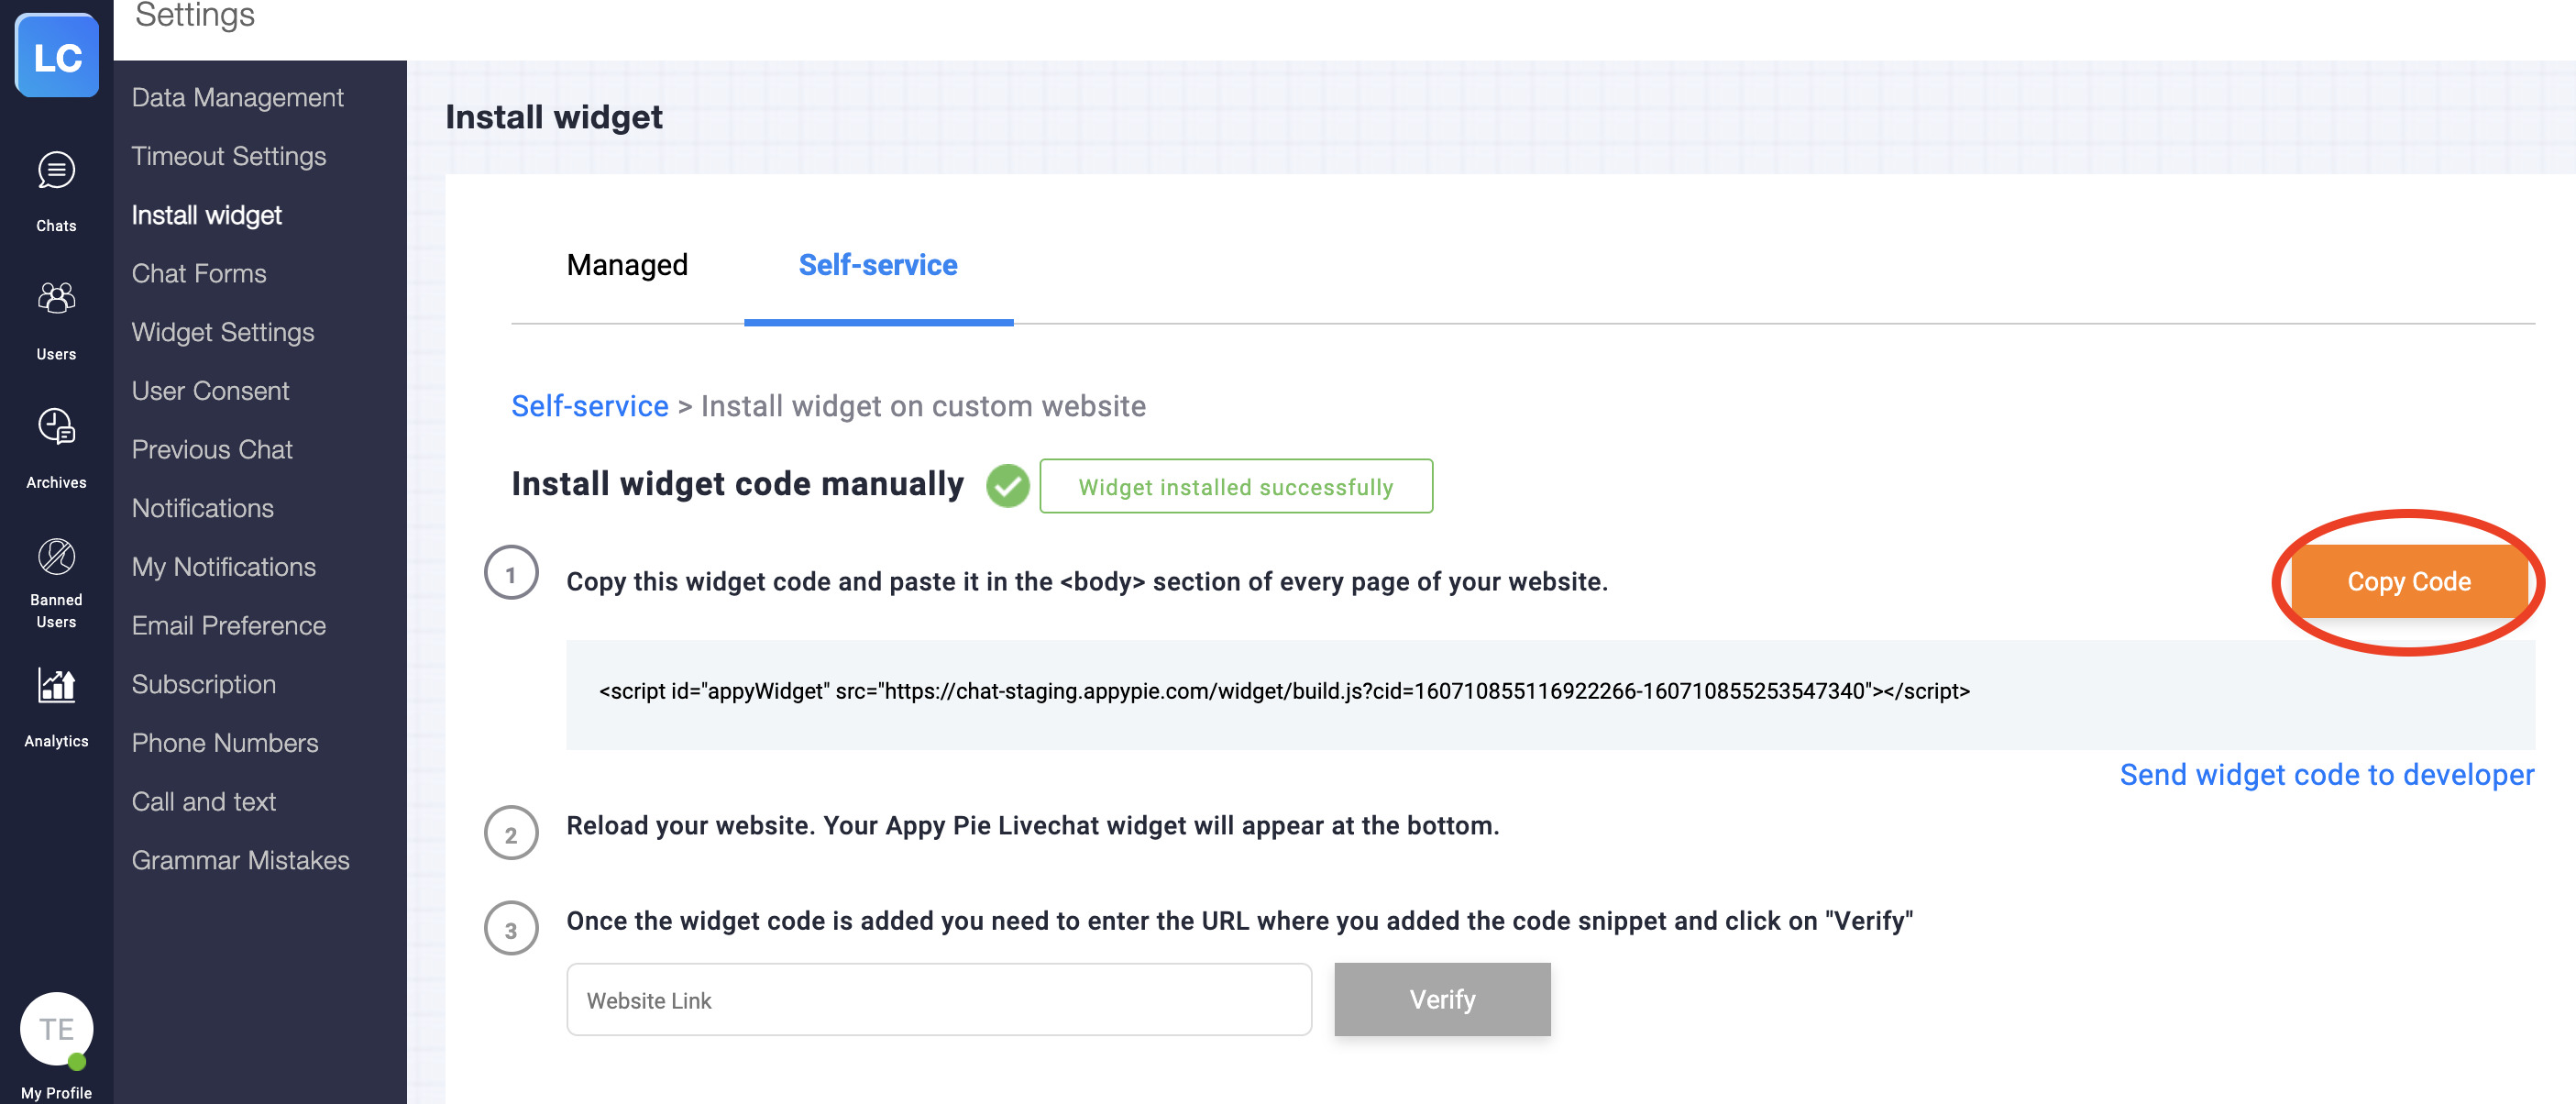
Step 8 : Now go back to webflow website’s backend, and paste the code widget on the embed section that you clicked on earlier. Click on save and close.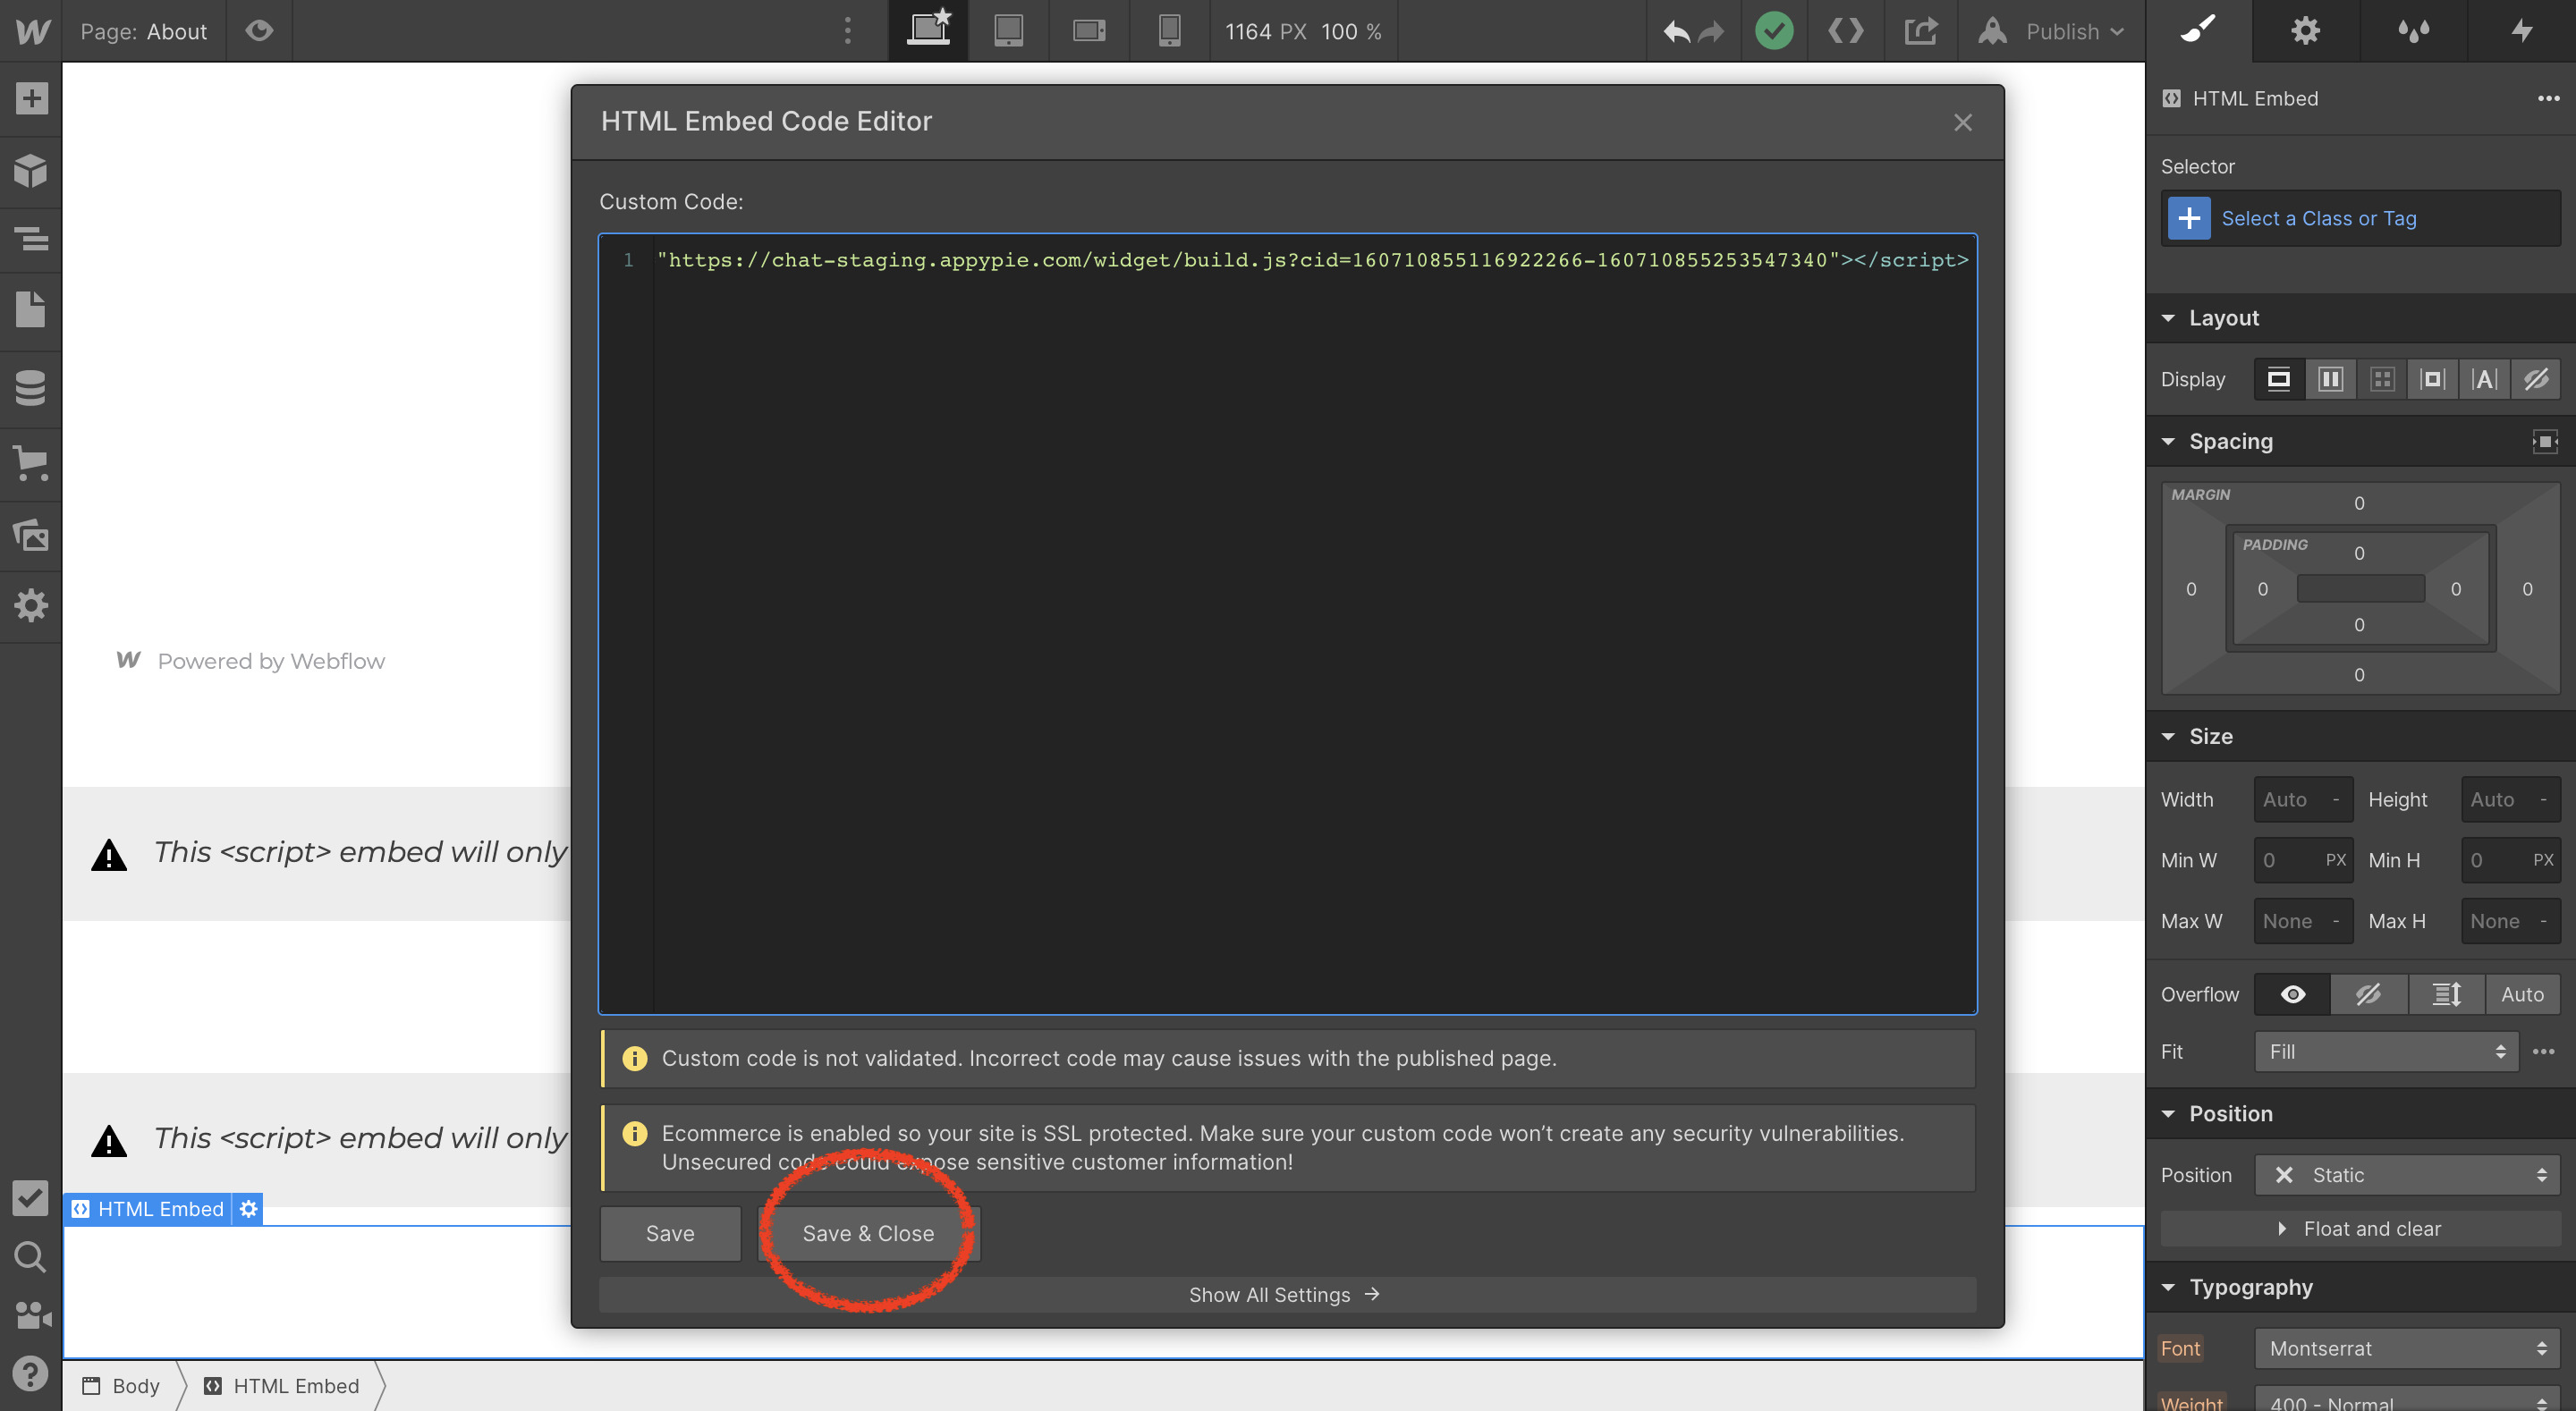
Step 9 : Now click the Publish button and select the domain you want to publish your website on.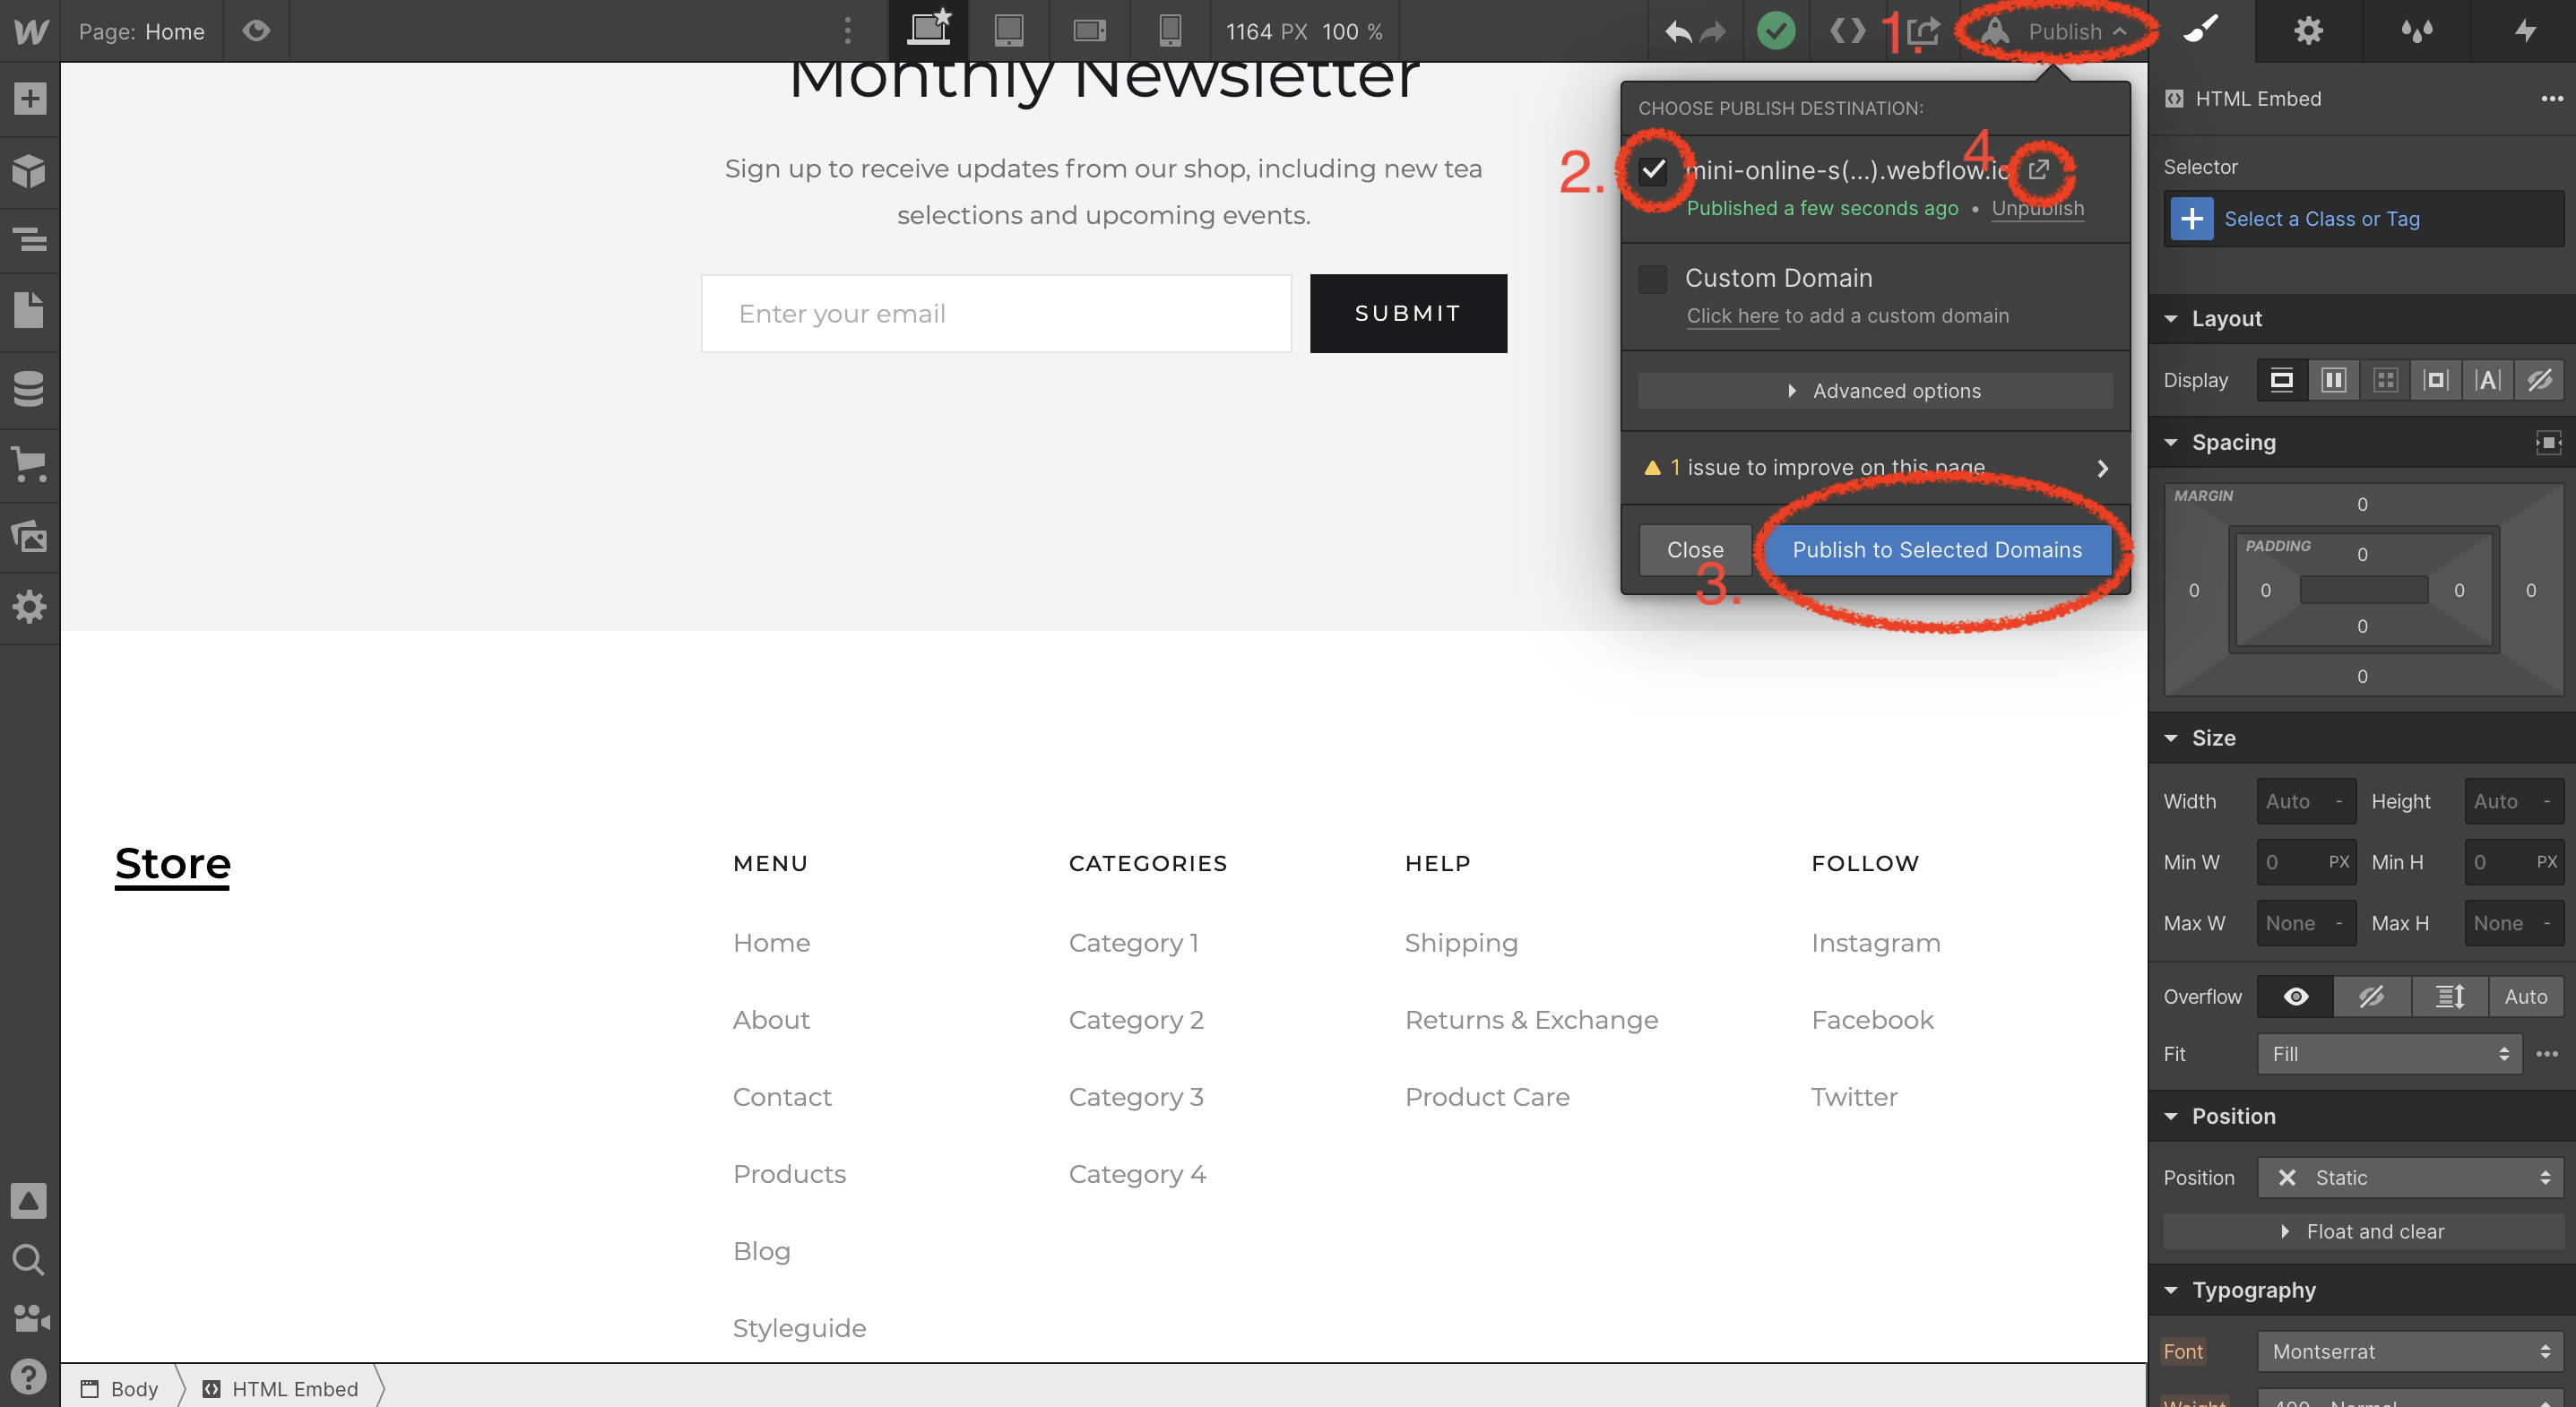
Step 10 : Click on the livechat widget on your website.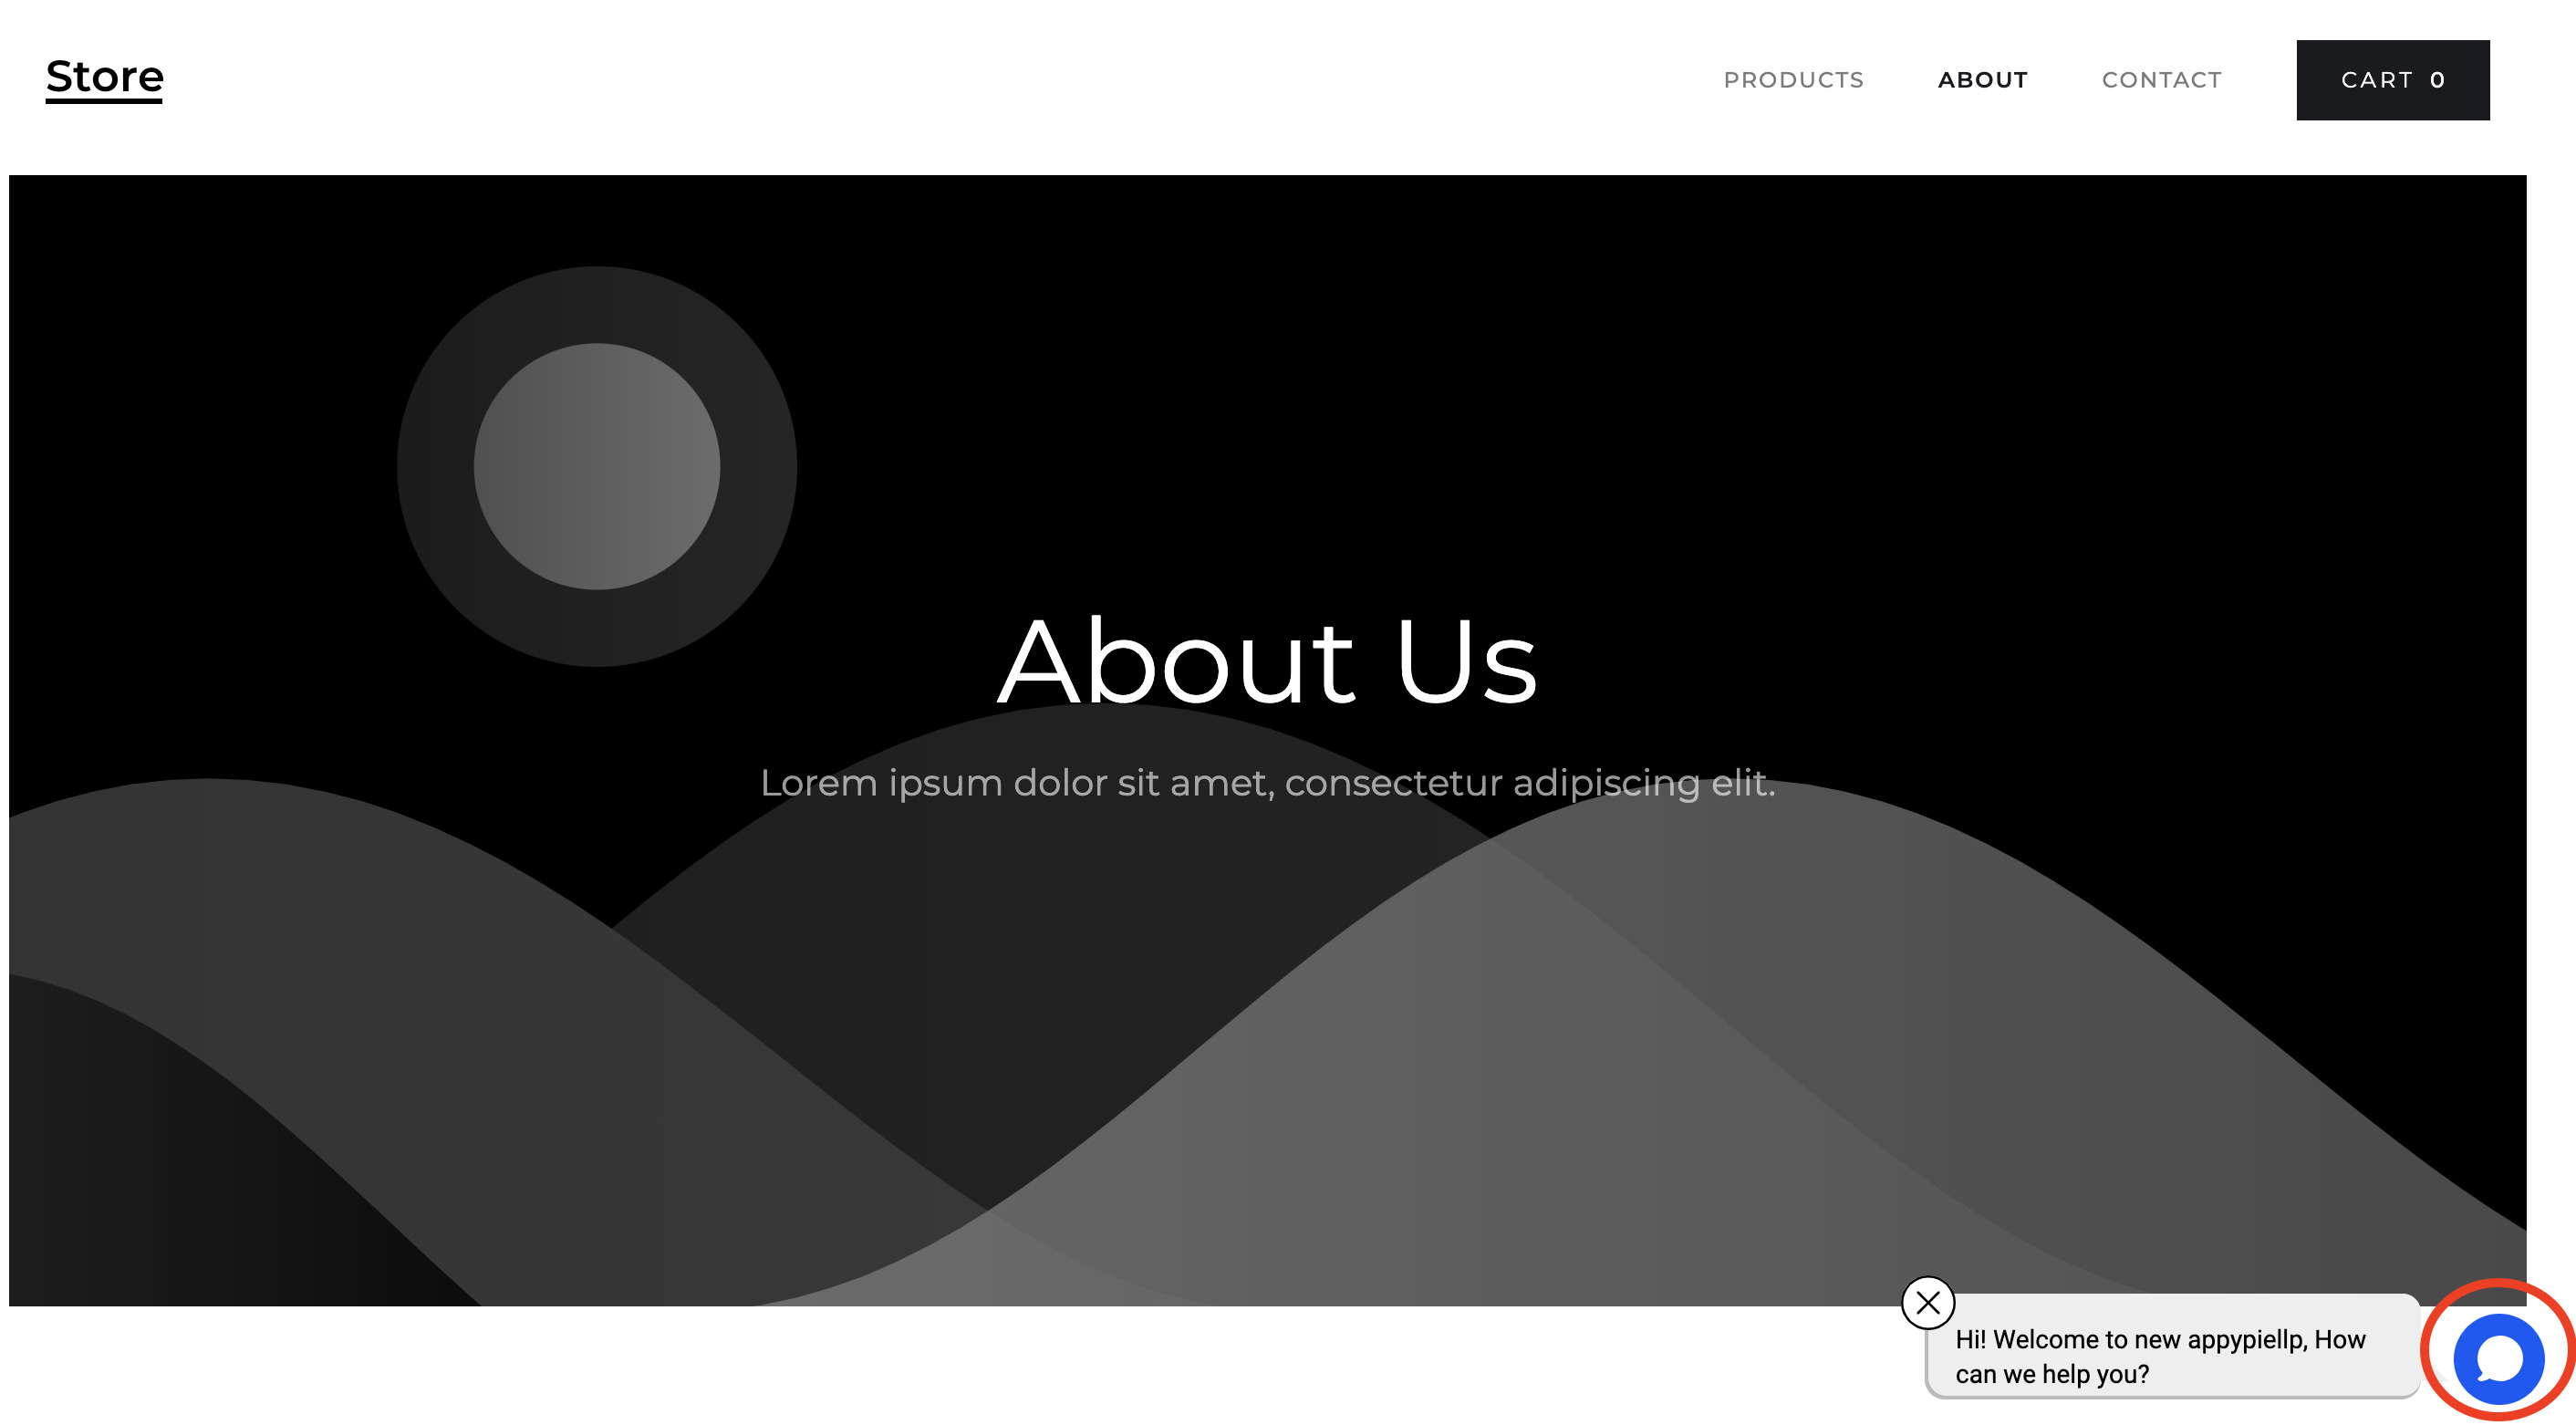
Step 11 : Congratulations! Your livechat is now working on your webflow website.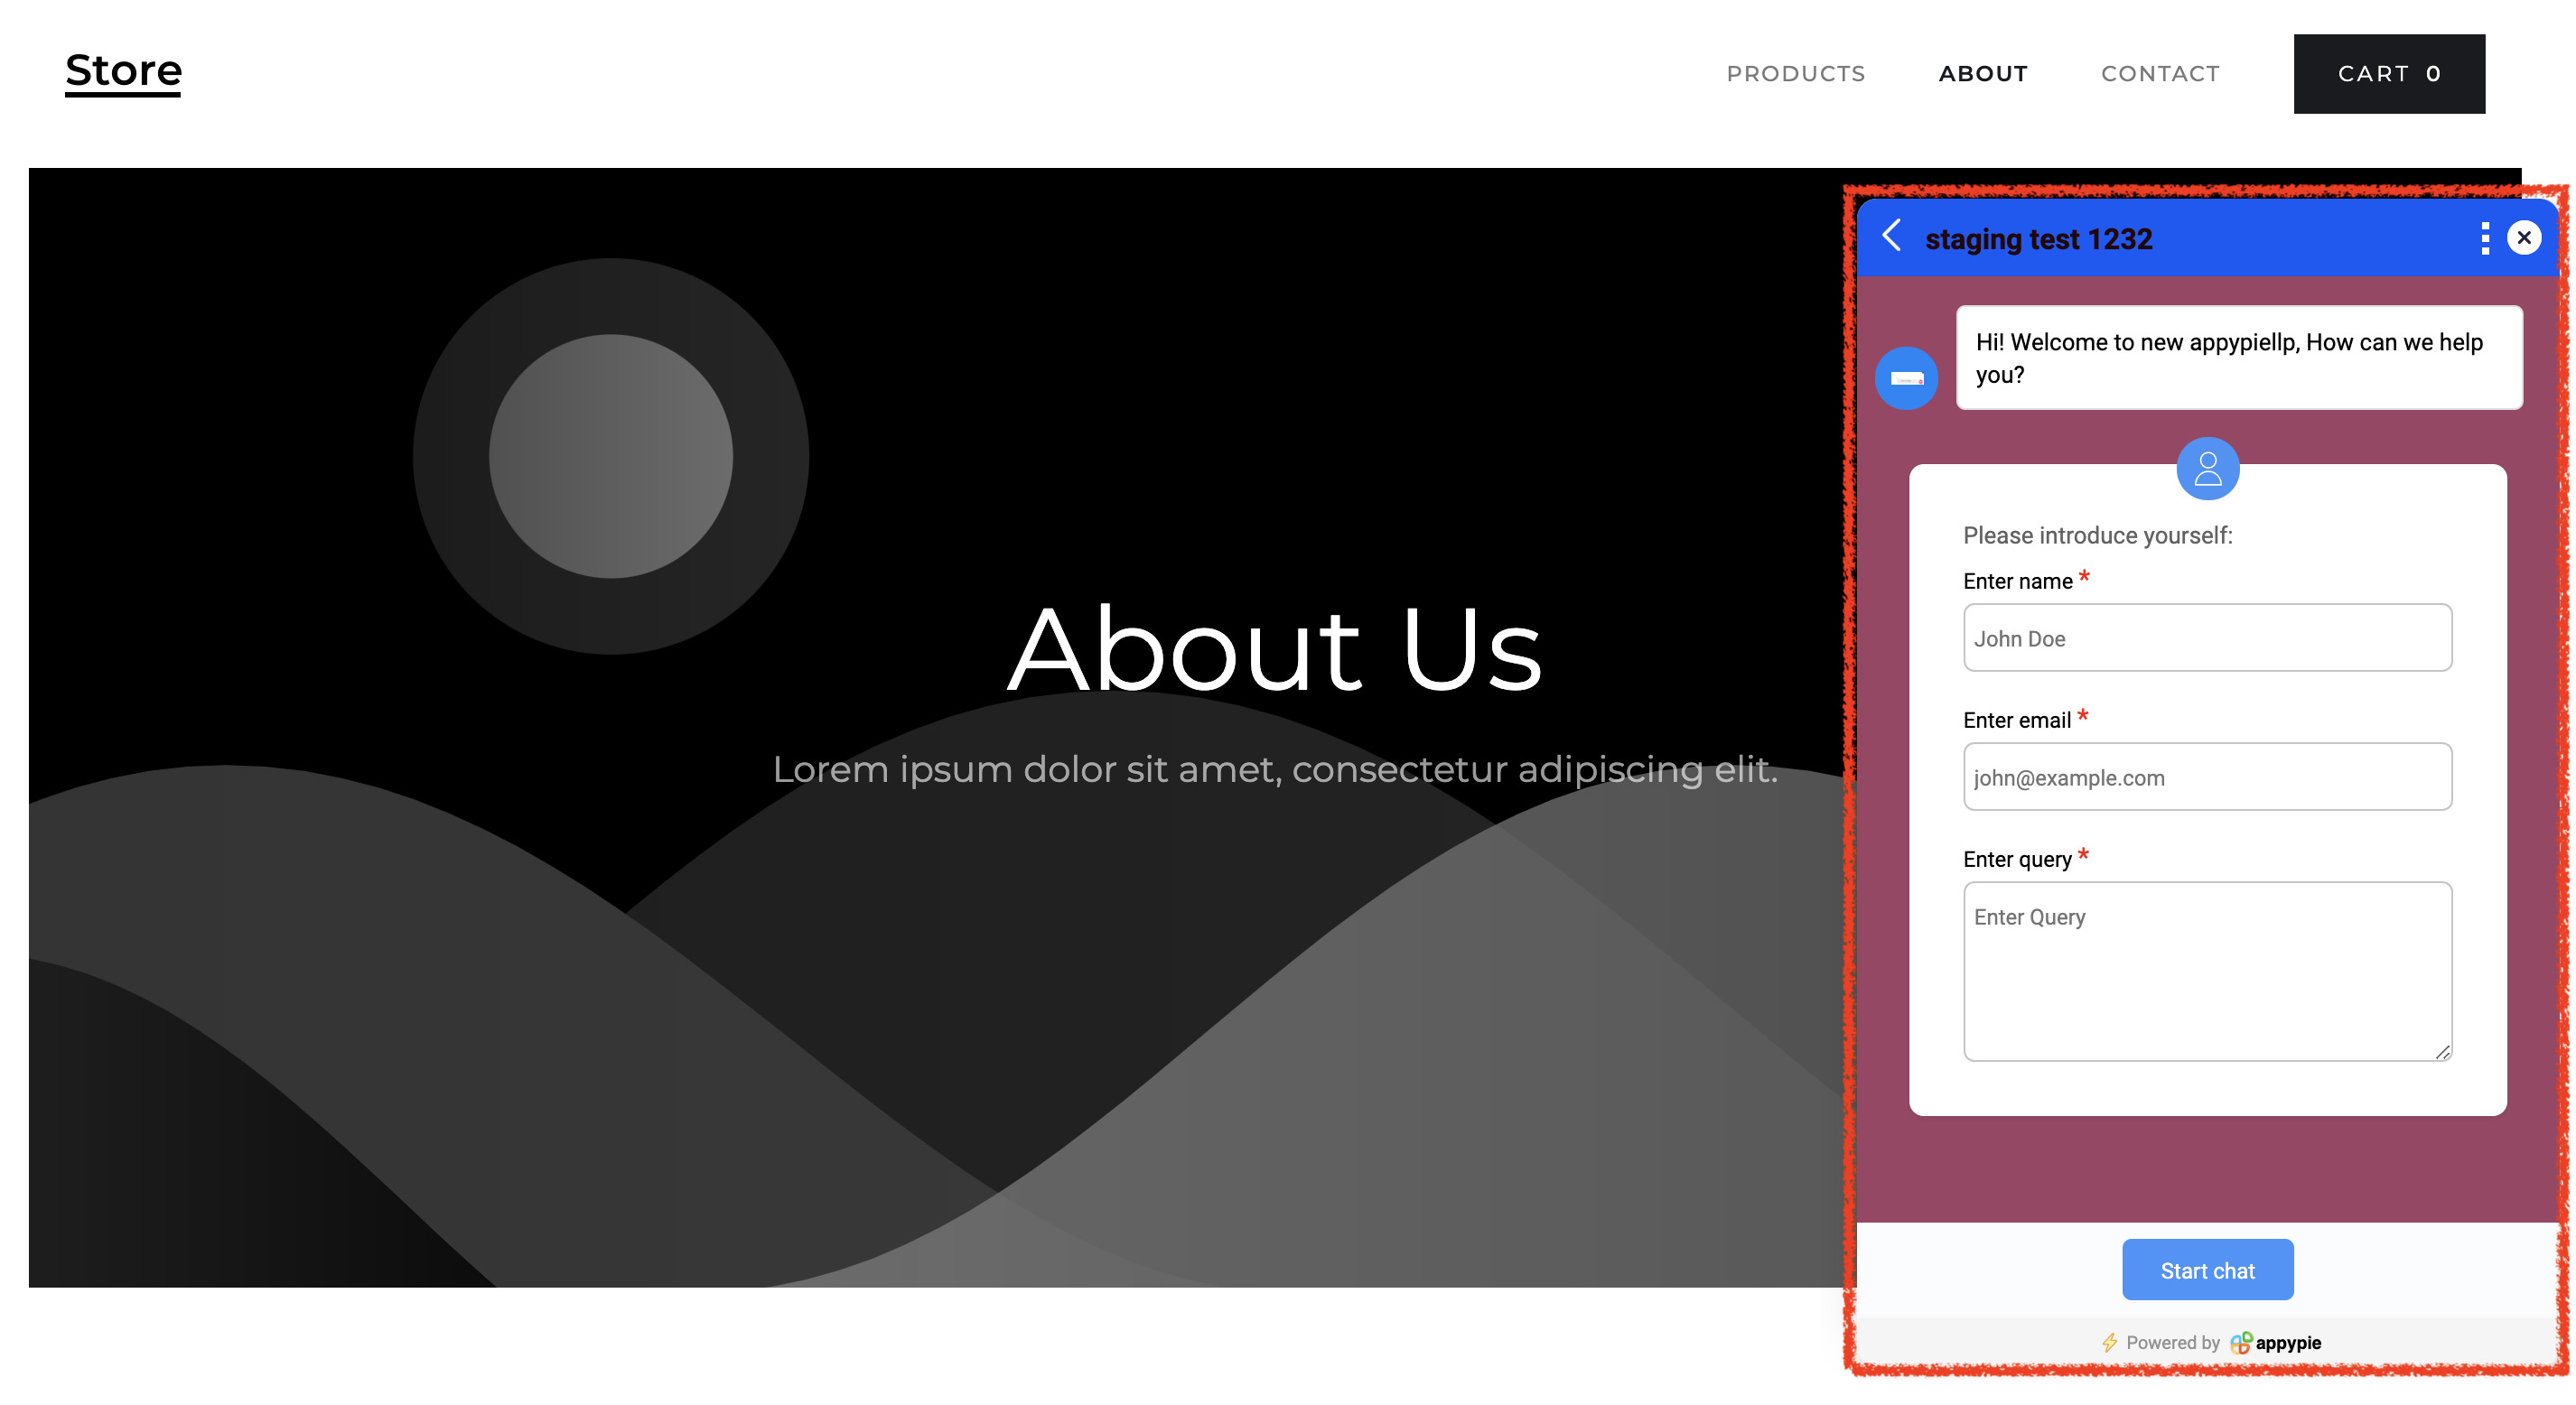
Follow our video tutorial below to know the deploy livechat’s widget on webflow website builder:
loading...
loading...
loading...
Related Articles
Still can’t find an answer?
Send us a ticket and we will get back to you.